Key Concepts
Modules are the building blocks of your workspace. Each module is a data structure that holds a specific type of record — like Leads, Contacts, Deals, or Accounts.
Module
A data structure (like a database table) that holds records of a specific type. Examples: Leads, Contacts, Deals, Accounts.
Singular Name
The name for a single record in this module (e.g., "Lead").
Plural Name
The name for multiple records in this module (e.g., "Leads"). Used in navigation and headings.
Module Icon
The icon displayed in the sidebar and module headers. Helps users identify modules at a glance.
Related guides: Once a module is created, use the Module Builder, Card View, and Form Rules guides to design its fields, layout, and conditional logic.
Modules Page
This page lists all the data modules in your workspace. Each module represents a type of record you track — like Leads, Contacts, Deals, or Accounts.
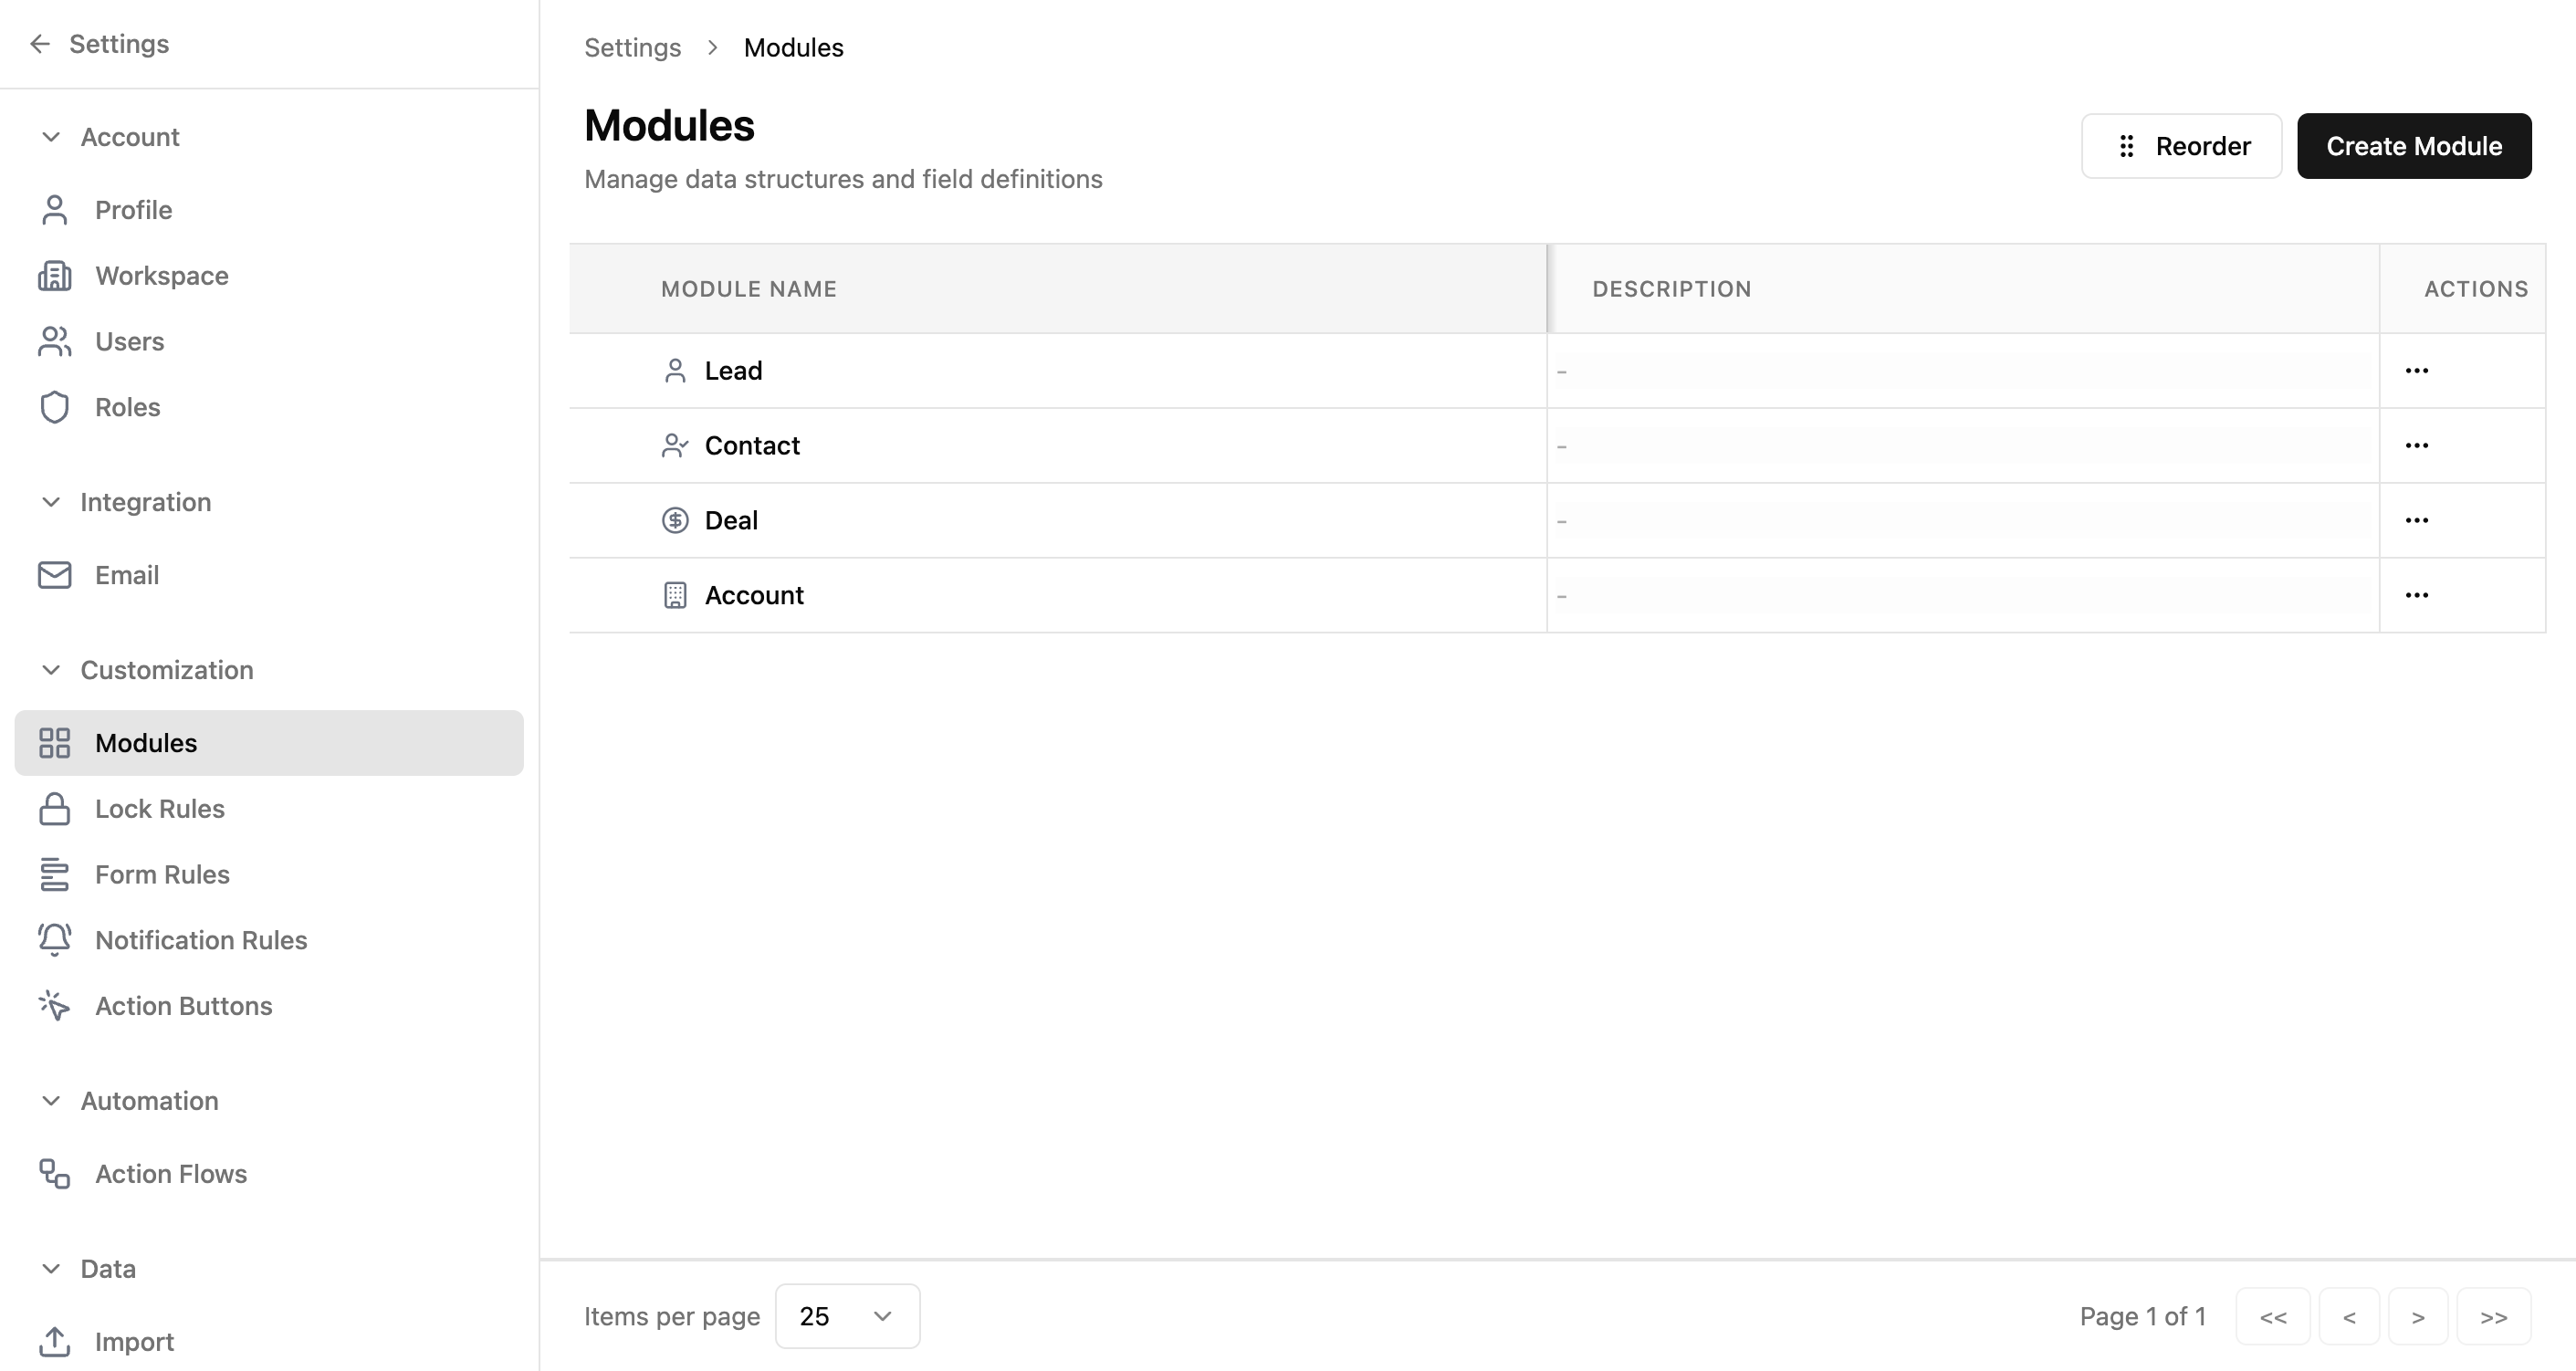
What Each Column Means
| Column | Description |
|---|---|
| Name | The module's display name. Click it to open the Module Builder. |
| Description | A brief summary of what this module is used for. |
| Actions | Three-dot menu with options to edit or delete the module. |
Available Actions
| Action | How |
|---|---|
| Create a new module | Click the "Create Module" button (top right) |
| Reorder modules | Click the "Reorder" button to drag modules into a new order |
| Edit a module's name or description | Click the three-dot menu → "Edit Module" |
| Delete a module | Click the three-dot menu → "Delete Module" |
| Open the Module Builder | Click the module's name in the table |
Caution: Deleting a module permanently removes all its records, fields, and related configurations. This action cannot be undone.
Creating a Module
Click "Create Module" to open a dialog where you define a new data structure for your workspace.
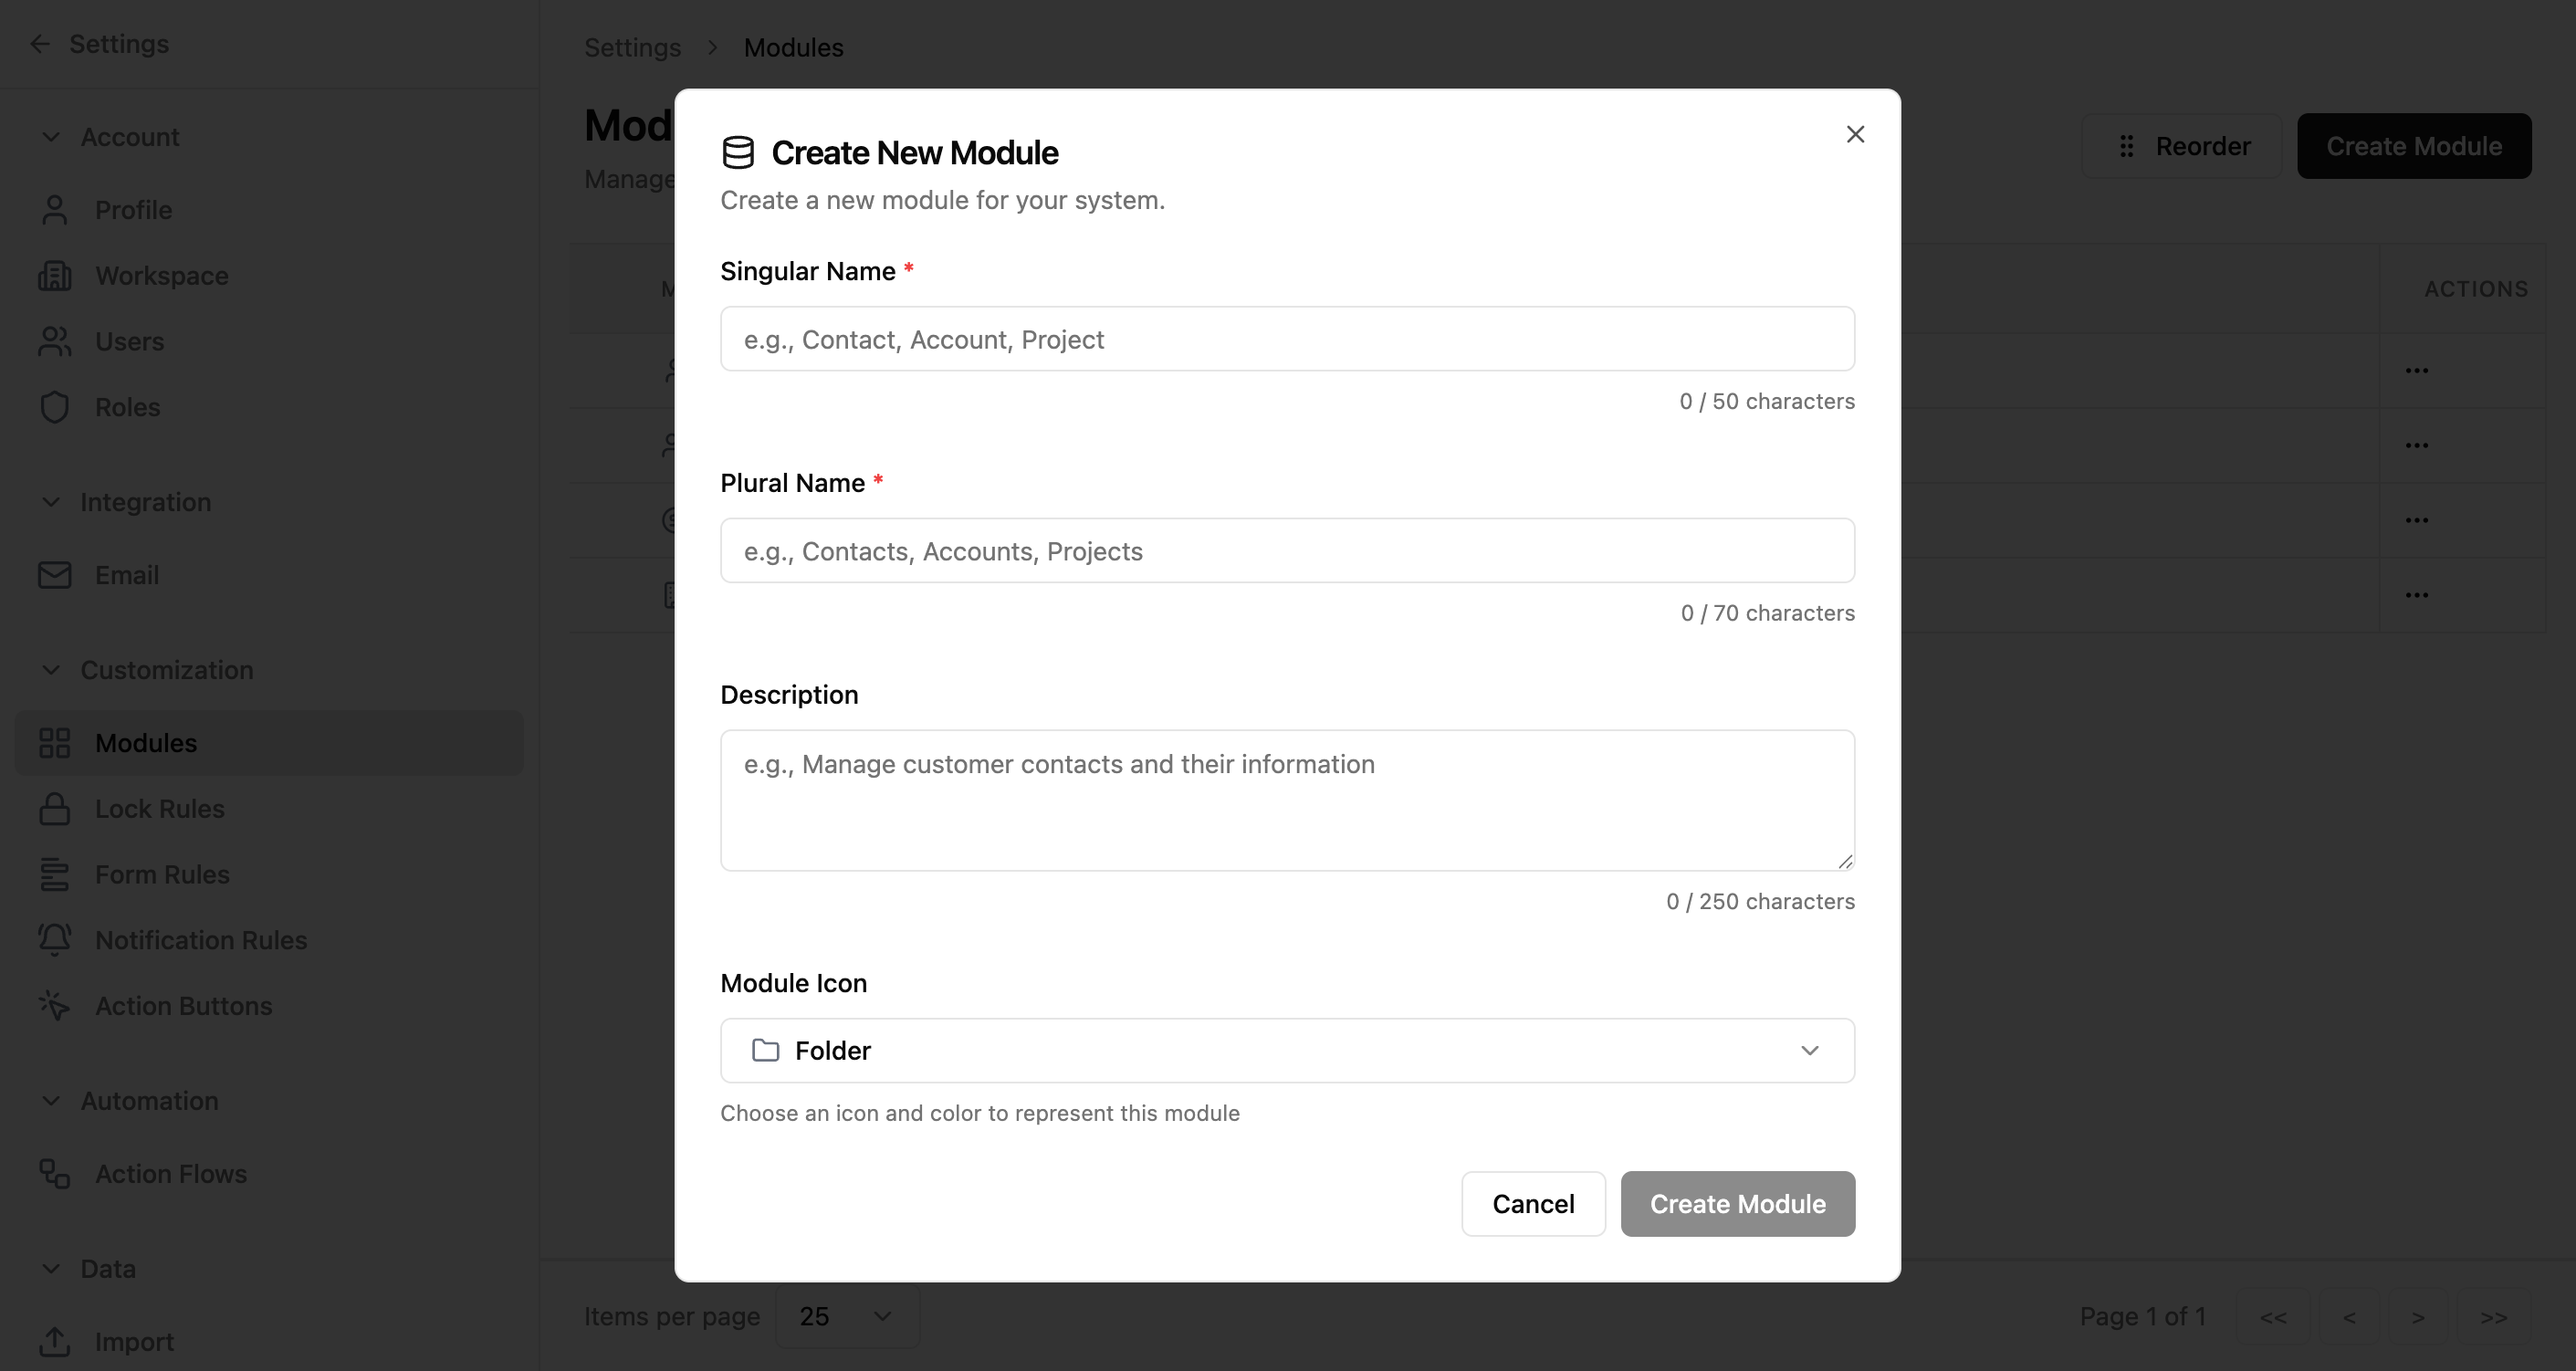
Form Fields
| Field | Required | Description |
|---|---|---|
| Singular Name | Required | The name for a single record (e.g., "Lead"). Max 50 characters. |
| Plural Name | Required | The name for multiple records (e.g., "Leads"). Max 70 characters. |
| Description | Optional | A brief explanation of what this module is for. Max 250 characters. |
| Module Icon | Optional | An icon displayed in the sidebar and module headers. Select from the dropdown. |
Steps
- 1Click "Create Module" on the Modules page
- 2Enter the singular name (e.g., "Ticket")
- 3Enter the plural name (e.g., "Tickets")
- 4Optionally add a description and select an icon
- 5Click "Create Module" in the dialog
- 6The new module appears in the list and opens in the Module Builder
Next: See the Module Builder guide to learn how to design fields, sections, and form layouts for your new module.
Real-World Use Case
Recruitment agency tracking candidates, clients, and placements
A staffing agency needs to track Candidates, Client Companies, Job Orders, and Placements — but their off-the-shelf CRM only has Leads, Contacts, and Deals. With Modules, they create a data structure that matches their actual business.
- 1Create a Candidates module (singular: Candidate) to store applicant profiles, skills, and availability
- 2Create a Job Orders module to track open positions from client companies
- 3Create a Placements module to record successful matches between candidates and job orders
- 4Reorder modules so the sidebar shows: Candidates → Job Orders → Placements → Client Companies
- 5Use the Module Builder to add fields specific to each module (e.g., "Availability Date" for Candidates, "Bill Rate" for Job Orders)
Adapt this for your team: Modules are the foundation of any workspace. A property management firm might create Tenants, Properties, Leases, and Maintenance Requests. A logistics company might need Shipments, Carriers, Routes, and Warehouses. Whatever your business tracks, create a module for it — the rest of the platform (roles, rules, automations) builds on top.
Common Workflows
Create a new module for your business
- 1Go to Settings → Modules
- 2Click "Create Module"
- 3Enter the singular name (e.g., "Ticket") and plural name (e.g., "Tickets")
- 4Optionally add a description and select an icon
- 5Click "Create Module" in the dialog
- 6Use the Module Builder to add fields and organize sections
Reorder modules in the sidebar
- 1Go to Settings → Modules
- 2Click the "Reorder" button
- 3Drag modules into the desired order
- 4Save the order — the sidebar reflects the new arrangement