Key Concepts
Before diving into the screens, here's what each term means in plain English.
Action Flow
A multi-step automation triggered by record events. It runs a sequence of actions automatically when a trigger fires and conditions are met — like a workflow engine.
Trigger
The event that starts an action flow. Options include record creation, record update, or specific field changes.
Condition
Optional filter applied after the trigger fires. Only records matching the condition continue through to the action.
Action
What the flow does when the trigger fires and conditions are met — update fields, send an email, call a webhook, etc.
Canvas
The visual workspace where you connect Trigger, Condition, and Action nodes to design the flow.
Action Flows List
This page shows all action flows configured in your workspace. Action flows are event-driven automations that run in the background when records are created or updated.
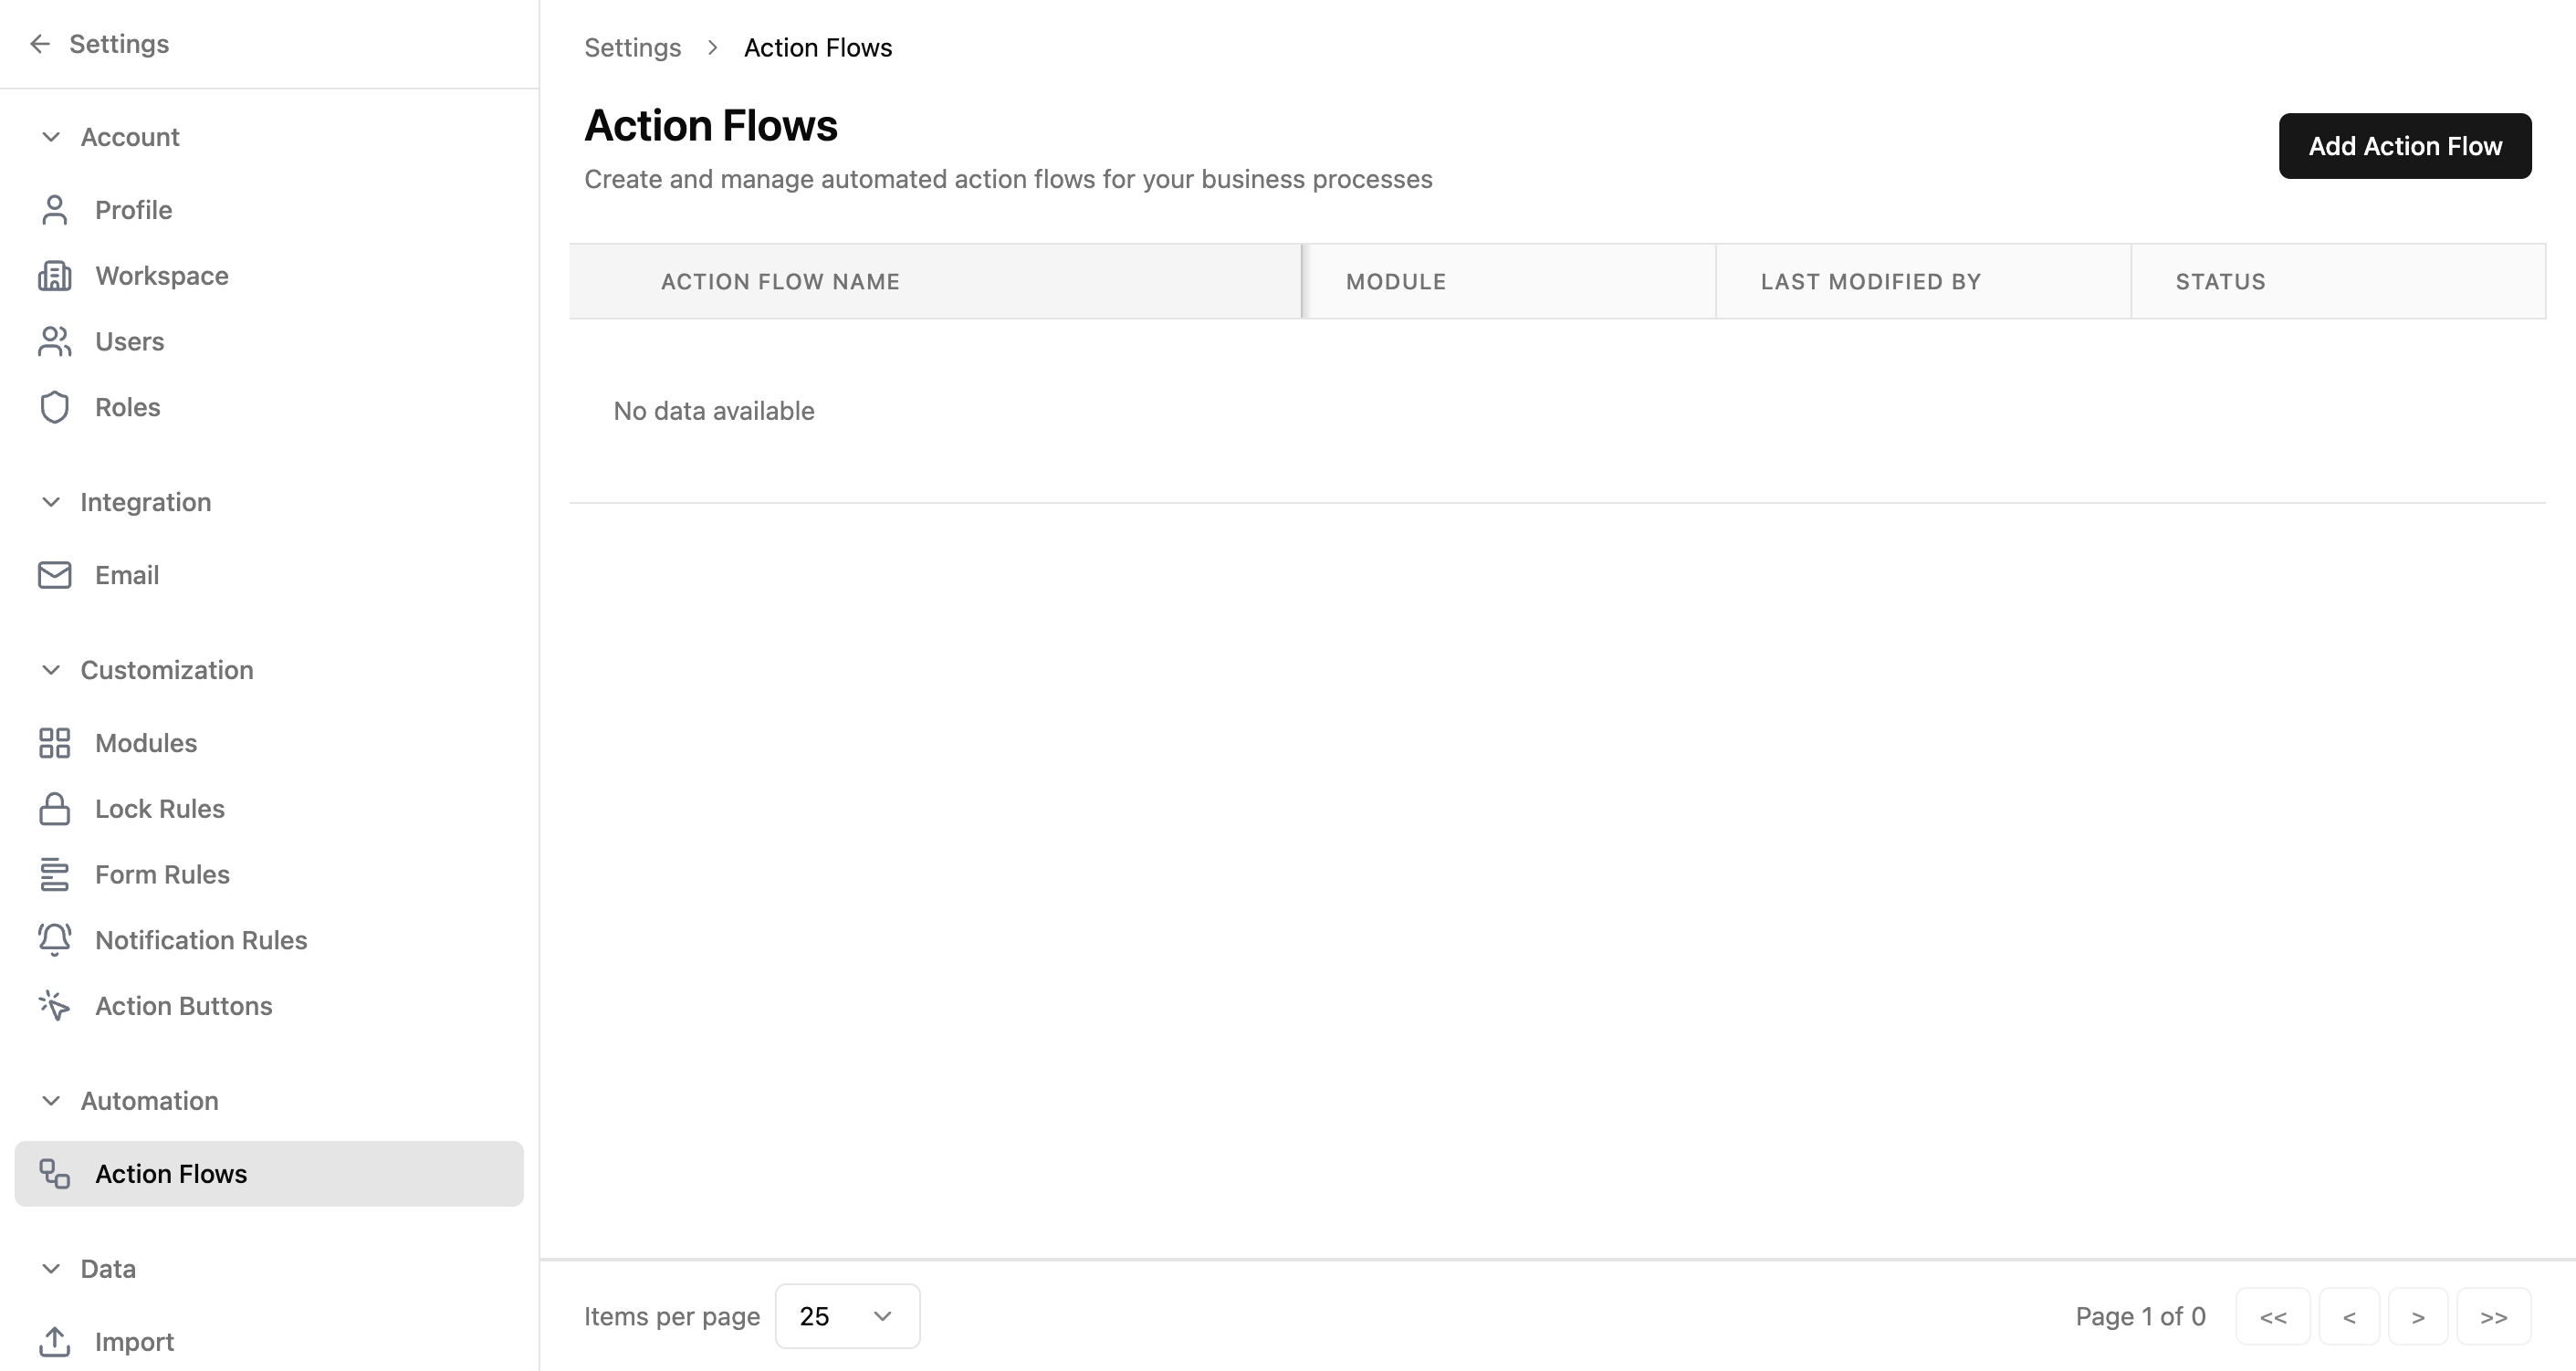
Table Columns
| Column | Description |
|---|---|
| Action Flow Name | The flow's display name. |
| Module | Which module triggers this flow. |
| Last Modified By | Who last updated this flow. |
| Status | Whether the flow is currently active or inactive. |
Available Actions
| Action | How |
|---|---|
| Create an action flow | Click the "Add Action Flow" button (top right) |
| Edit an action flow | Click the flow's name in the table |
| Enable/disable a flow | Toggle the Status switch in the table row |
Creating an Action Flow
Click "Add Action Flow" to open a dialog where you define the flow's basic details. After clicking Next, you'll configure the trigger, conditions, and actions in the visual builder.
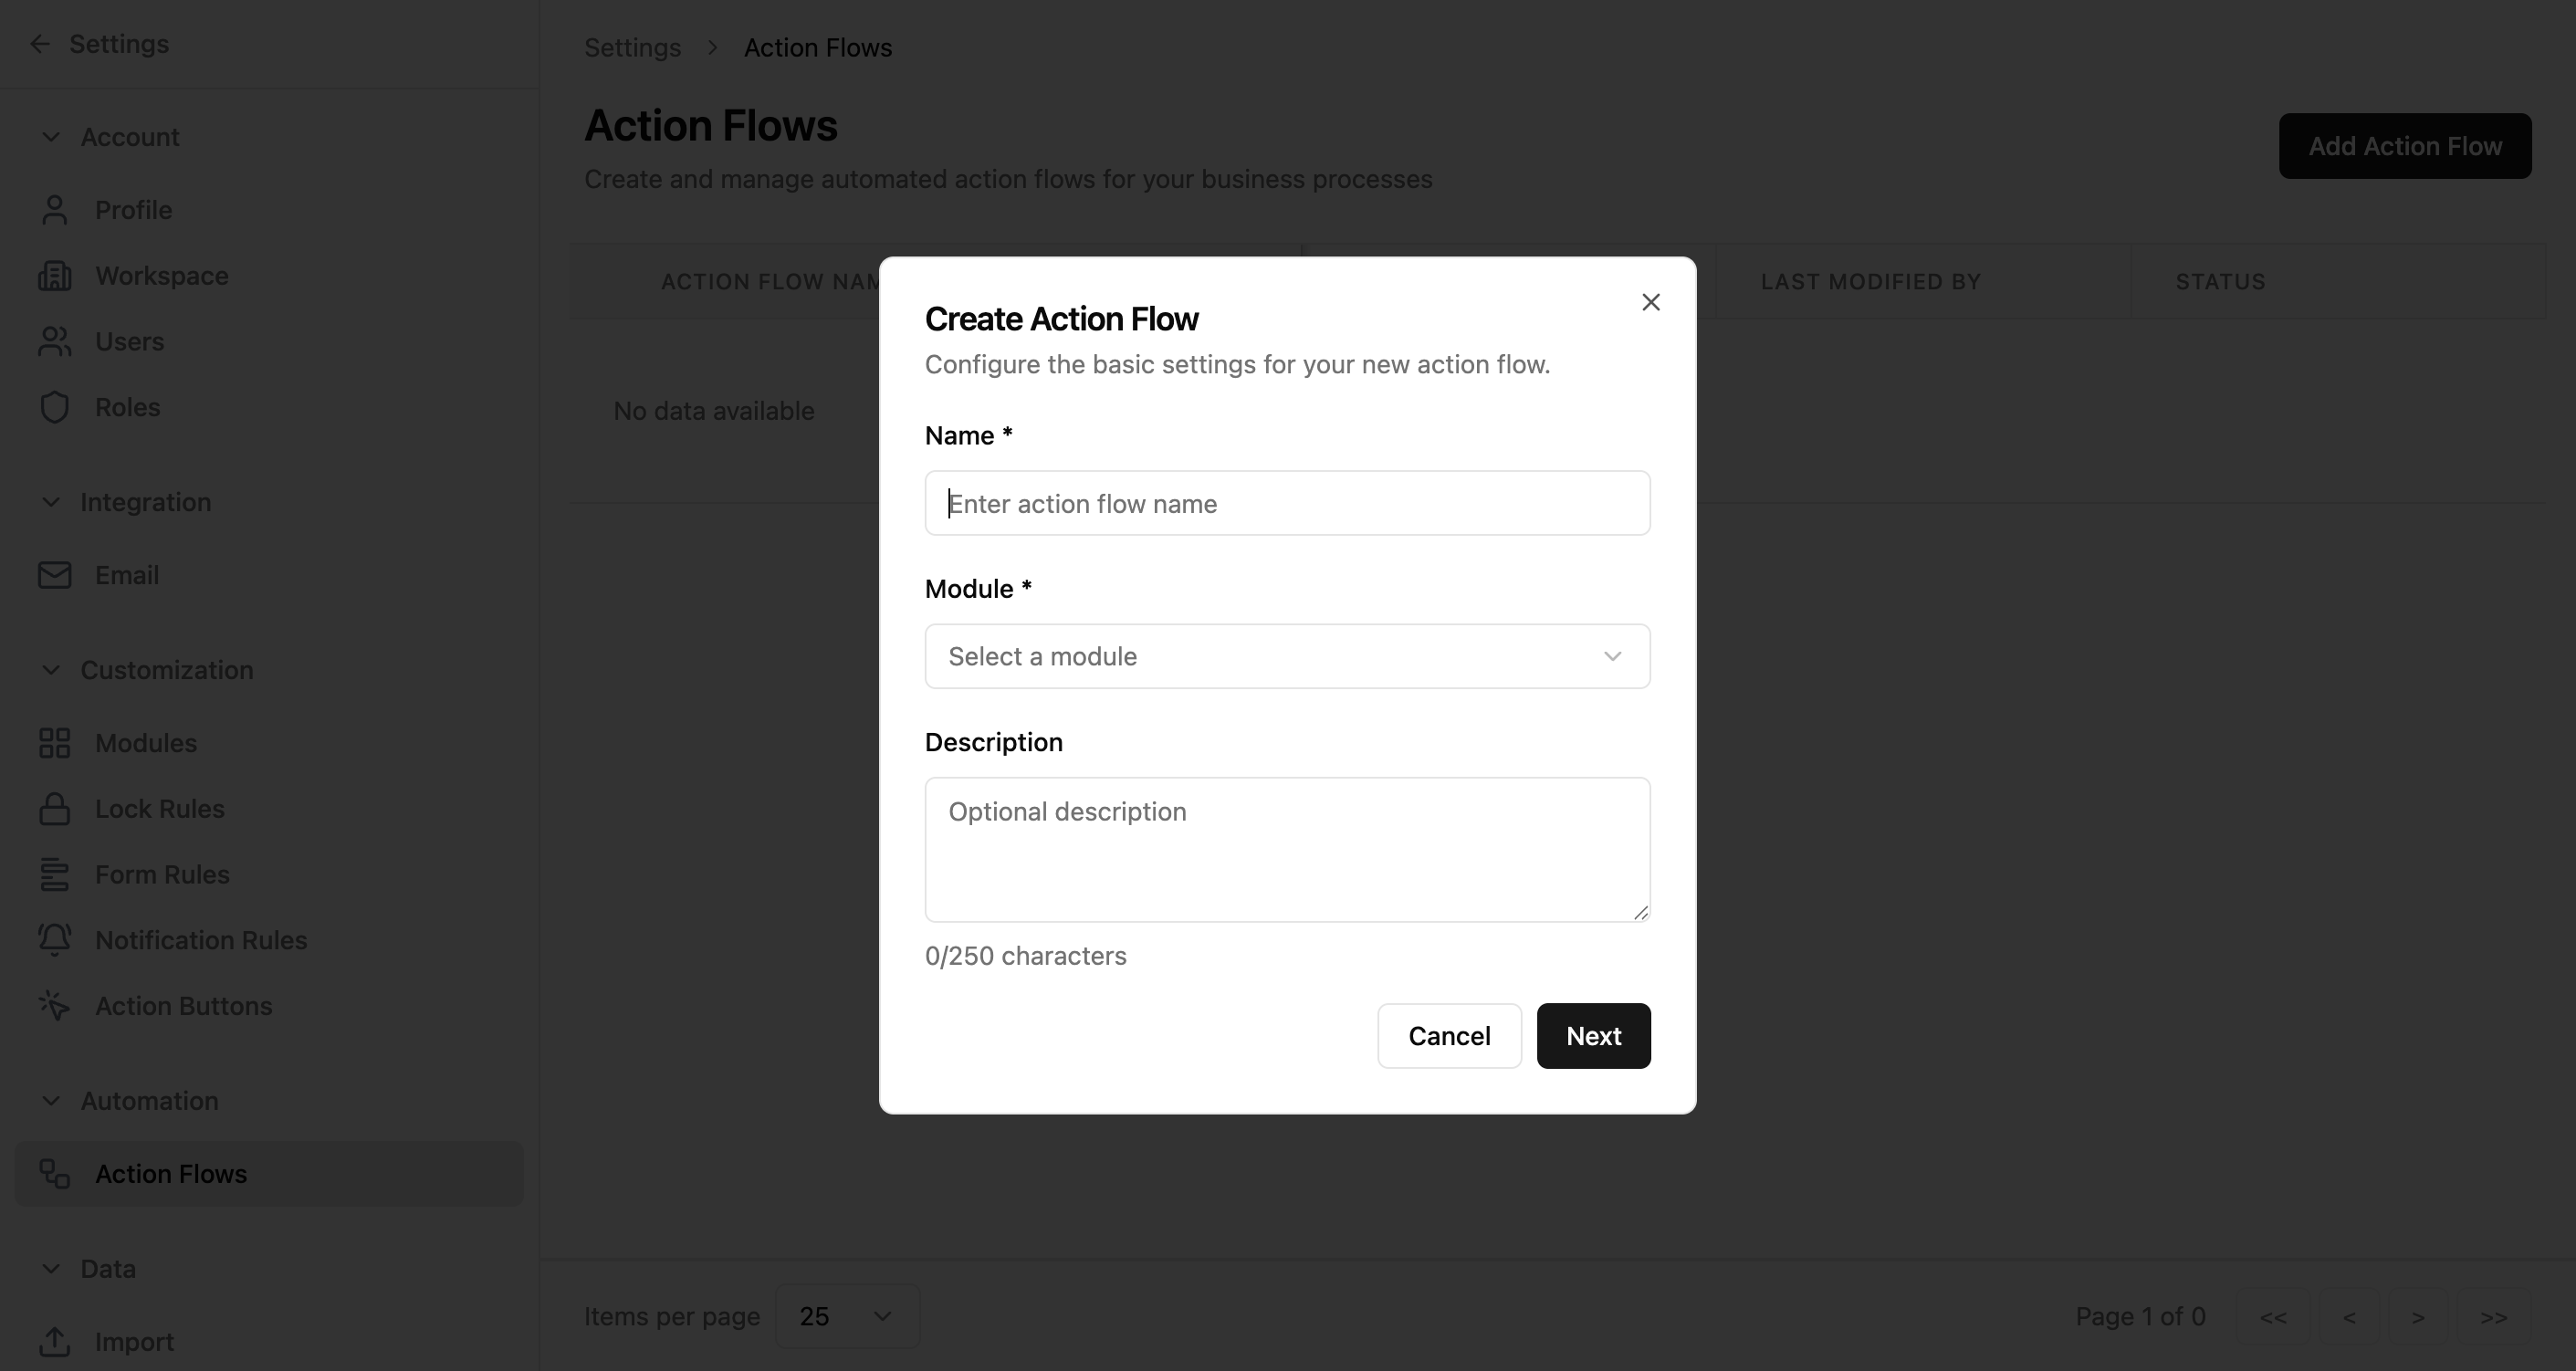
Form Fields
| Field | Required | Description |
|---|---|---|
| Name | Required | A descriptive name for this flow (e.g., "Send Welcome Email on Lead Create"). |
| Module | Required | The module whose records trigger this flow. Options: Lead, Contact, Deal, Account. |
| Description | Optional | A brief explanation of what this flow does. Max 250 characters. |
Steps
- 1Click "Add Action Flow" on the Action Flows page
- 2Enter a descriptive name for the flow
- 3Select the target module from the dropdown
- 4Optionally add a description
- 5Click "Next" to open the visual flow builder
Action Flow Builder
The flow builder is a visual canvas where you design your automation as a sequence of connected nodes: Trigger → Condition → Action. Each node represents a step in the flow.
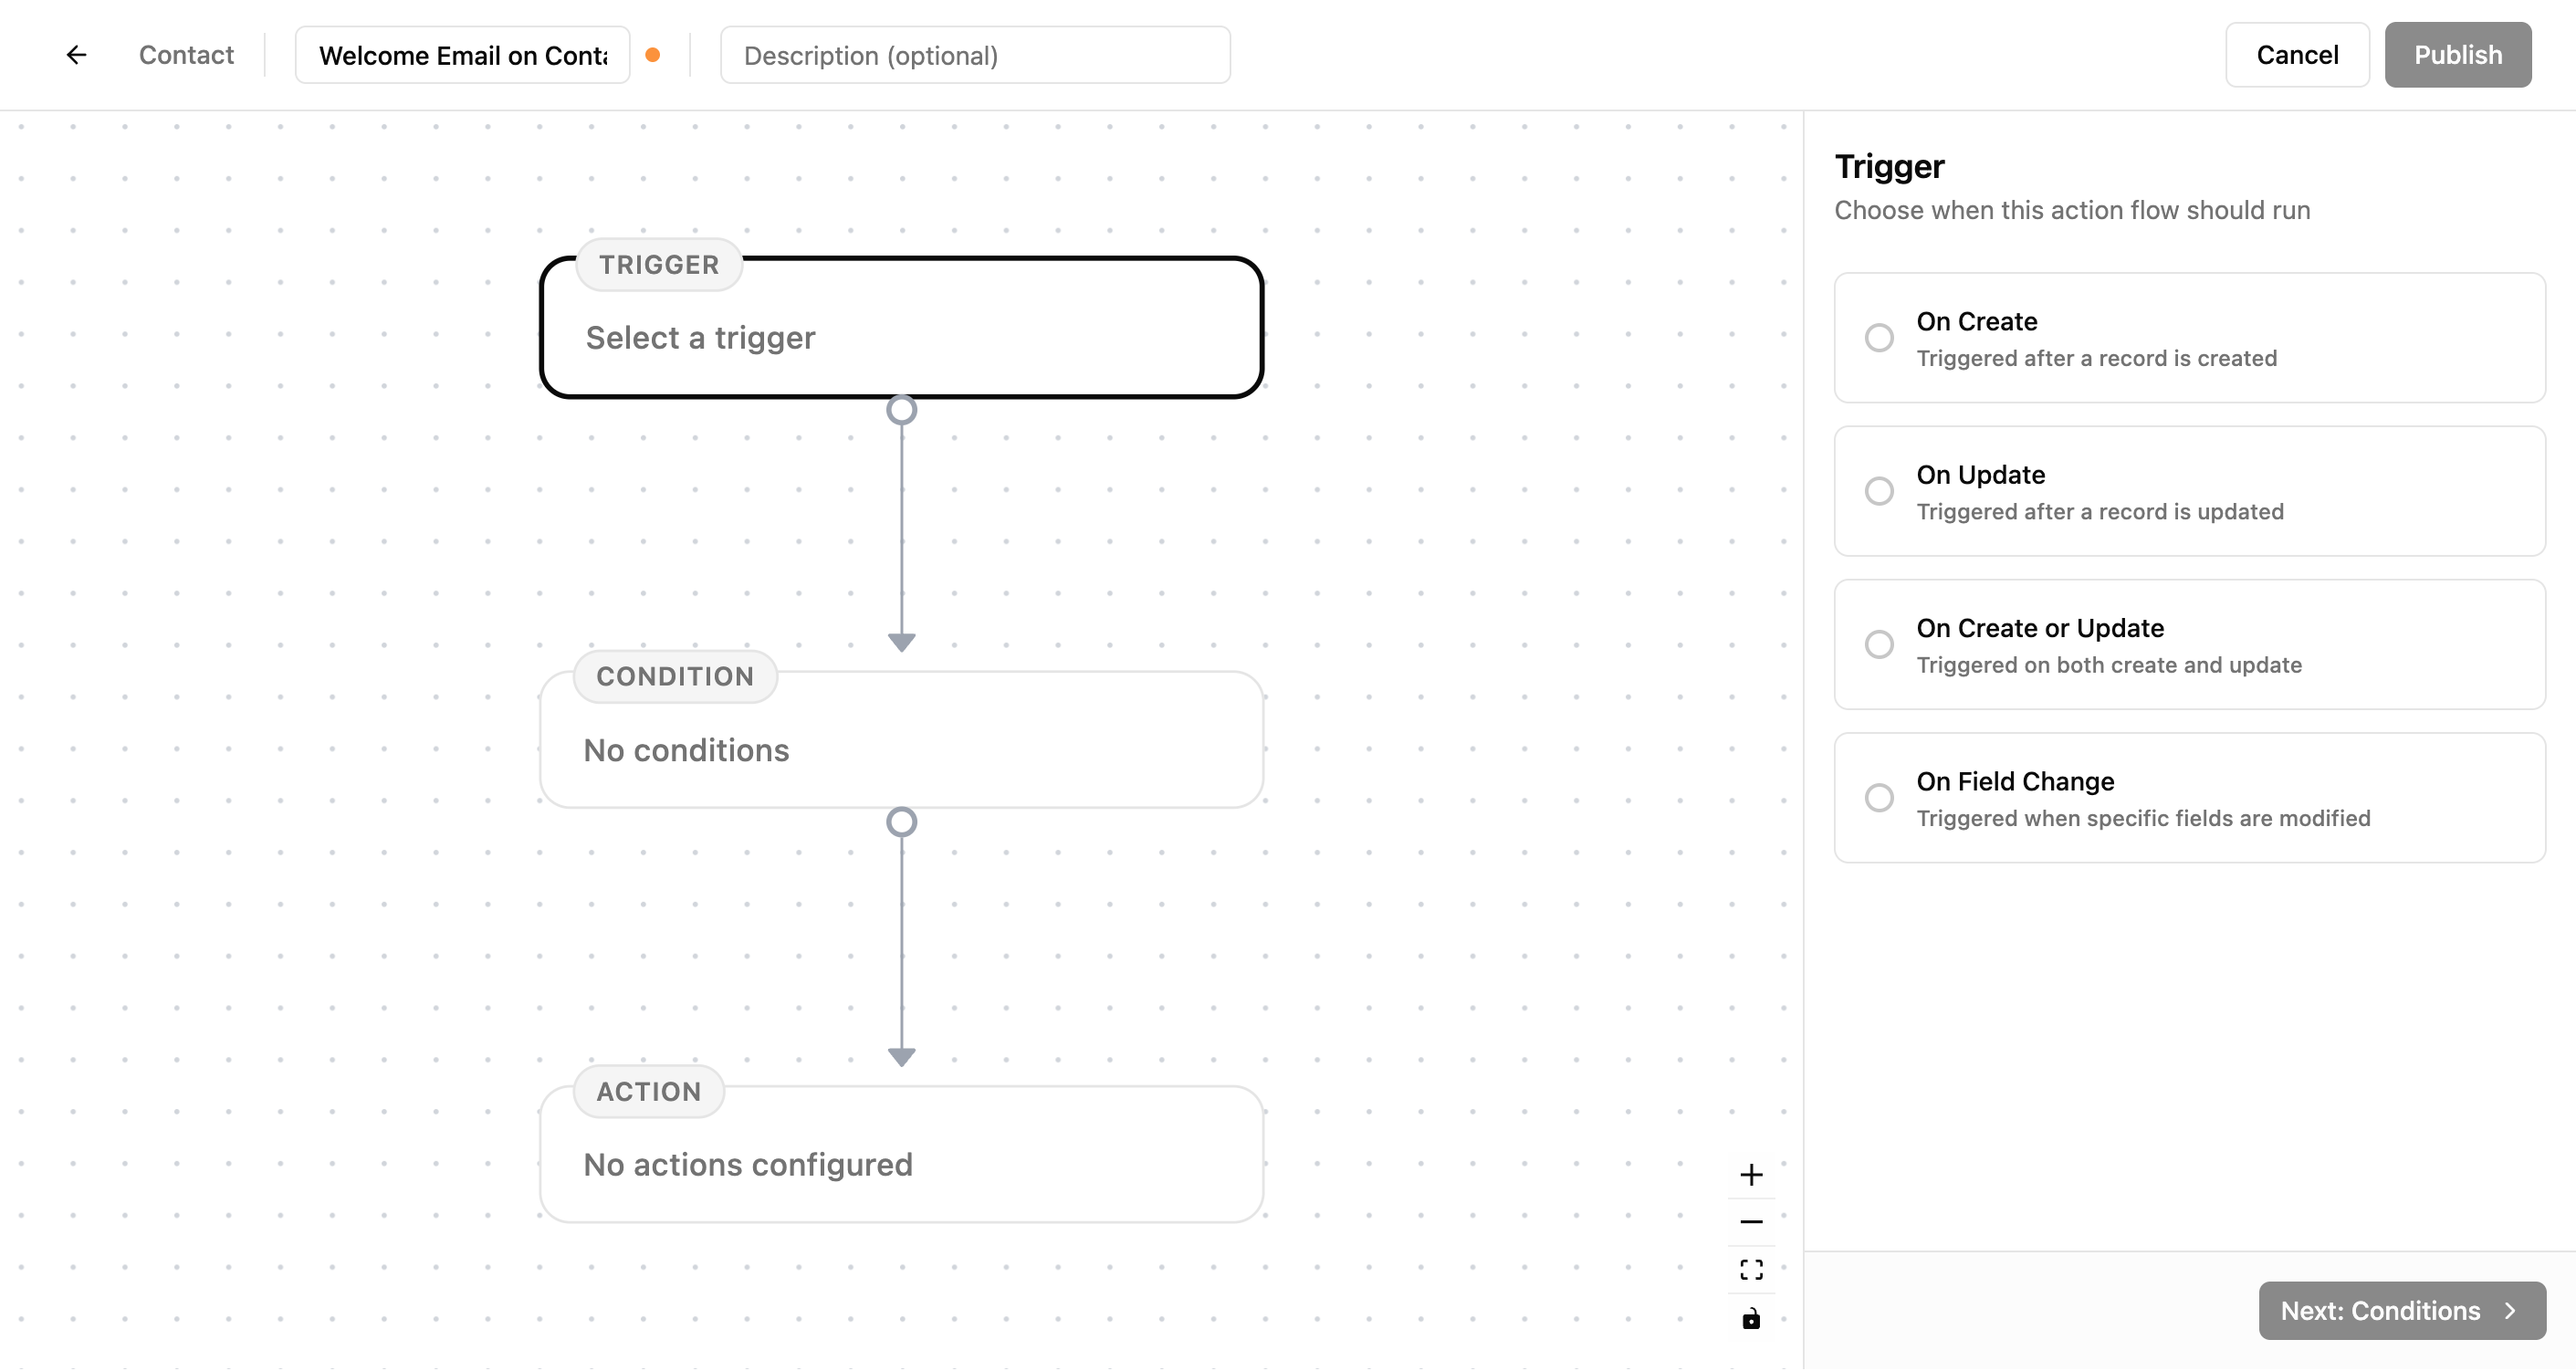
Page Header
| Element | Description |
|---|---|
| Module Name | The module this flow is triggered by. |
| Flow Name | Editable — click to rename the flow. |
| "Unsaved changes" | Indicator that appears when you have unpublished modifications. |
| Description | Editable description field. |
| Cancel | Discard changes and return to the Action Flows list. |
| Publish | Save and activate the flow. |
Canvas Elements
| Element | Purpose |
|---|---|
| Trigger node | The starting point — defines what event starts the flow. |
| Condition node | Optional filter — only records matching criteria proceed to the action. |
| Action node | What happens when the flow runs — the automated operation to perform. |
| Edges (connecting lines) | Show the flow direction from trigger through condition to action. |
Canvas Controls
| Control | What It Does |
|---|---|
| Zoom In | Increase the canvas zoom level. |
| Zoom Out | Decrease the canvas zoom level. |
| Fit View | Auto-zoom to fit all nodes in the viewport. |
| Toggle Interactivity | Enable or disable canvas panning and node dragging. |
Flow Triggers
Click the Trigger node on the canvas to open the trigger selection panel on the right. Choose when this action flow should run.
Available Triggers
| Trigger | When It Fires |
|---|---|
| On Create | Triggered after a record is created in the module. |
| On Update | Triggered after a record is updated in the module. |
| On Create or Update | Triggered on both record creation and updates. |
| On Field Change | Triggered when specific fields are modified. Requires selecting which fields to watch. |
Trigger Panel
- Heading: "Trigger — Choose when this action flow should run"
- Four trigger options displayed as selectable cards
- Select one trigger — it highlights to show your selection
- "Next: Conditions" button at the bottom (disabled until a trigger is selected)
Steps
- 1Click the Trigger node on the canvas
- 2The trigger selection panel opens on the right
- 3Select one of the four trigger options
- 4Click "Next: Conditions" to proceed to the condition configuration
- 5Define any conditions (or skip to apply to all records)
- 6Configure the action node with what should happen
Tip: Use "On Field Change" when you want the flow to run only for specific field transitions — like when a Deal's stage changes to "Closed Won" rather than on every update.
Real-World Use Case
E-commerce company — automating order fulfillment
An e-commerce company receives dozens of orders daily. When an order's payment is confirmed, several things need to happen automatically: the warehouse team gets notified, inventory is updated, and the customer receives a confirmation. Instead of relying on someone to trigger each step manually, action flows handle it.
- 1Create a flow "Payment Confirmed → Notify Warehouse" on the Orders module
- 2Set trigger to On Field Change: Payment Status changes to "Confirmed"
- 3Add a condition: Order Total is greater than $0 (skip $0 orders like free samples)
- 4Configure the action to send an email to the warehouse team with order details
- 5Create a second flow "Payment Confirmed → Update Inventory" with the same trigger
- 6Configure the action to update the Stock Level field on related Product records
- 7Create a third flow "Order Shipped → Notify Customer" triggered when Shipping Status changes to "Shipped"
- 8Configure the action to send a customer-facing email with tracking information
Adapt this for your team: Action flows automate any multi-step process triggered by data changes. A recruitment agency can auto-send offer letters when a candidate's status changes to "Selected". A property manager can trigger maintenance workflows when a tenant submits a request. A school can auto-notify parents when attendance is marked. If your team does the same steps every time a record changes, an action flow can do it for them.
Common Workflows
Create a flow to send a welcome email on Lead creation
- 1Go to Settings → Action Flows
- 2Click "Add Action Flow"
- 3Name it "Welcome Email" and select Lead as the module
- 4Click "Next"
- 5Click the Trigger node and select "On Create"
- 6Click "Next: Conditions"
- 7Skip conditions (or add criteria like "Source equals Website")
- 8Configure the Action node to send an email
- 9Click "Publish"
Create a flow to update a field when a Deal is won
- 1Go to Settings → Action Flows
- 2Click "Add Action Flow"
- 3Name it "Mark Won Date" and select Deal as the module
- 4Click "Next"
- 5Click the Trigger node and select "On Field Change"
- 6Configure the field change: Stage changes to "Closed Won"
- 7Click "Next: Conditions"
- 8Skip conditions (apply to all won deals)
- 9Configure the Action node to update the "Won Date" field to today's date
- 10Click "Publish"