Overview
Custom lists let you save different configurations of your record table — choosing which columns to display, what order to sort by, and which records to include.
Custom List
A saved table configuration with specific columns, sort order, and optional filter conditions.
Default List
The custom list that loads automatically when you navigate to a module.
Visibility
Controls who can see a custom list — Private (just you), specific roles, or the entire organization.
Related guide: See Advanced Filters for narrowing down which records appear in a list using field-based conditions.
Creating a Custom List
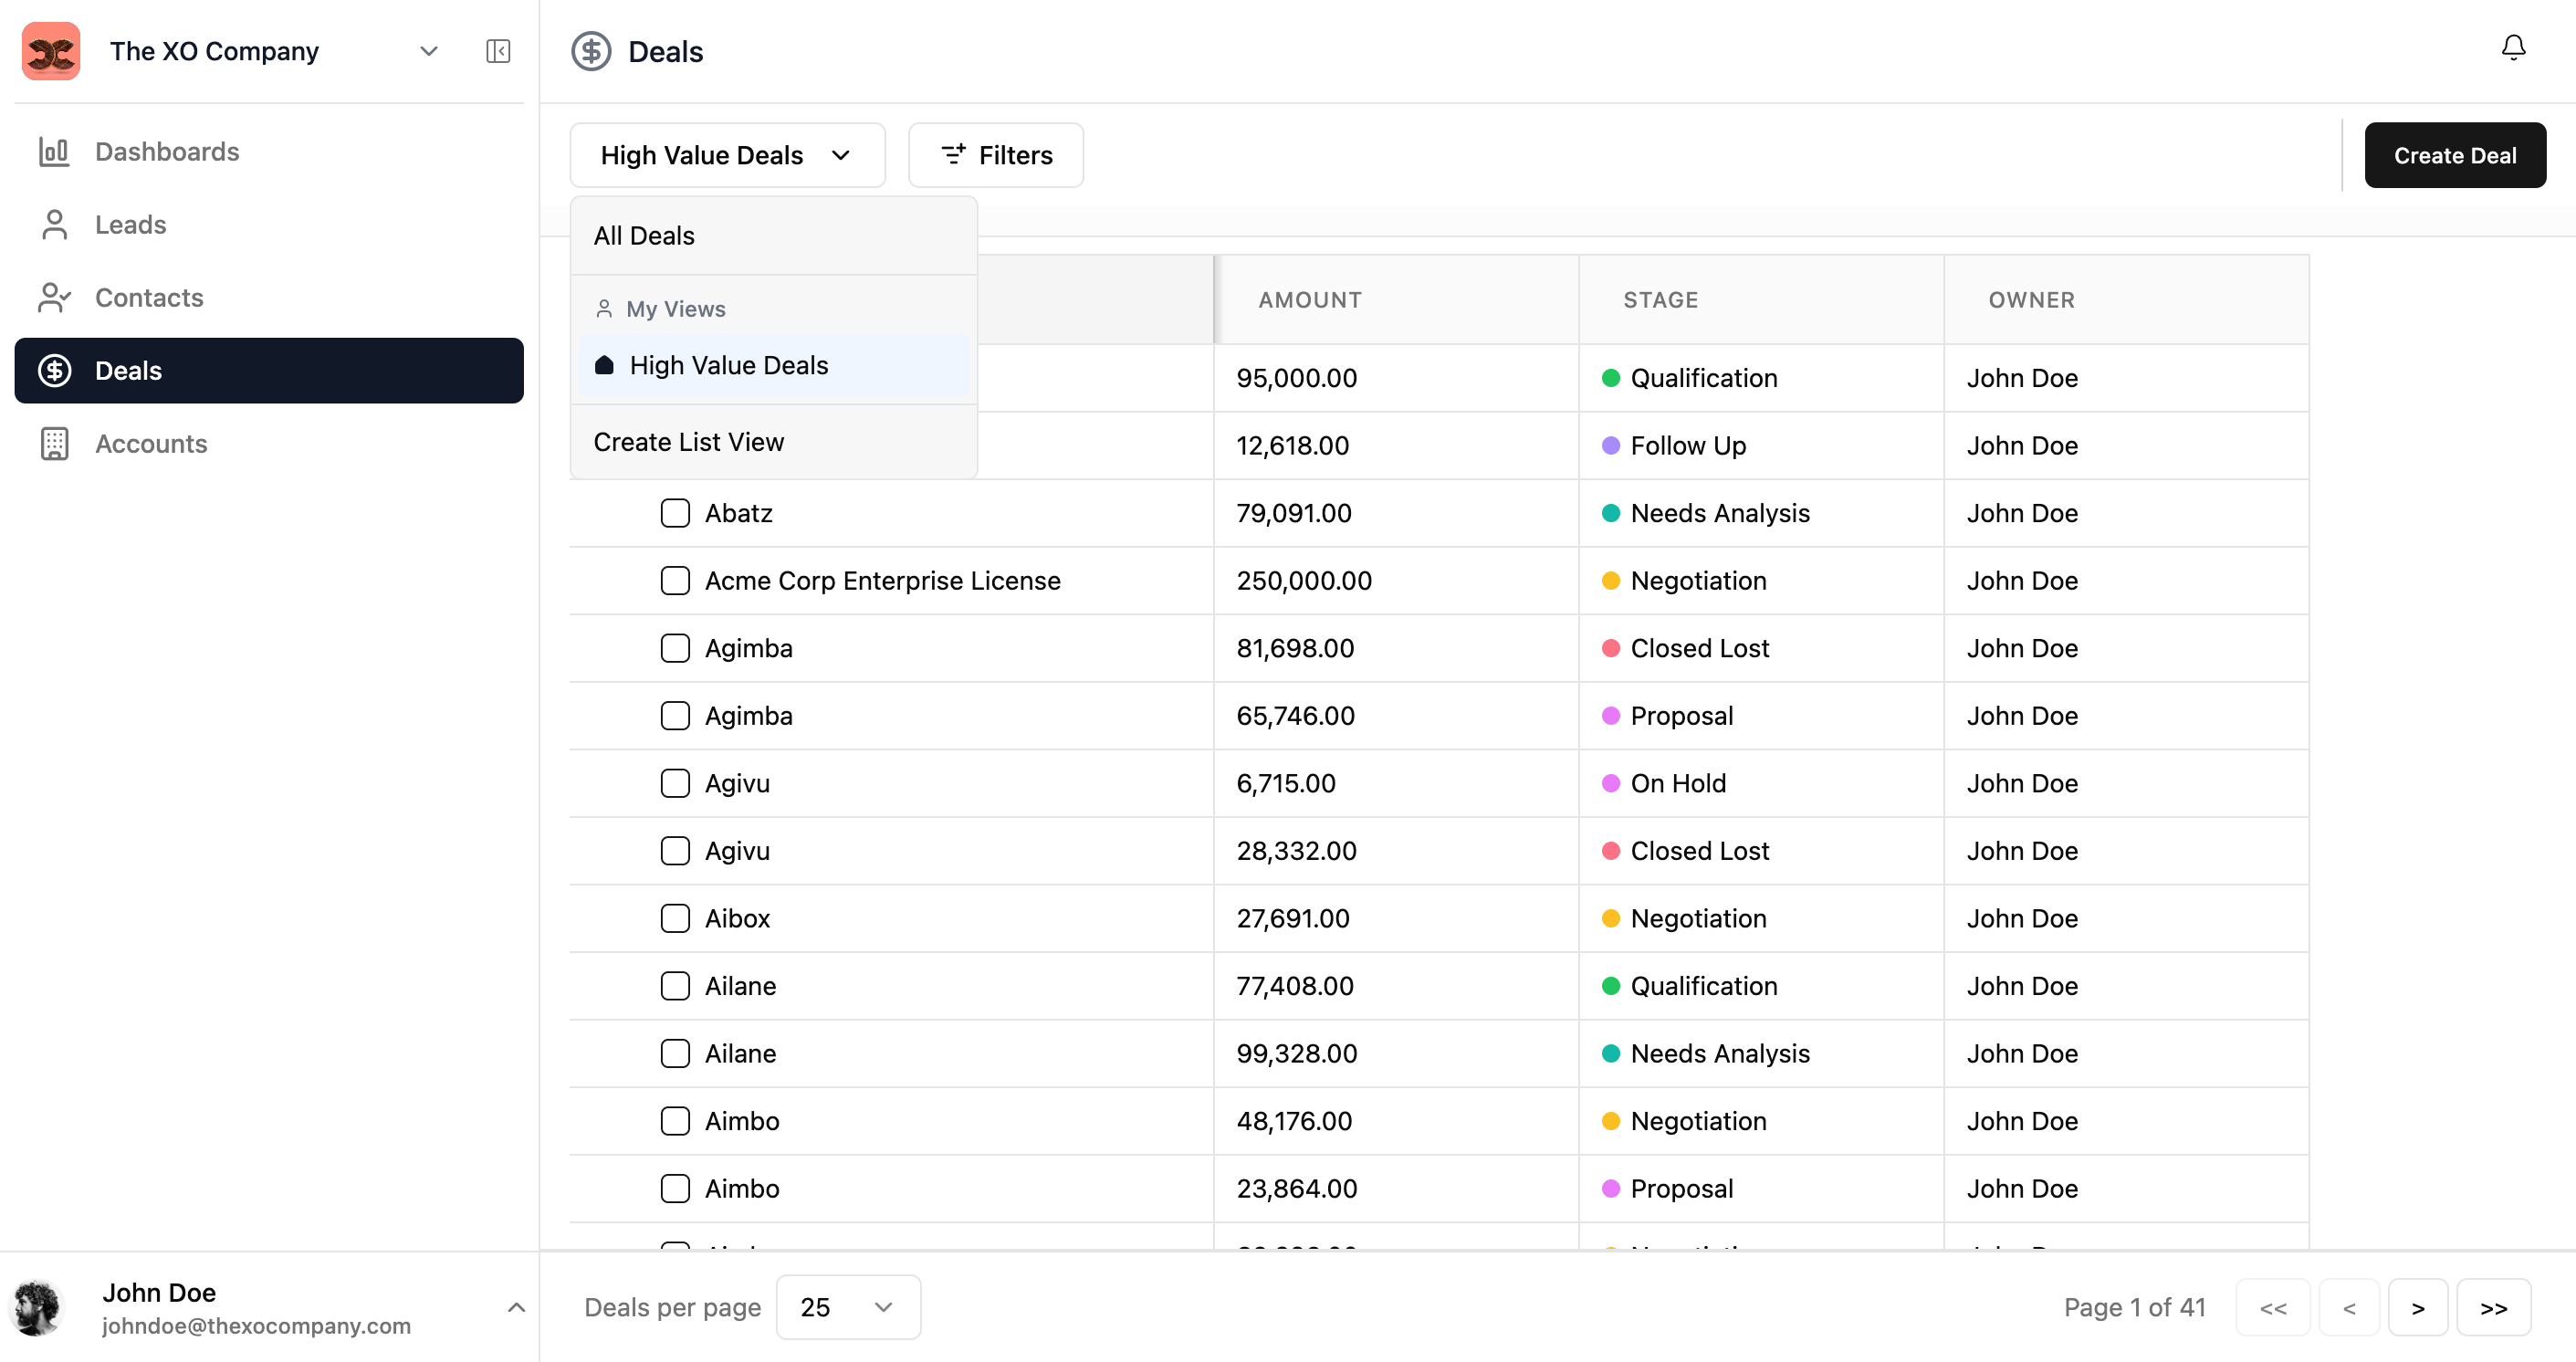
- 1Click the view dropdown (shows current list name, e.g., "All Deals").
- 2Select Create Custom List.
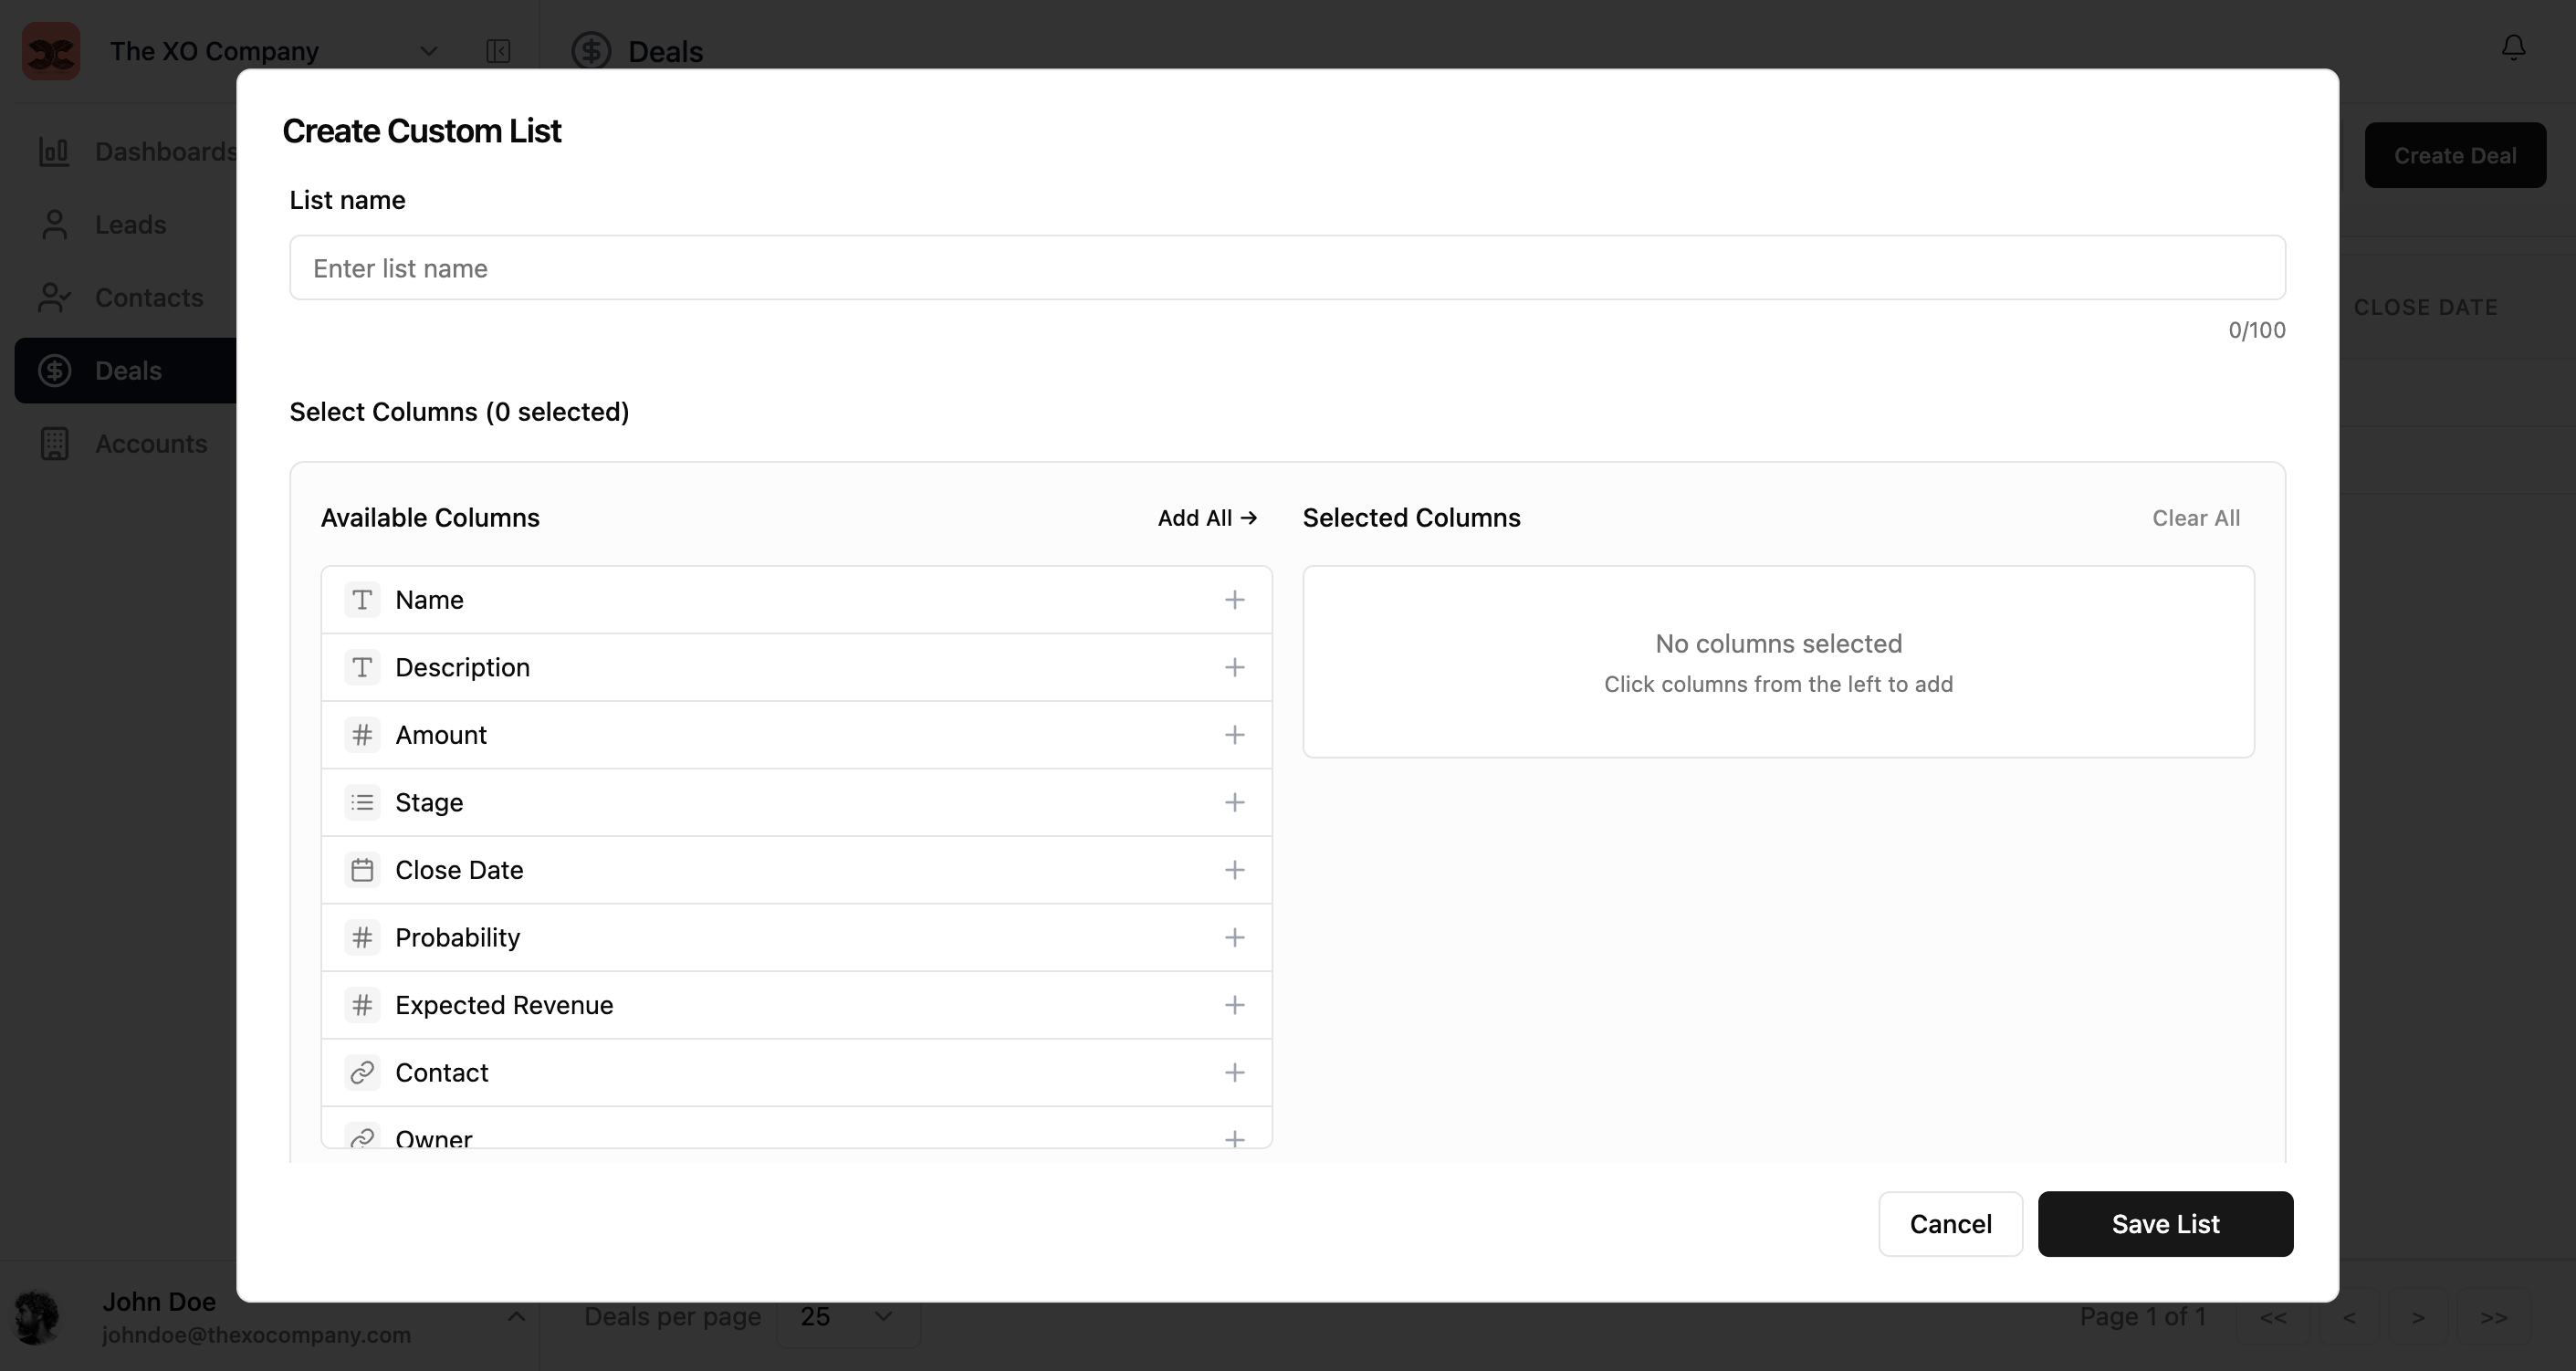
- 3Enter a name for your list.
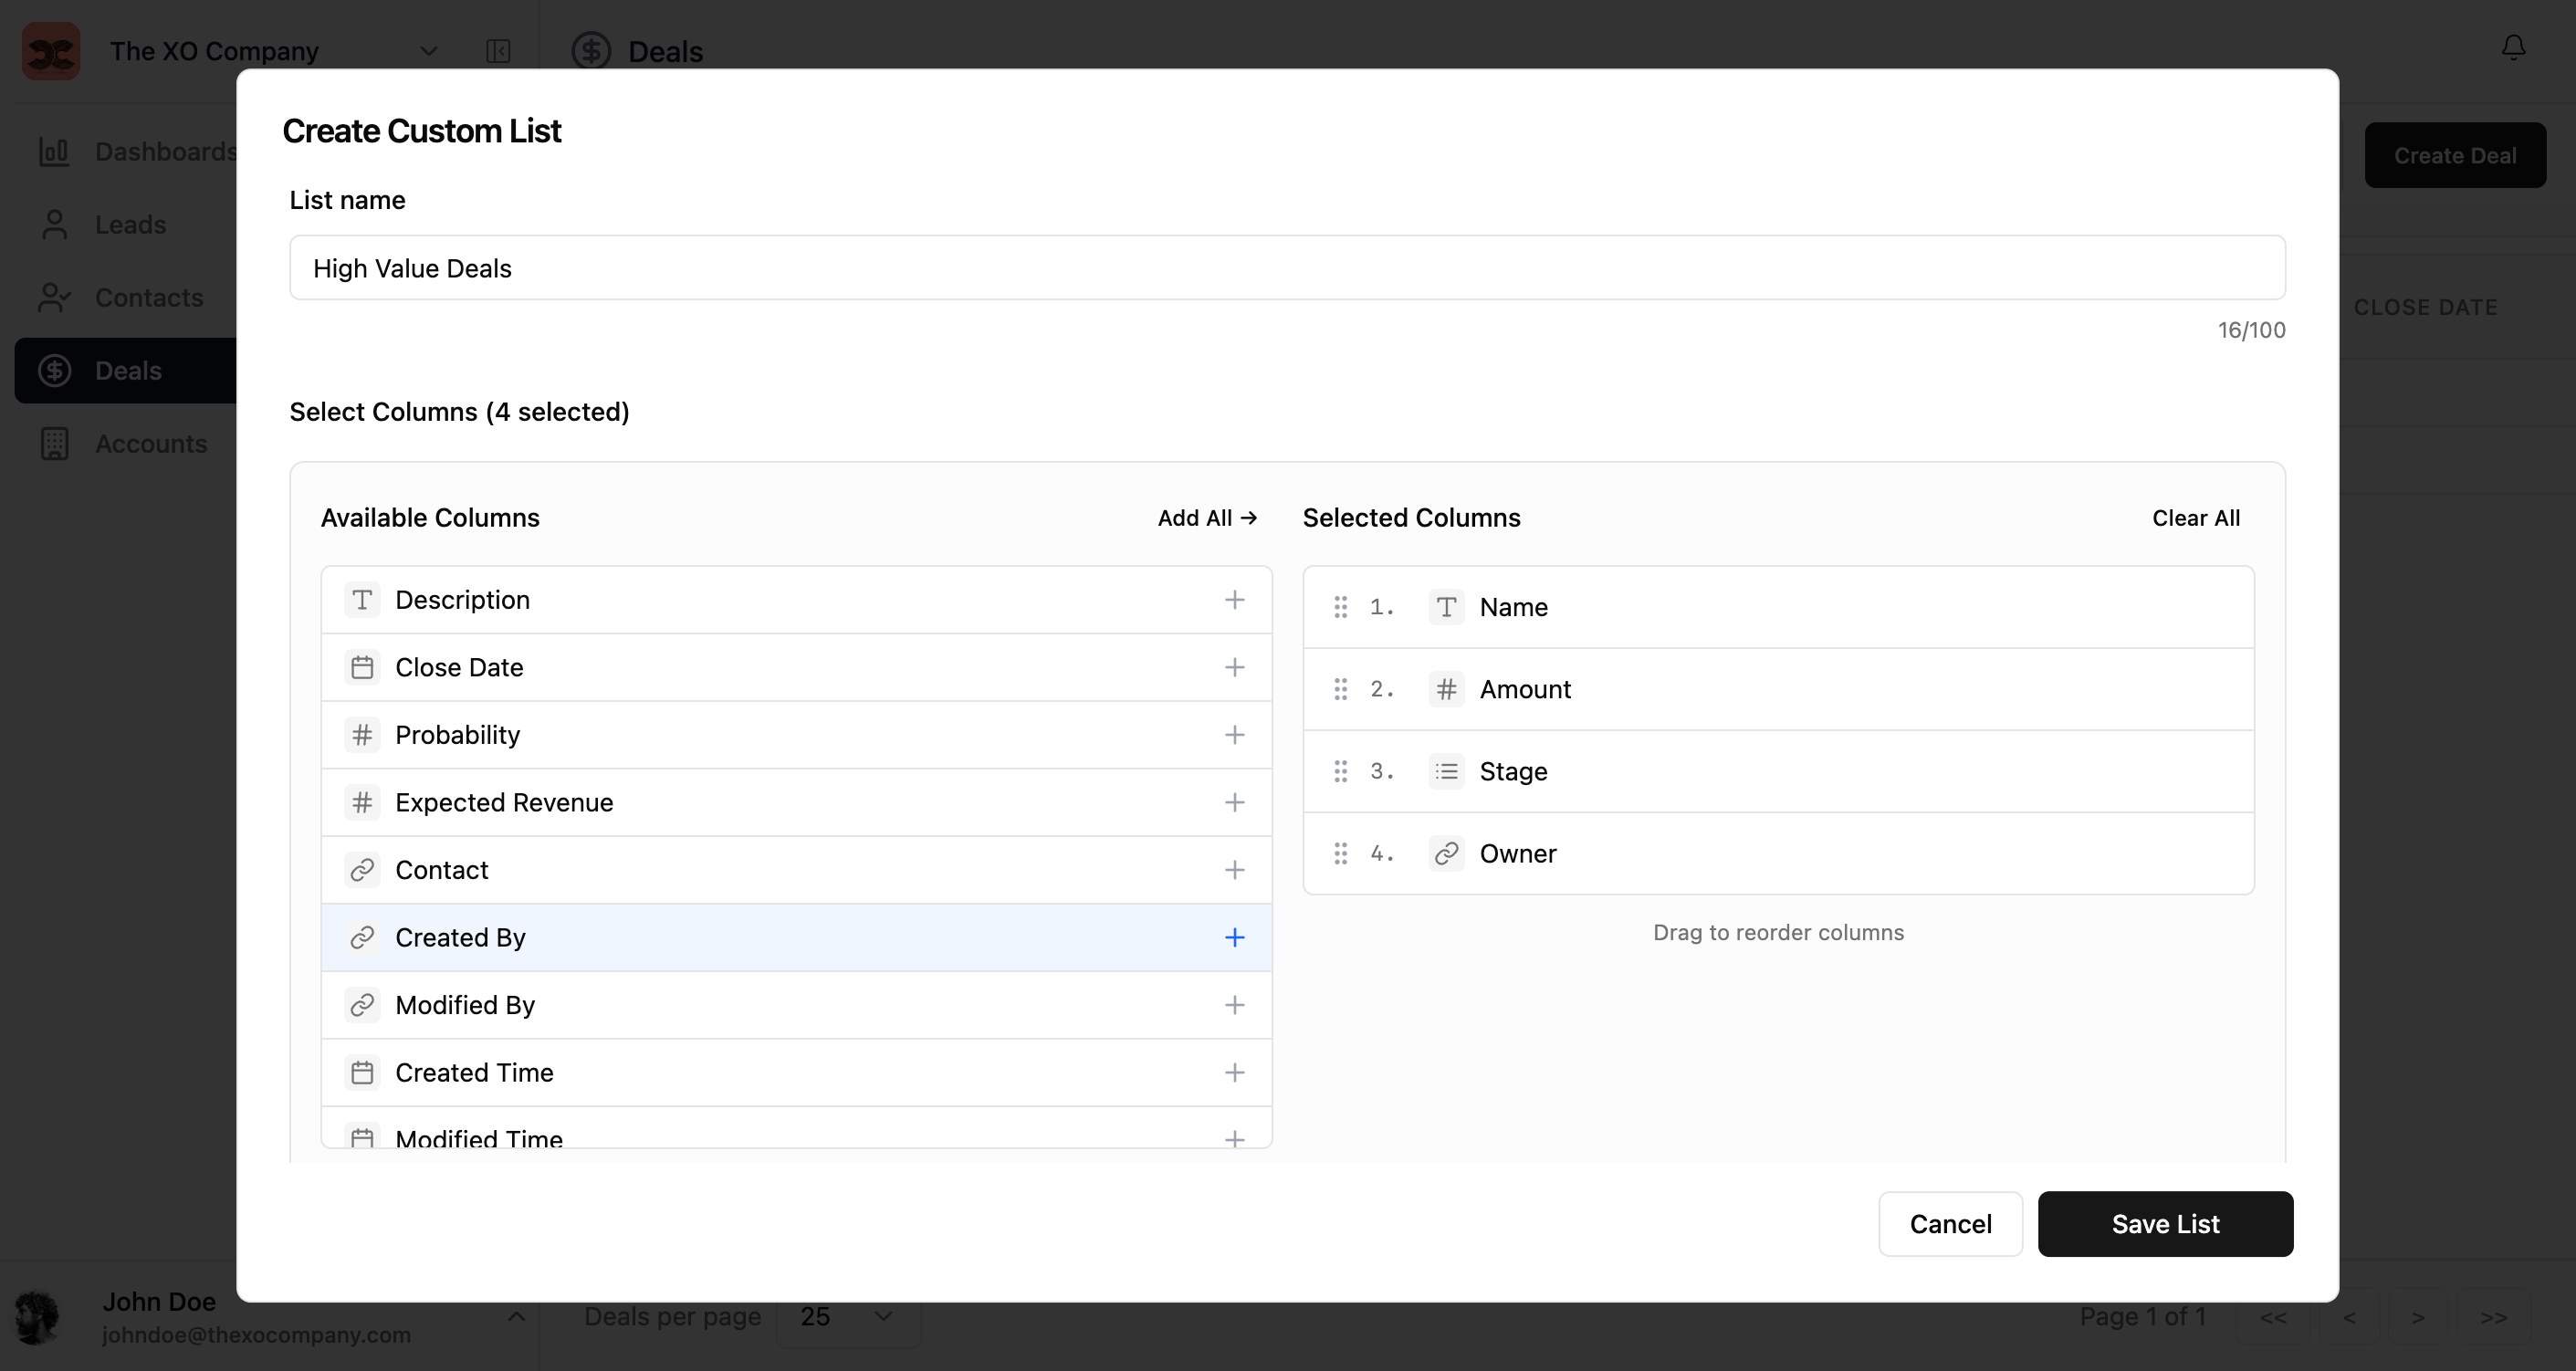
- 4Select which columns to include by clicking them from the Available Columns panel.
- 5Optionally set filter conditions and sort configuration.
- 6Click Save List.
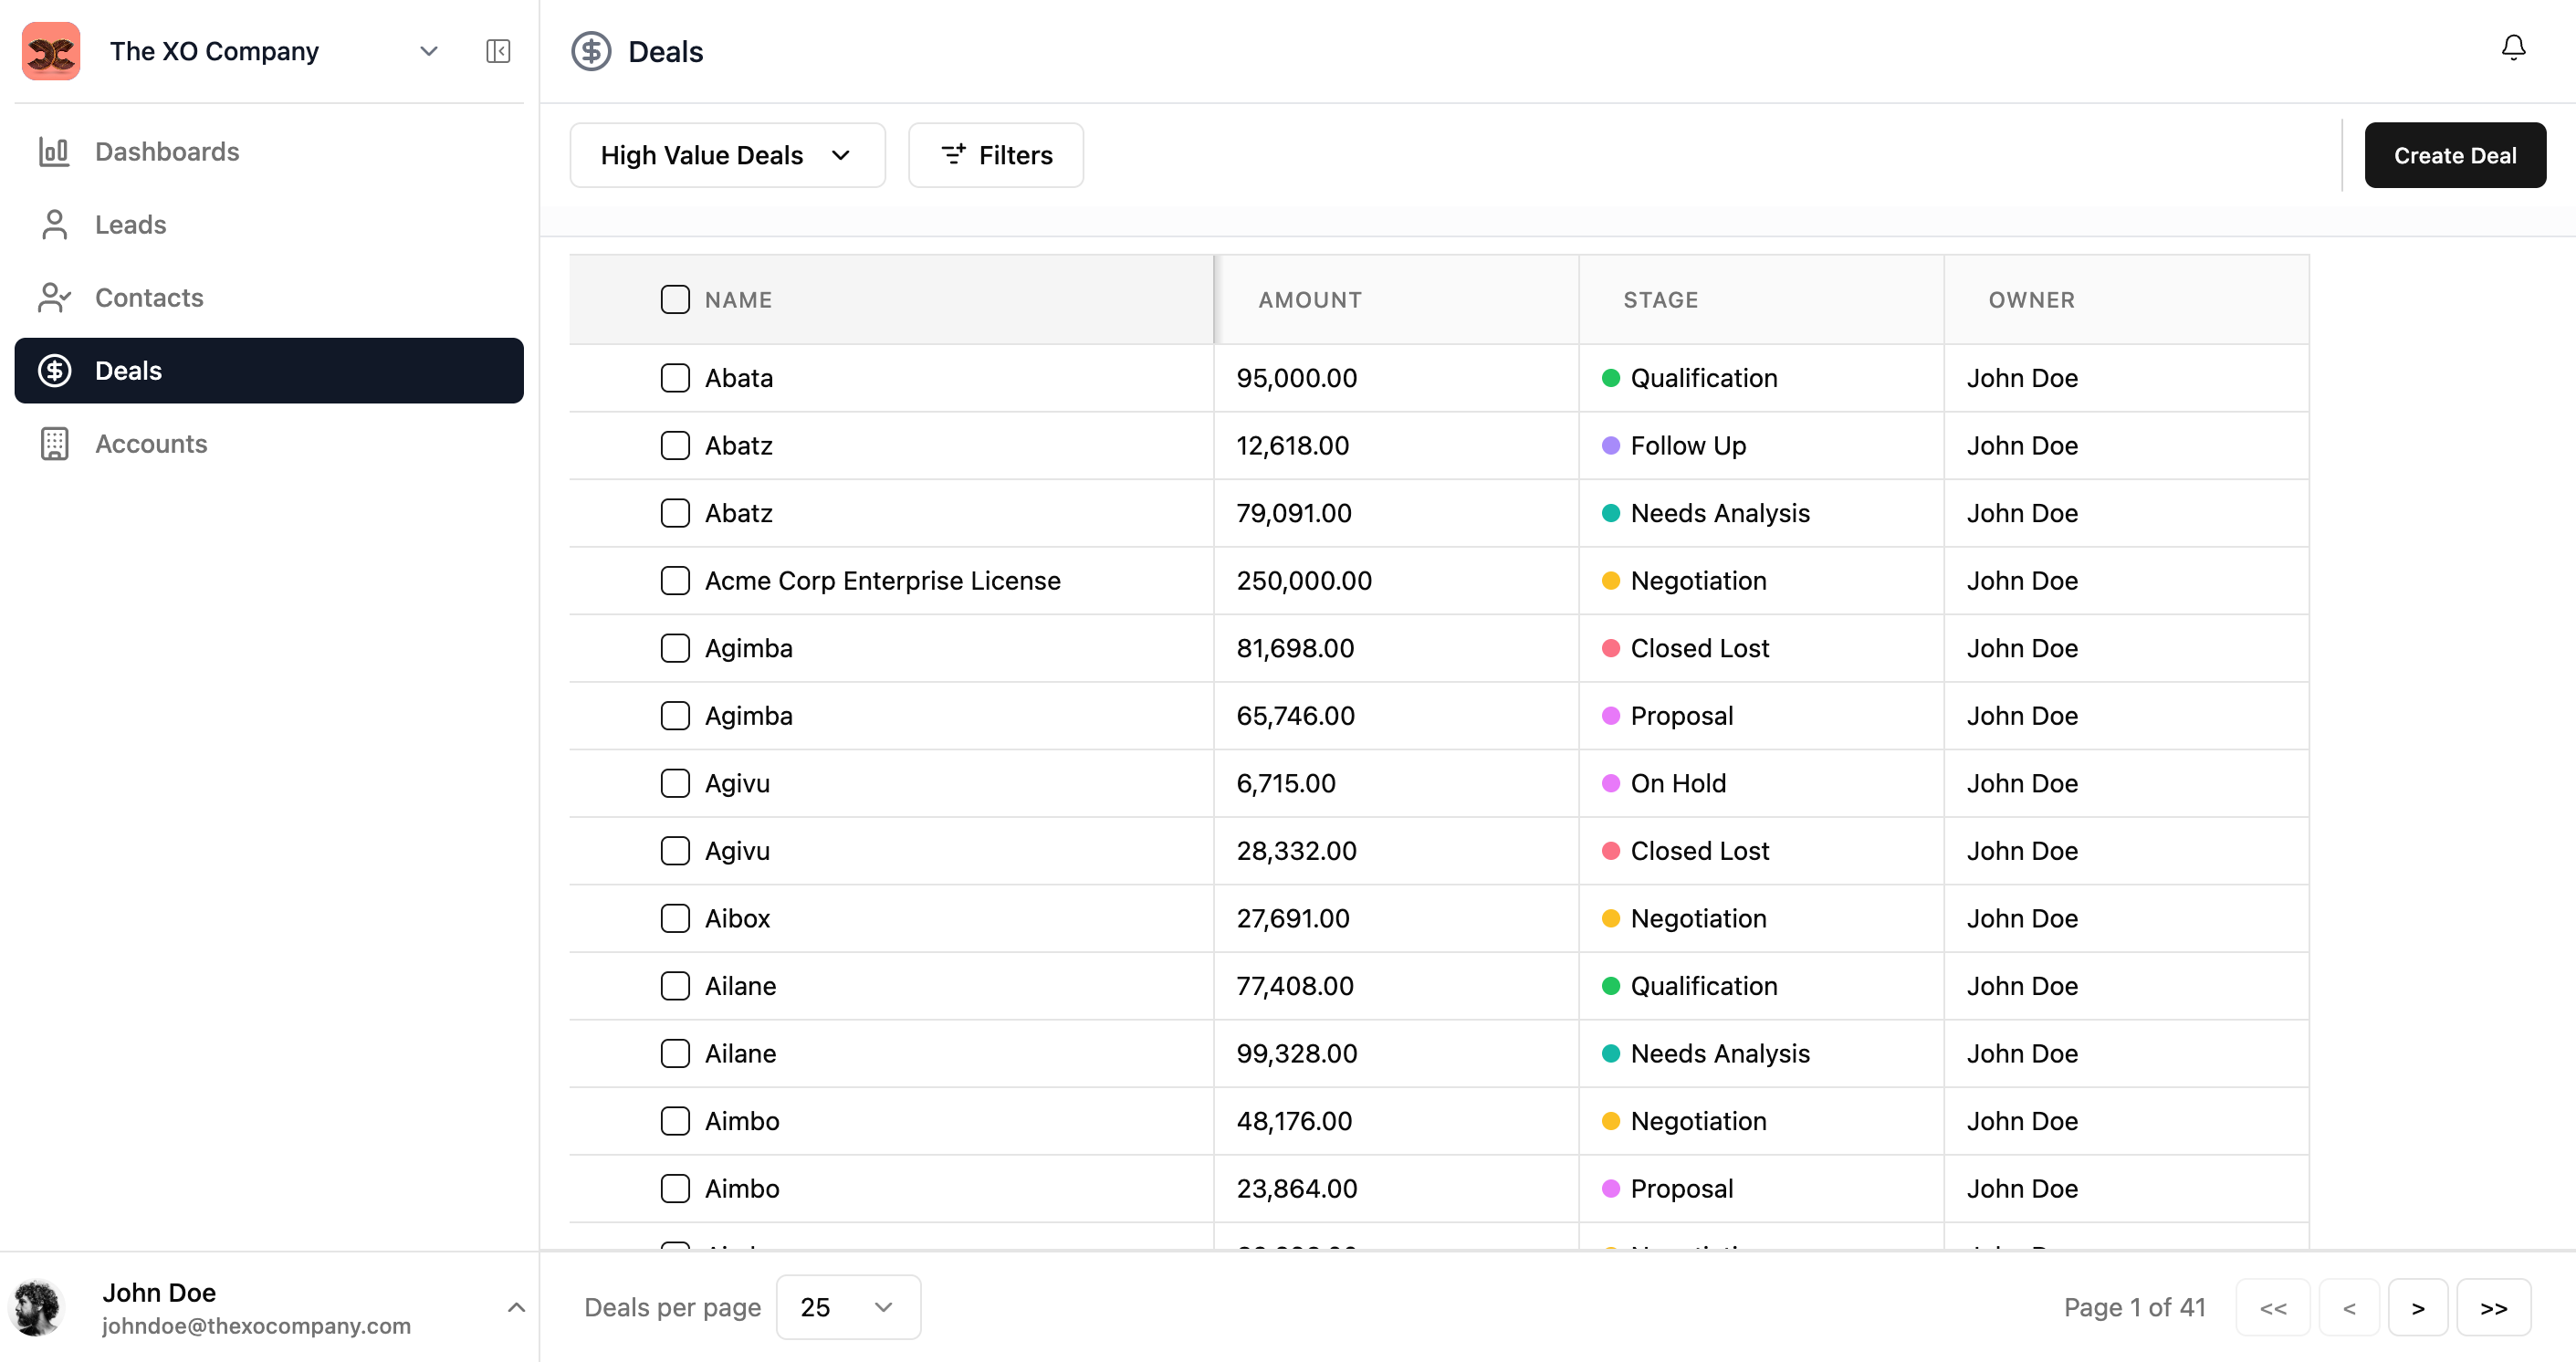
After saving, the table switches to your new custom list with only the columns you selected.
Managing Lists
Each custom list has a set of management actions accessible from the view dropdown.
- 1Click the view dropdown to see your lists.
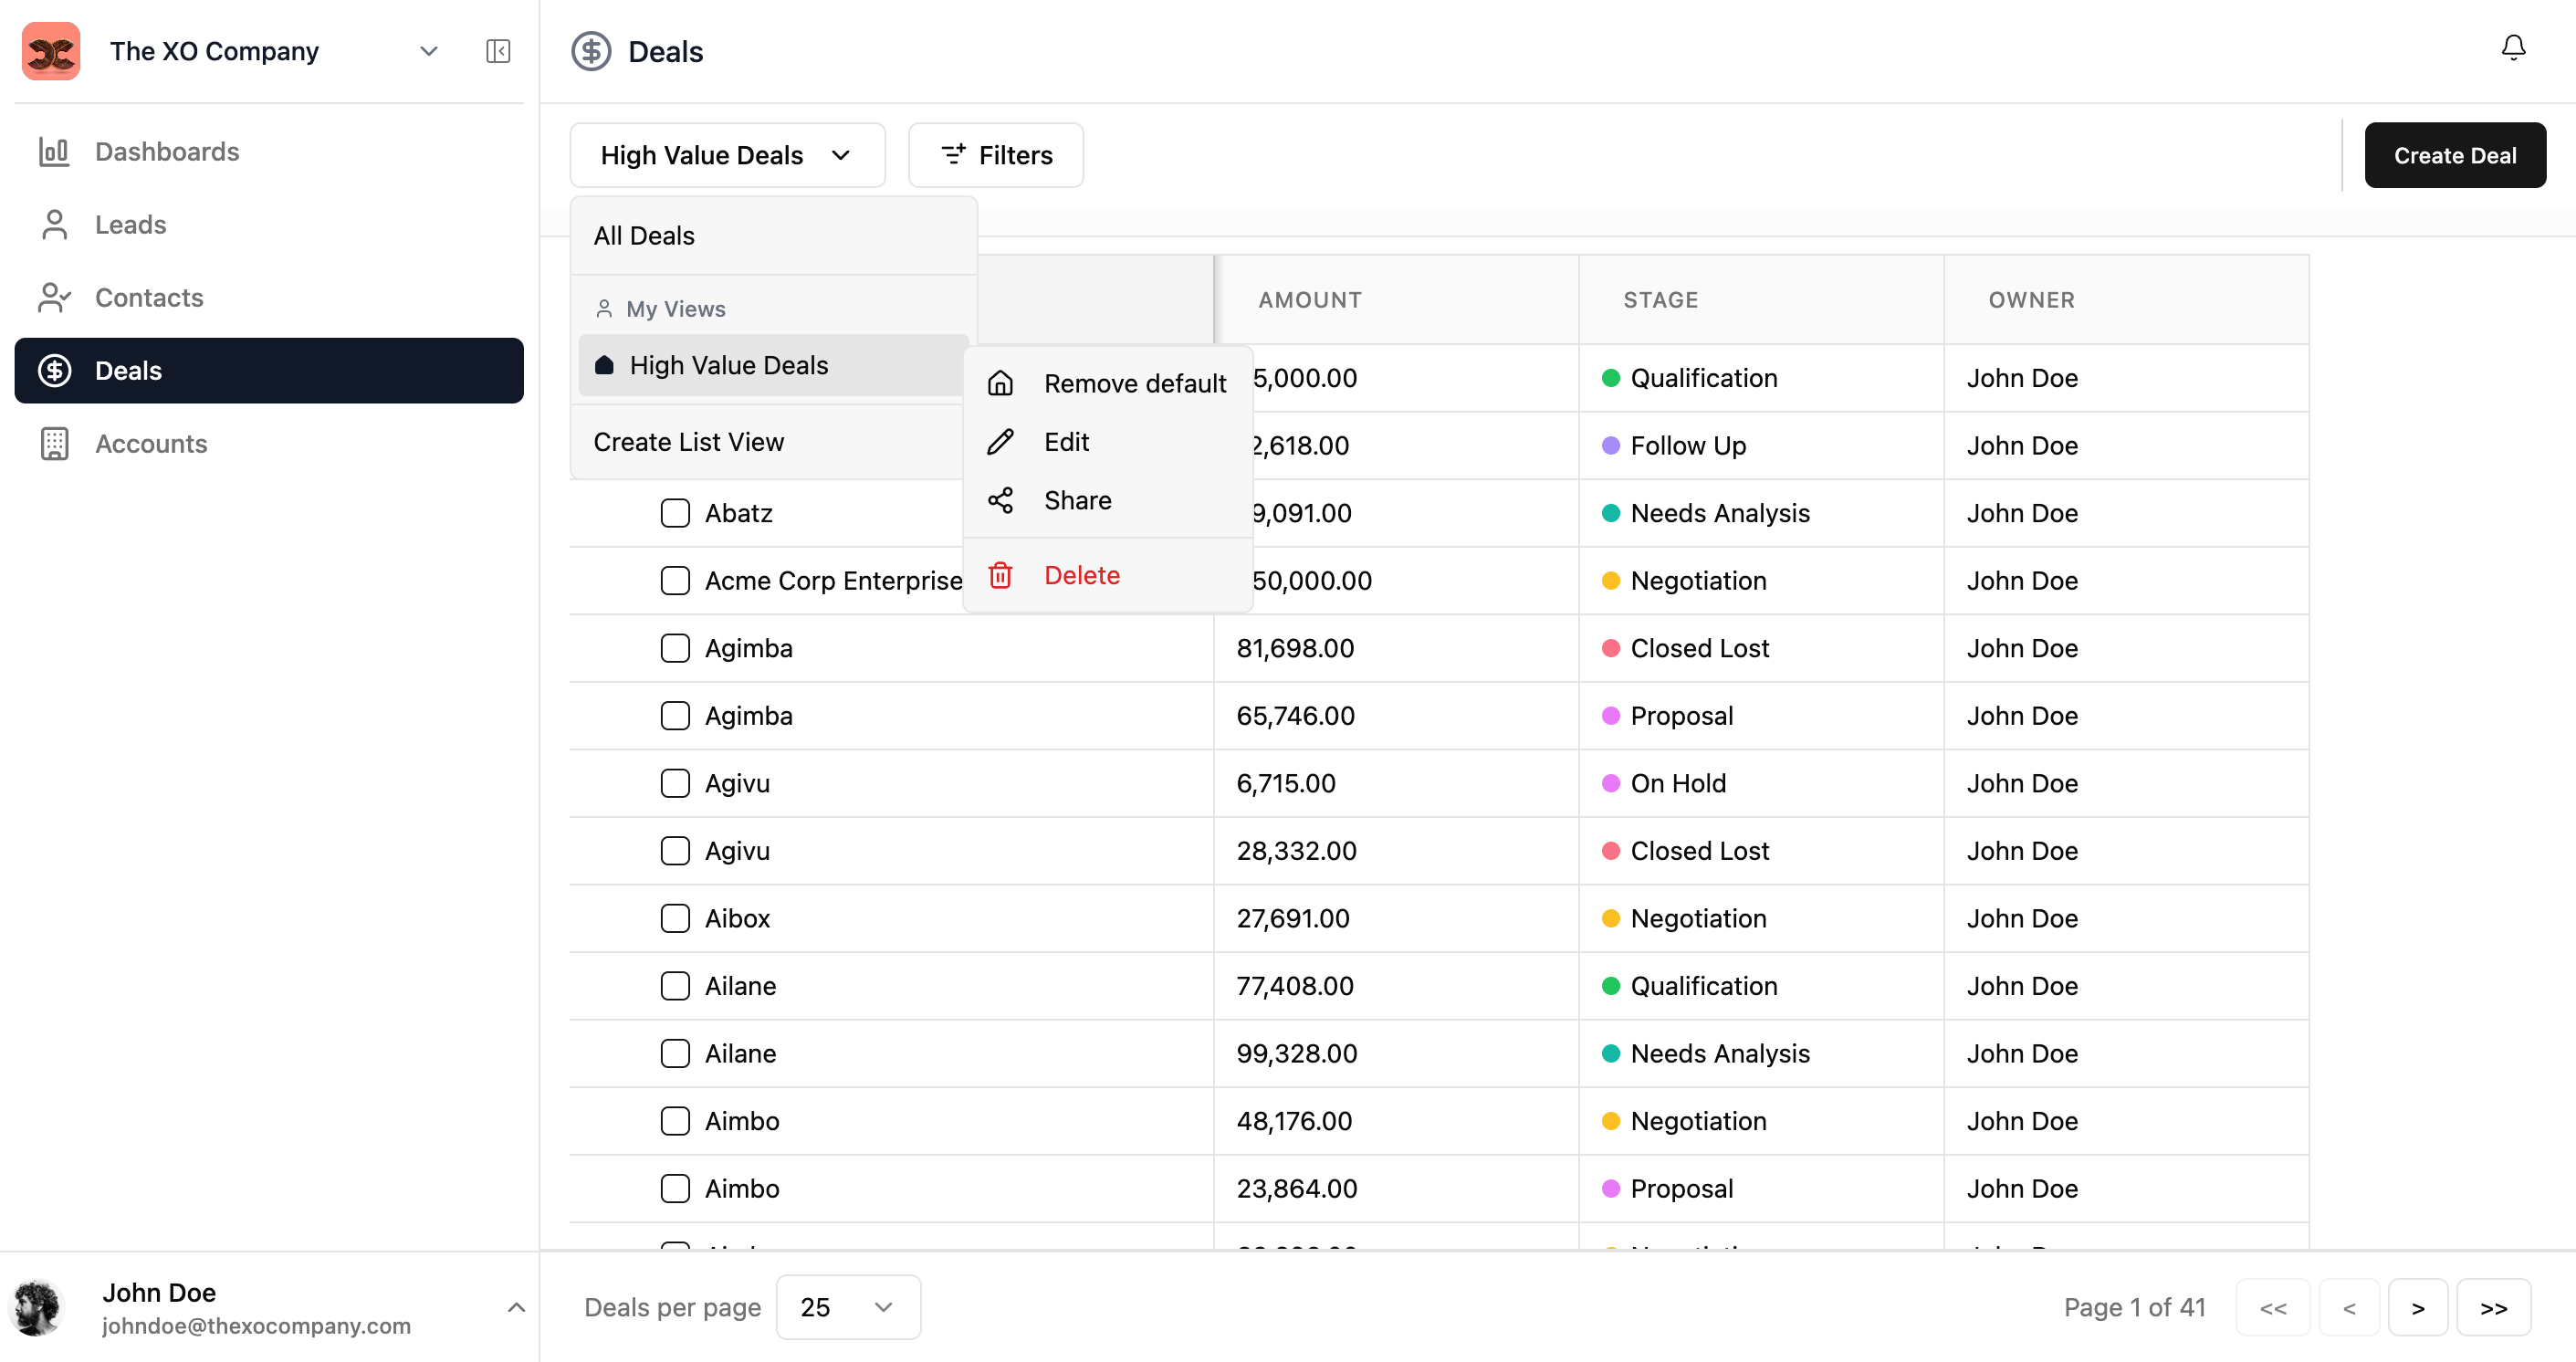
- 2Click the ⋯ button next to a custom list to see actions.
- 3Choose from: Set as default, Edit, Share, or Delete.
Set as Default
Setting a list as default means it will load automatically whenever you navigate to that module. The option changes to "Remove default" once set.
Share
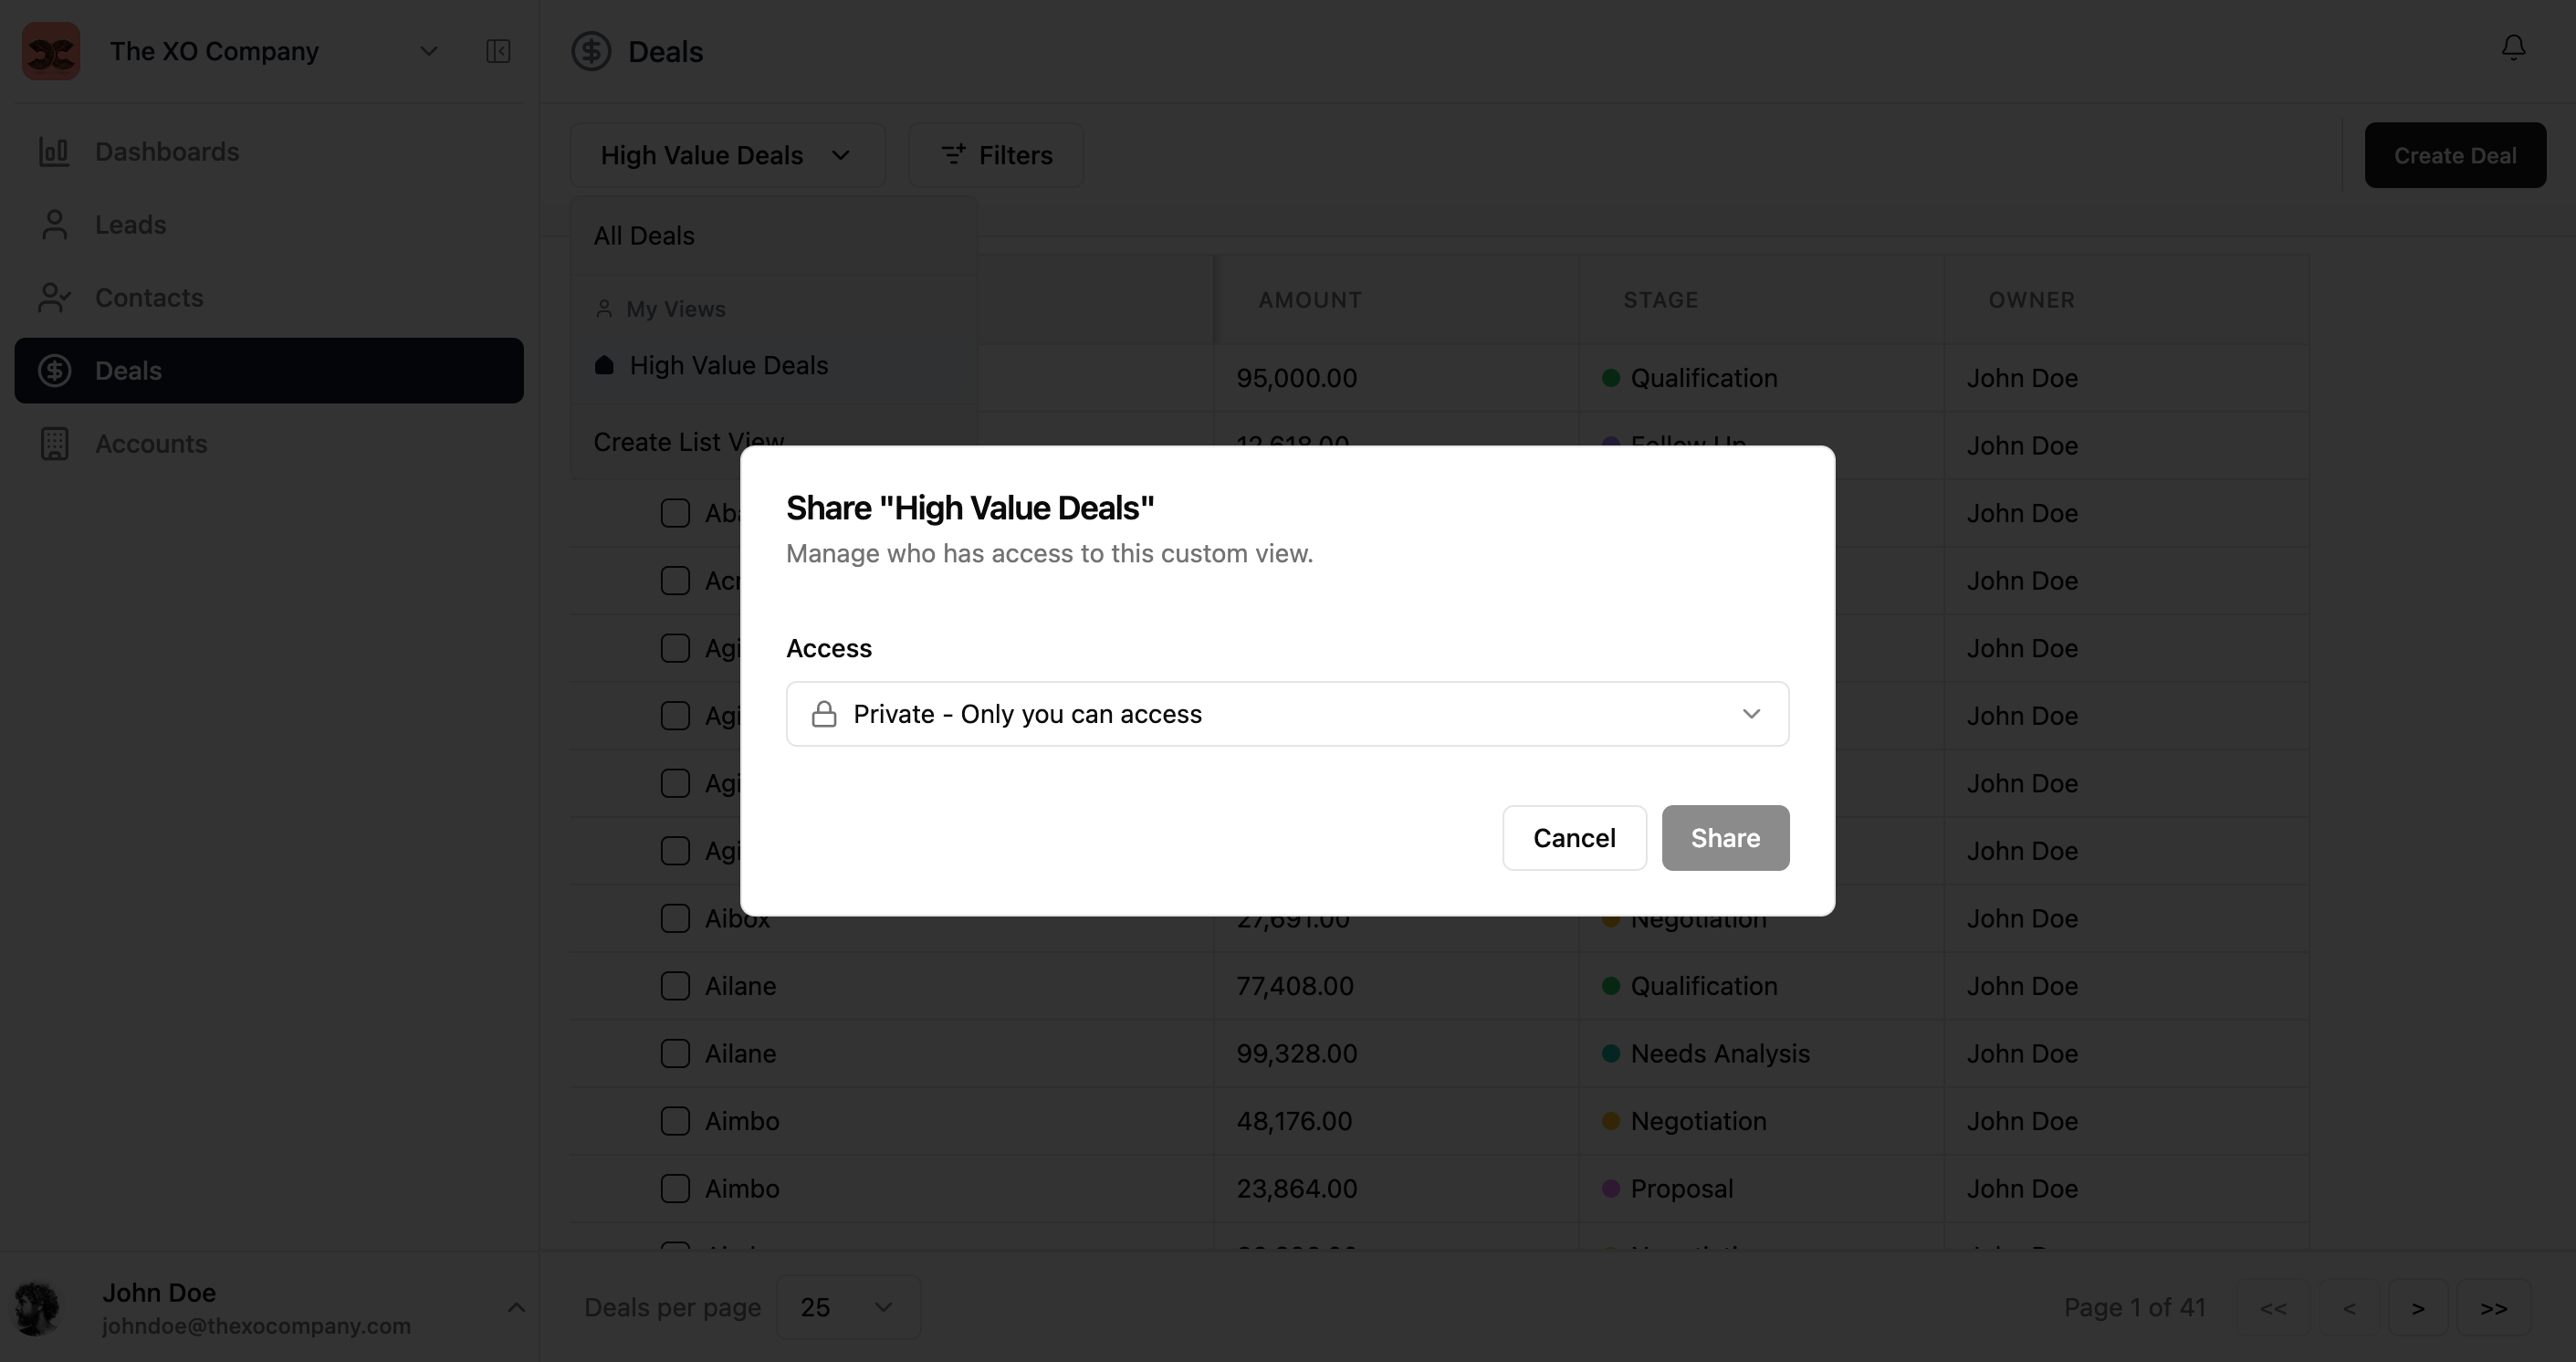
Share a custom list with your team. You can set visibility to Private (only you), specific roles, or the entire organization.
Delete
Deleting a custom list removes it permanently. If it was set as default, the module will revert to the "All Records" list.
Common Workflows
Build a focused list for daily use
- 1Open the module and click the view dropdown
- 2Select Create Custom List
- 3Name it (e.g., "My Open Deals This Week")
- 4Pick only the columns you need — fewer columns make scanning faster
- 5Sort by the most important field (e.g., Close Date ascending)
- 6Click Save List
- 7Open the actions menu and choose Set as default
Share a custom list with your team
- 1Open the view dropdown and find the custom list
- 2Click the ⋯ menu and choose Share
- 3Select visibility — specific roles or the whole organization
- 4Save — the list now appears in the dropdowns of users with access
Reset to the default "All Records" list
- 1Open the view dropdown
- 2Click the ⋯ next to the currently-default list
- 3Choose Remove default
- 4Navigating to the module now opens All Records