Key Concepts
Form rules make your record forms dynamic. Instead of one static form, fields can appear, hide, or change behavior based on what users enter elsewhere on the form.
Form Rule
Conditional logic that changes the form dynamically — showing/hiding fields, making them required, or prefilling values based on other field values.
Trigger On
When the rule evaluates: on Create, on Edit, or on both.
Block
A unit within a form rule. Each block has a condition (FOR) and one or more actions (DO). A rule can have multiple blocks.
FOR
The condition portion of a block — defines which records the block applies to.
DO
The action portion of a block — what happens when the FOR condition is met.
Condition Pattern
How multiple conditions in a block combine — AND, OR, or custom logic like (1 AND 2) OR 3.
Form Rules Tab
The Form Rules tab lists all form rules configured for this module. From here you can create new rules, edit existing ones, or toggle them on/off.
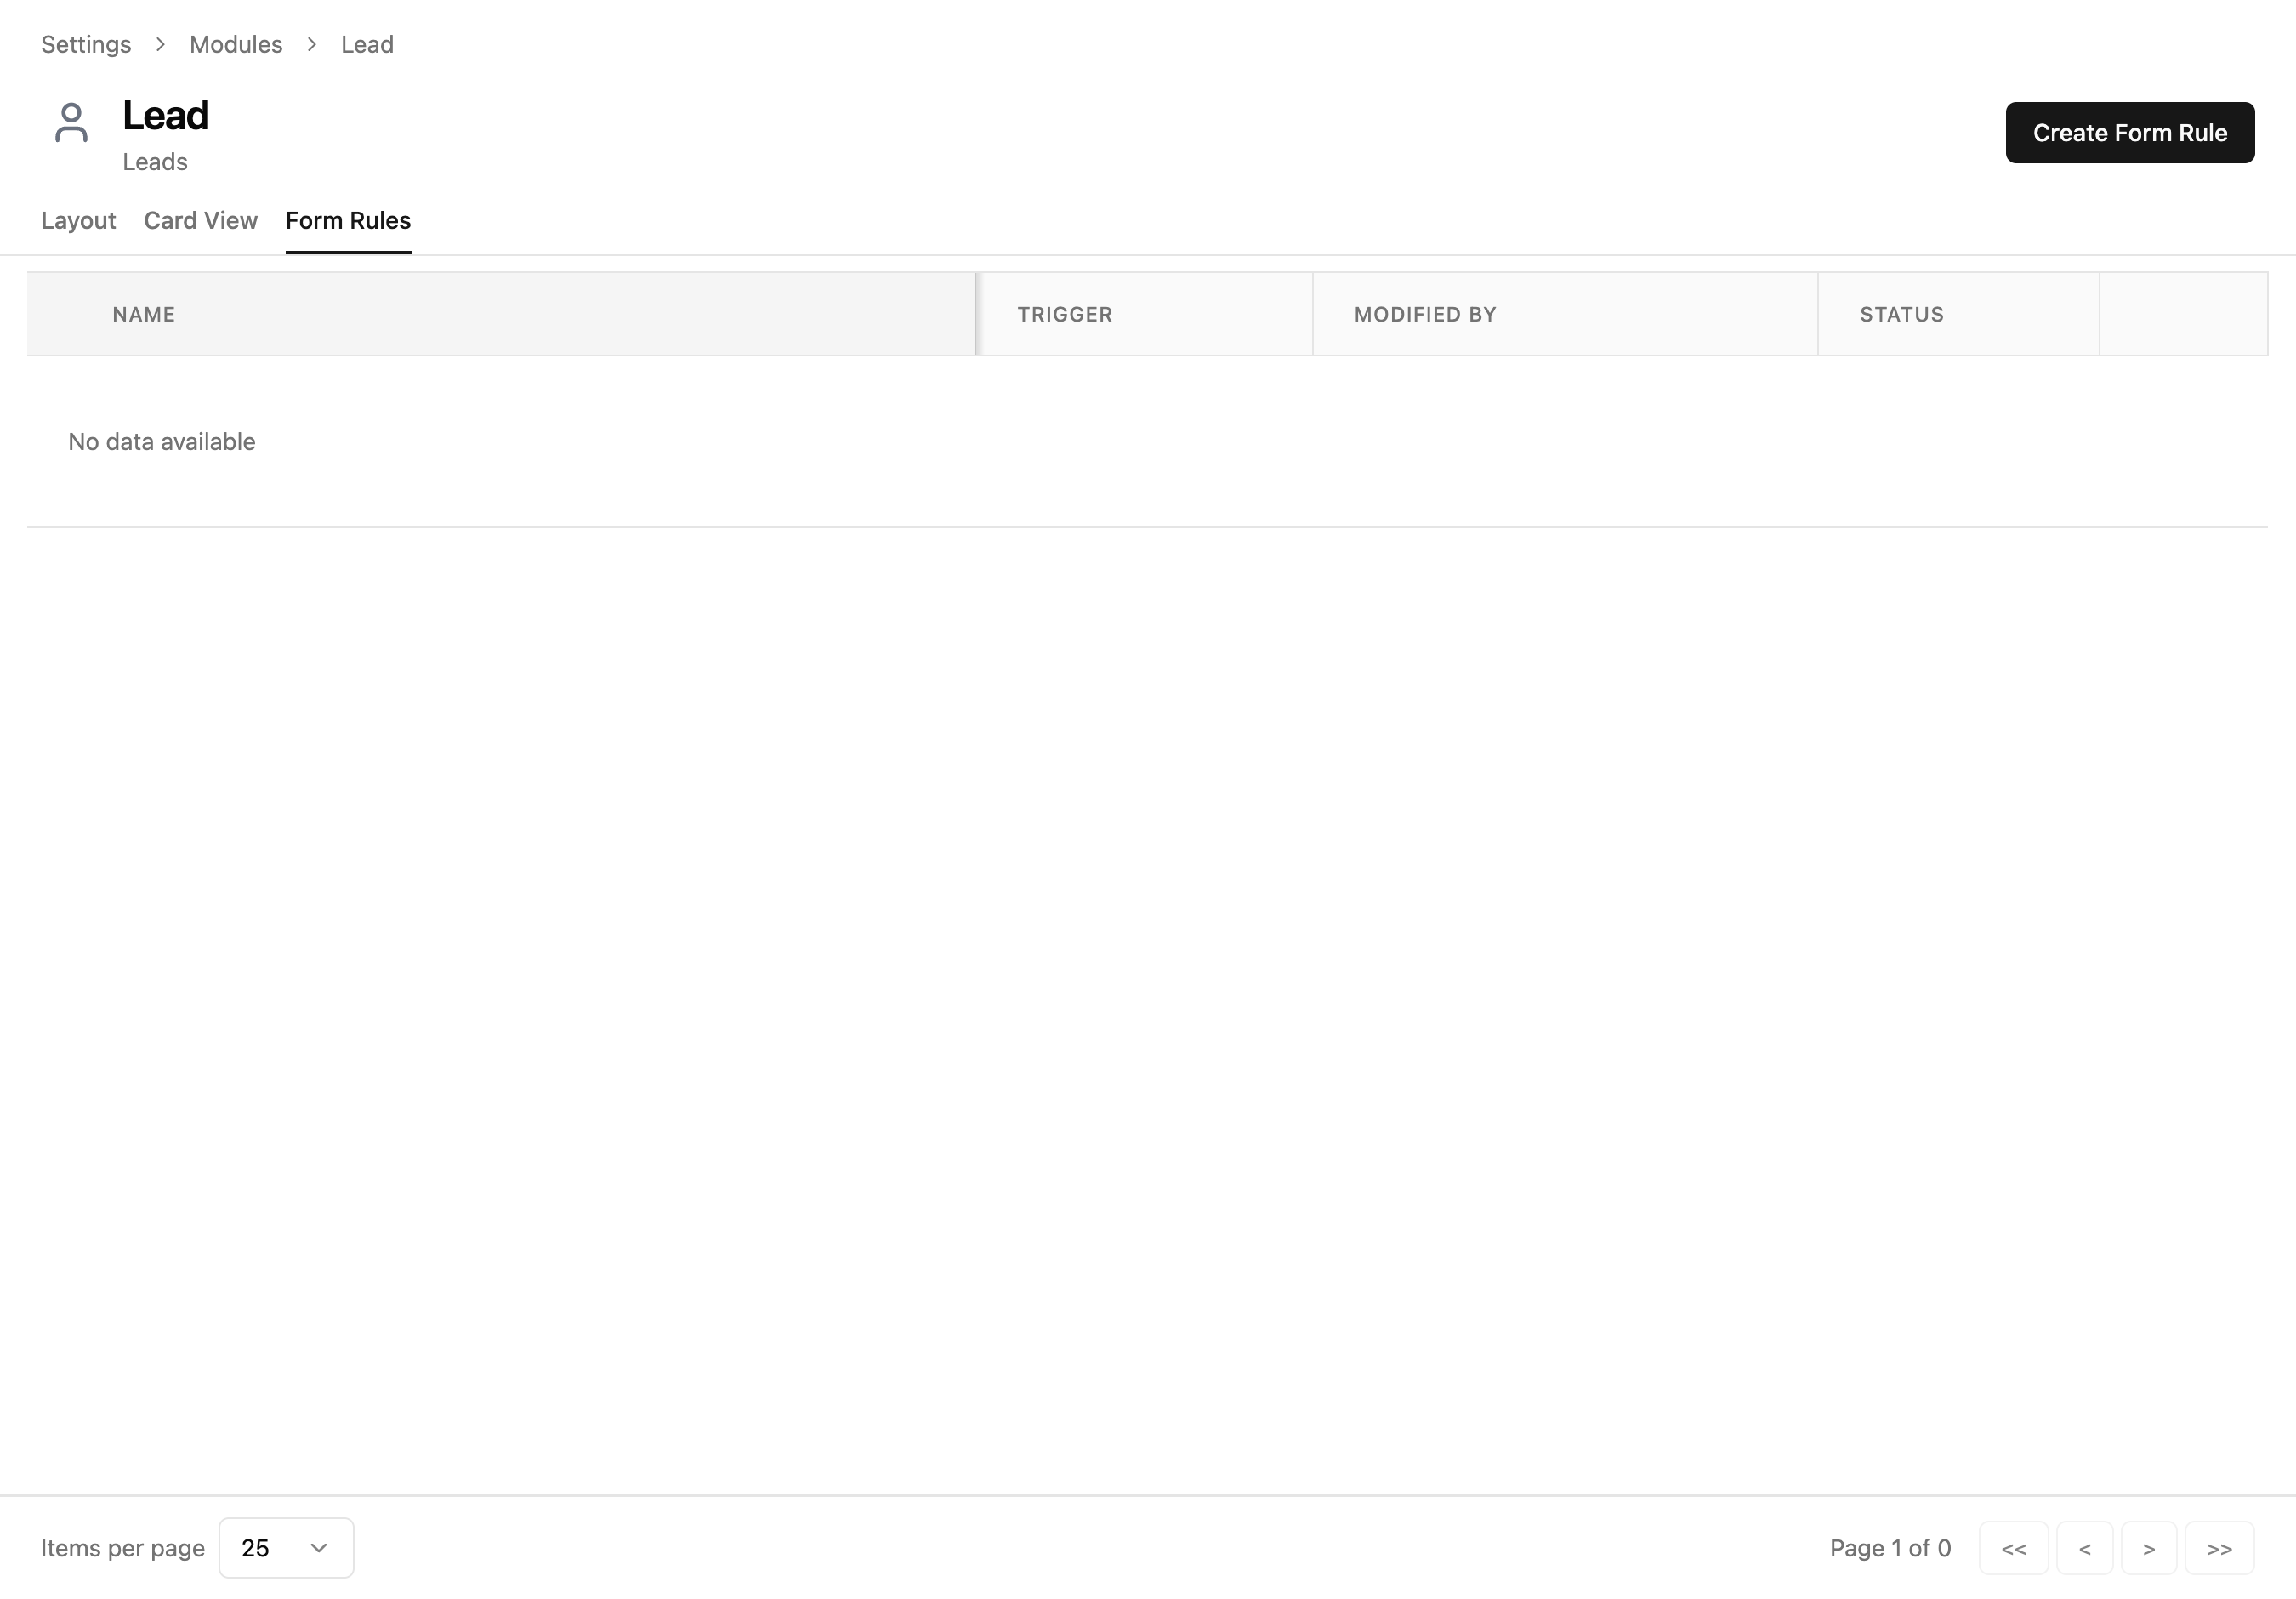
Table Columns
| Column | Description |
|---|---|
| Name | The form rule's display name. Click to edit. |
| Trigger | When the rule evaluates — on Create, Edit, or Both. |
| Modified By | Who last updated this rule. |
| Status | Toggle switch to enable/disable the rule. |
Tip: You can also access form rules from Settings → Form Rules for a workspace-wide list across all modules.
Creating a Form Rule
Click "Create Form Rule" to open a dialog where you name the rule and choose when it should trigger.
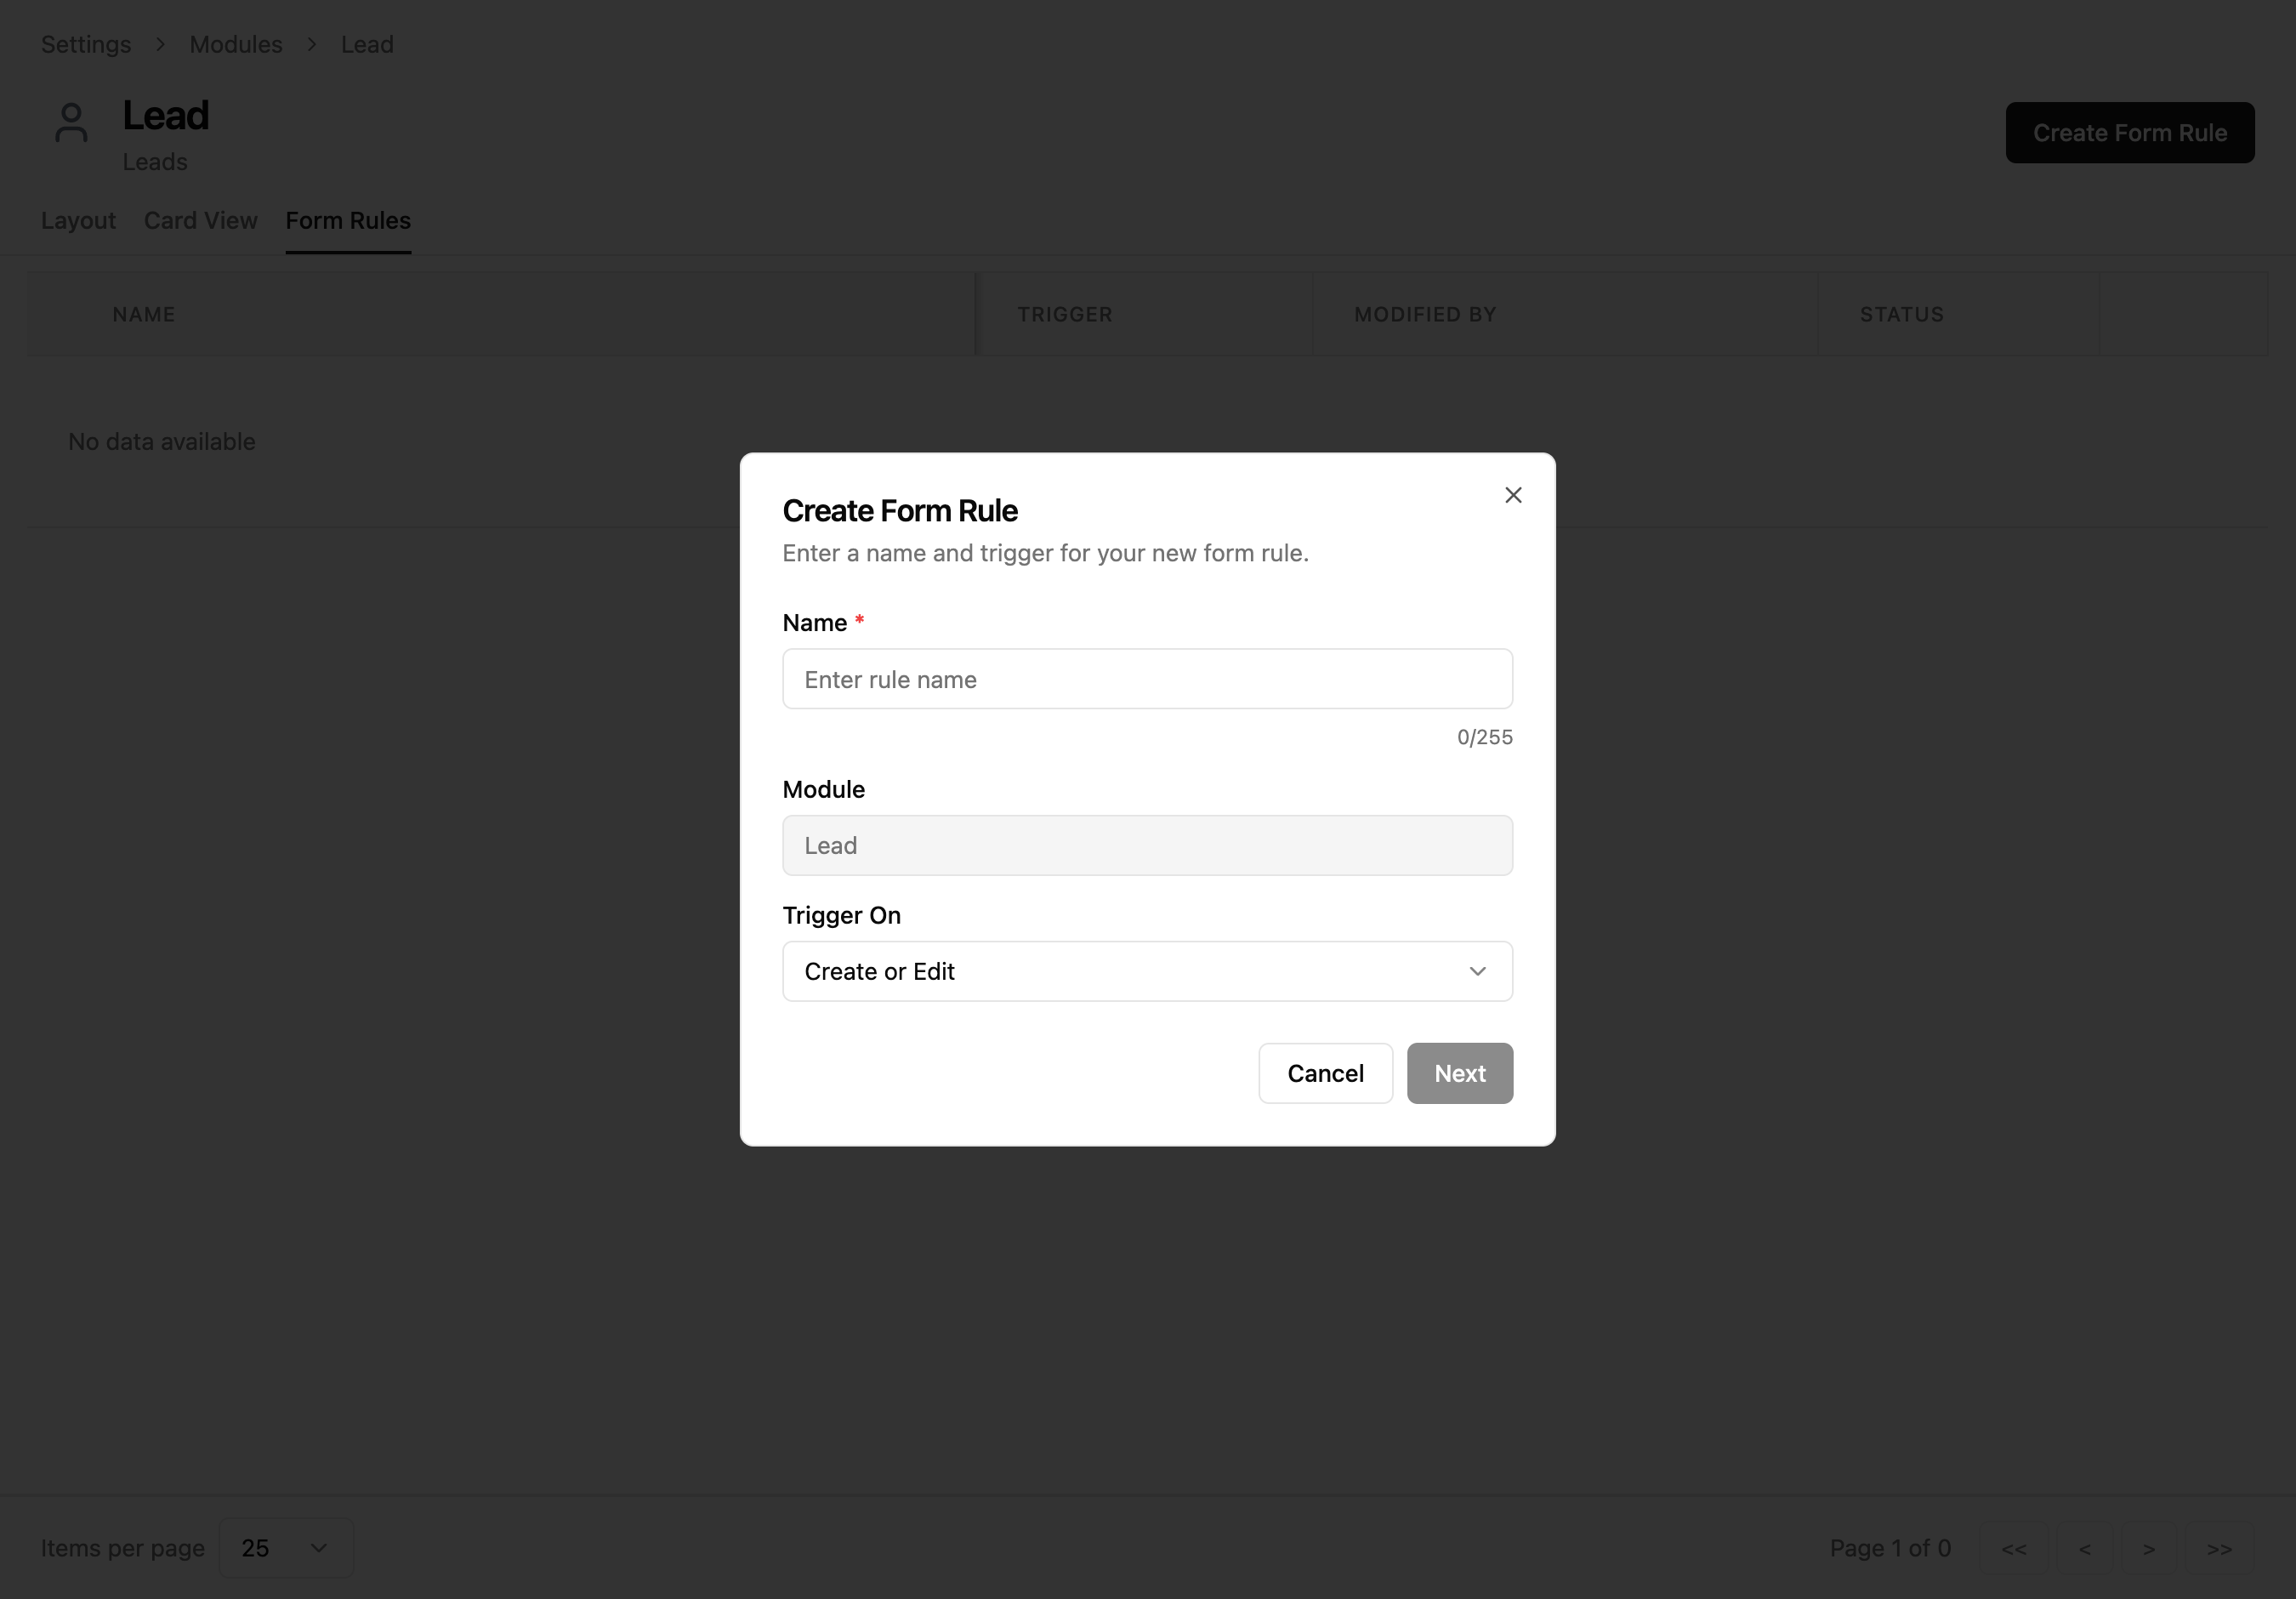
Dialog Fields
| Field | Required | Description |
|---|---|---|
| Name | Required | A descriptive name for the rule (max 255 characters). Use something that explains what it does. |
| Module | — | Pre-filled and read-only. Shows which module this rule applies to. |
| Trigger On | Required | When the rule evaluates: Create, Edit, or Create or Edit (both). |
Trigger Options
| Option | When It Fires |
|---|---|
| Create | Only when a new record is being created |
| Edit | Only when an existing record is being edited |
| Create or Edit | Every time the form is opened (both scenarios) |
Click "Next" to proceed to the rule builder. The button is disabled until you enter a name.
Form Rule Builder
After clicking Next, you land on the full rule builder. This is where you define the logic: which records the rule applies to (FOR) and what happens (DO).
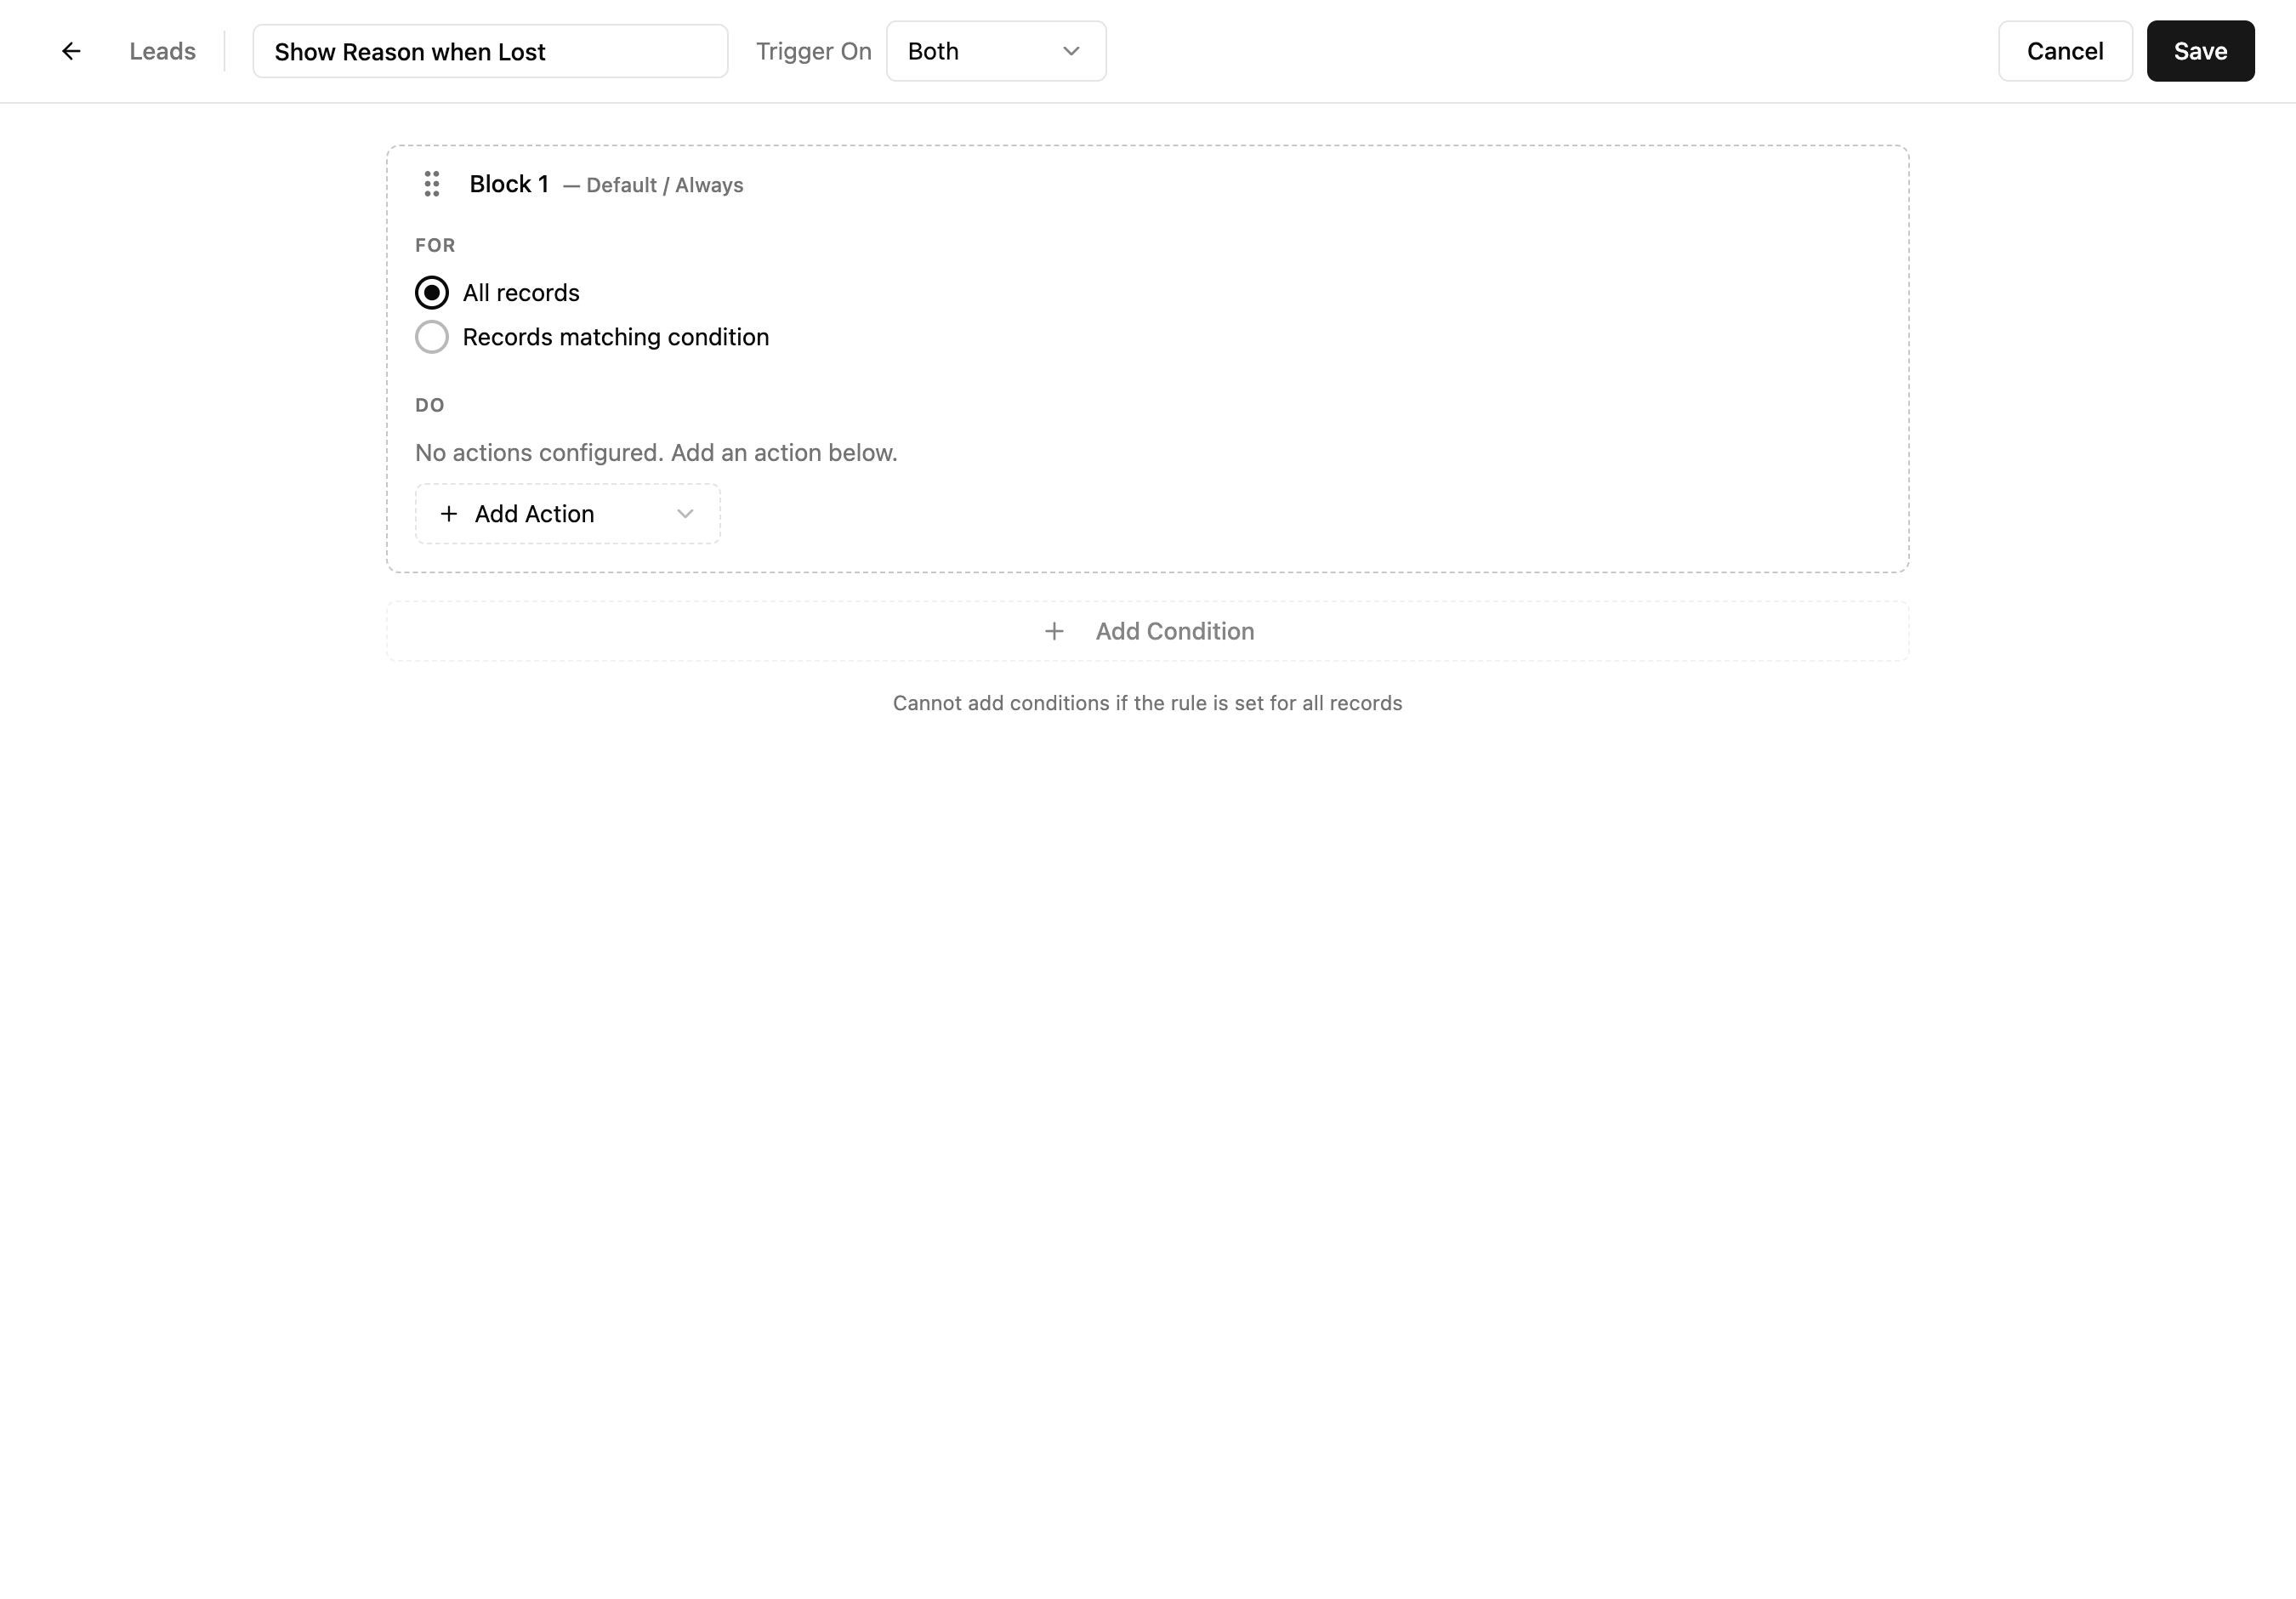
Builder Layout
| Element | What It Does |
|---|---|
| Header bar | Shows module name, editable rule name, Trigger On dropdown, Cancel and Save buttons. |
| Block | A numbered unit of logic. Each block has a FOR condition and one or more DO actions. |
| FOR section | Defines which records this block applies to — all records or records matching a condition. |
| DO section | The actions to perform when the FOR condition is met. |
| Add Action dropdown | Adds a new action to the current block's DO section. |
| Add Condition button | Adds another condition block below the current one. |
FOR Options
| Option | Behavior |
|---|---|
| All records | The block's actions apply to every record, unconditionally. |
| Records matching condition | The block's actions only apply when specific field conditions are met. |
Click "Save" when done. The rule is created in an active state and immediately applies to forms.
Conditions
When you select "Records matching condition", a criteria builder appears where you define which records the block applies to.
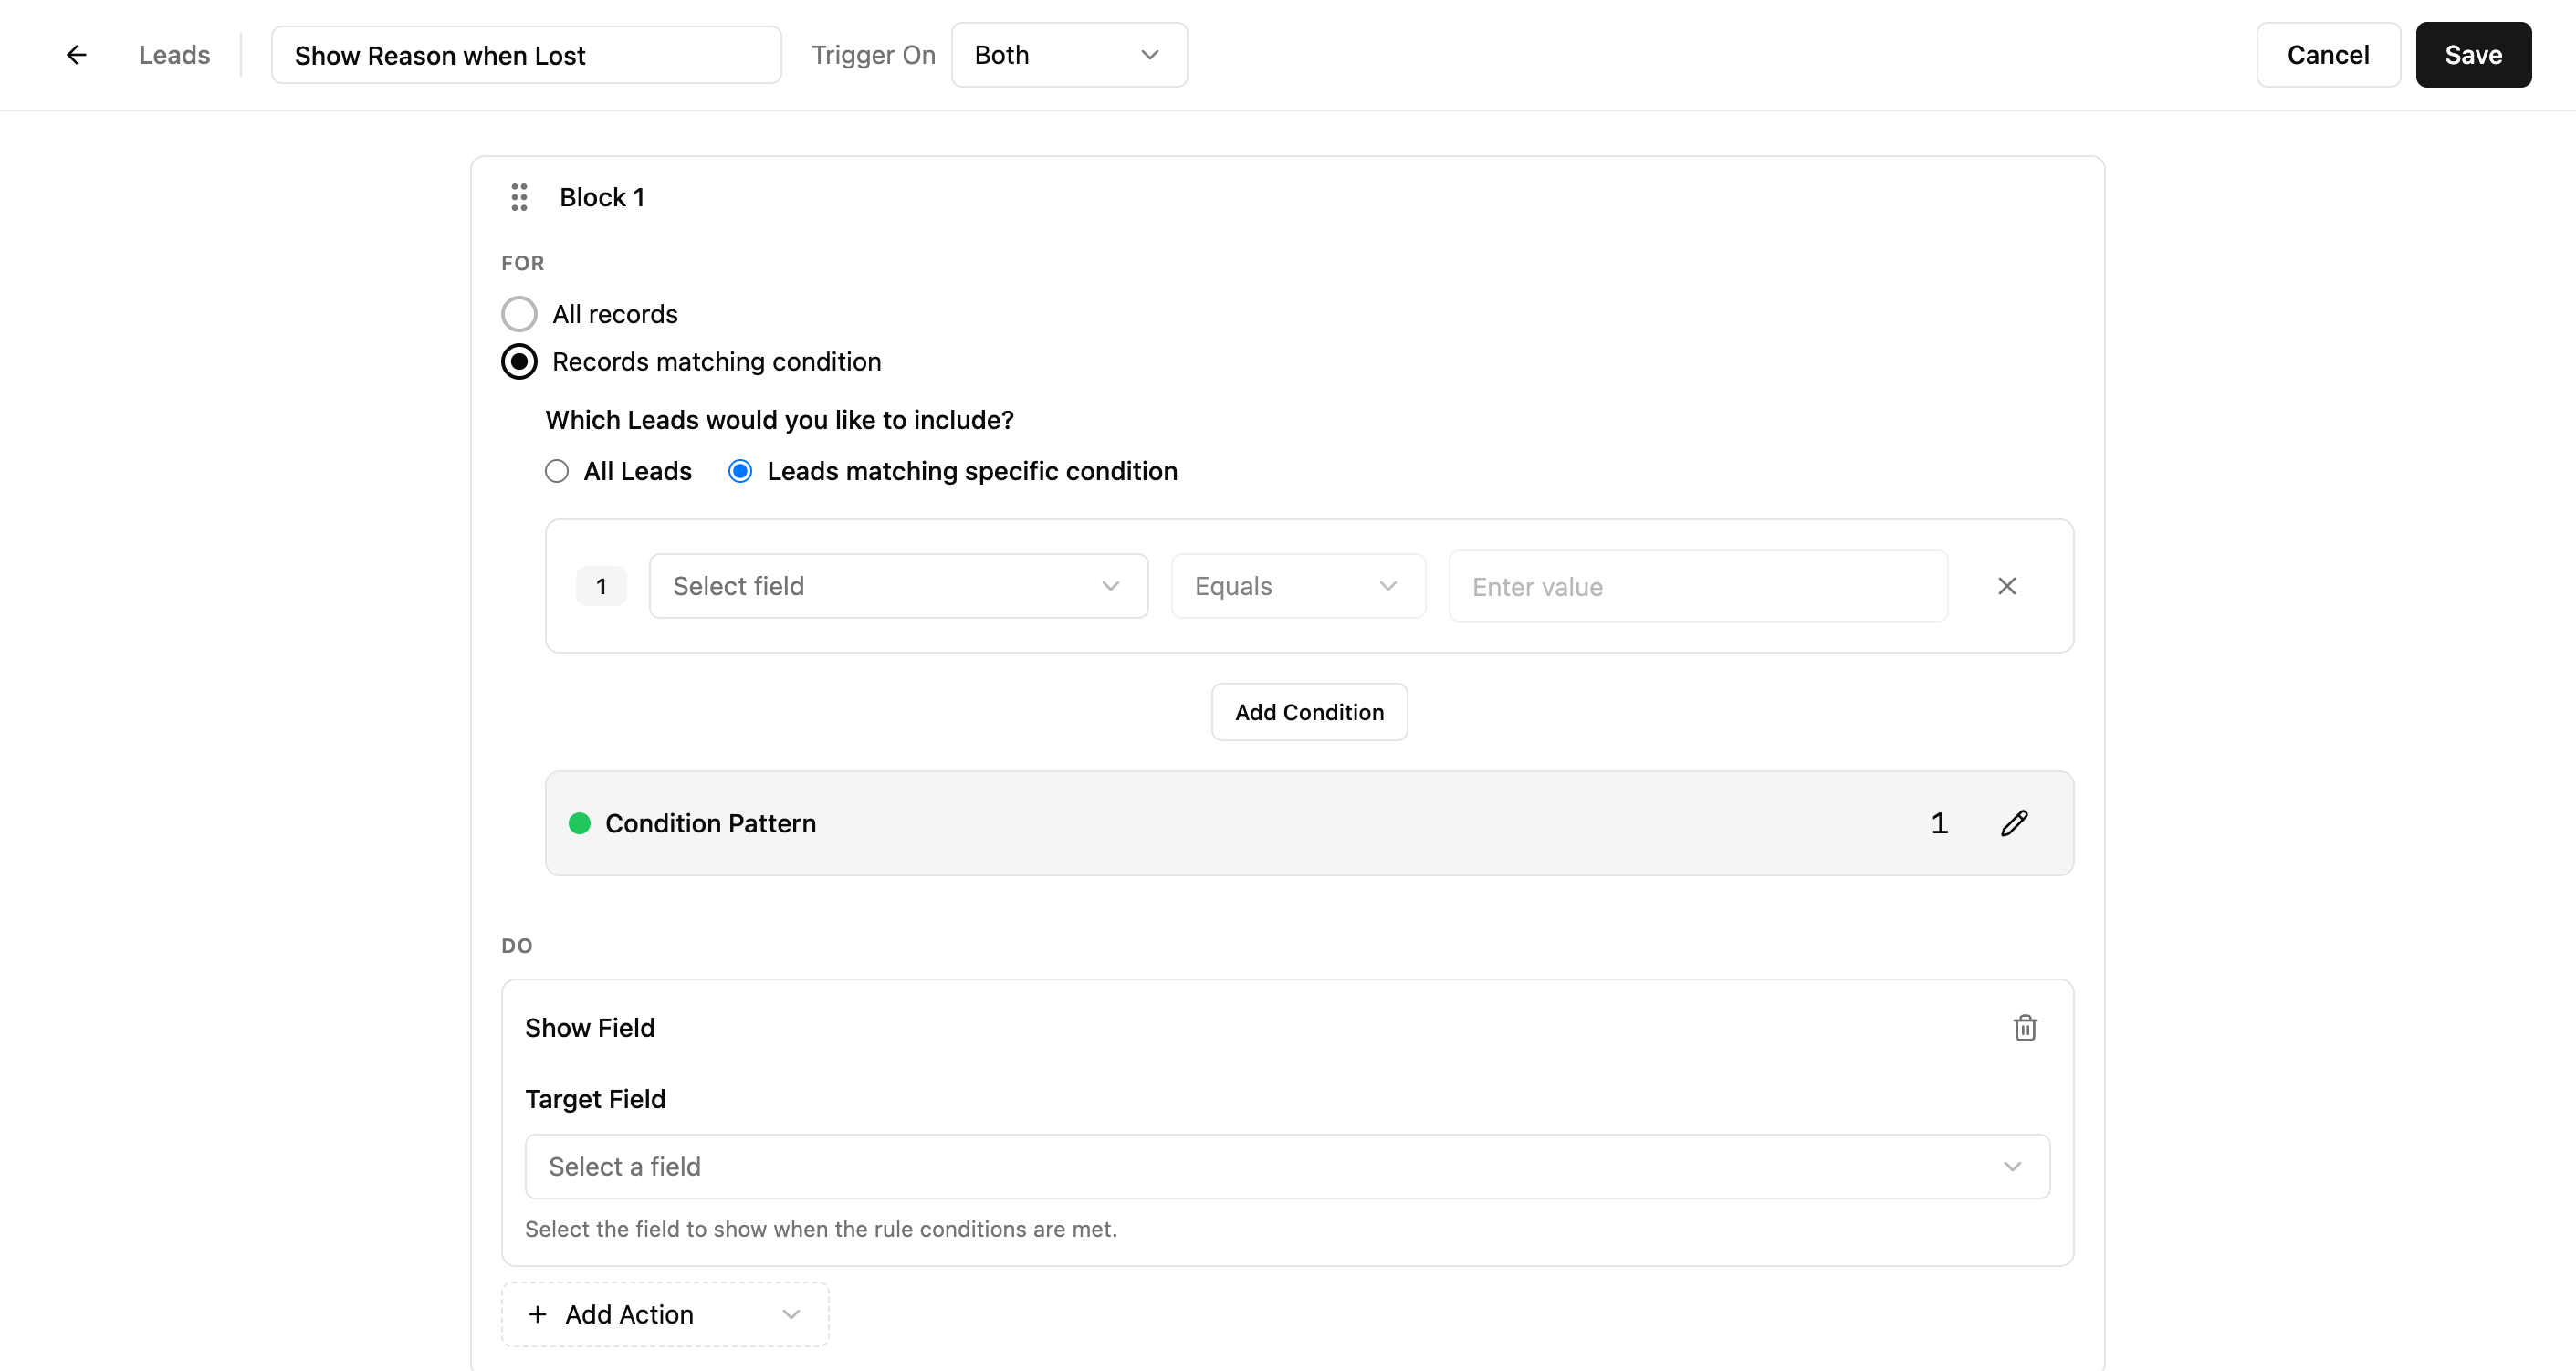
Condition Row
| Element | What It Does |
|---|---|
| Field selector | Dropdown listing all fields in the module. Pick the field to evaluate. |
| Operator | Comparison type: Equals, Not Equals, Contains, Is Empty, etc. Options change based on field type. |
| Value | The value to compare against. Input type matches the field (text input, dropdown for picklists, date picker for dates). |
| Remove button | Deletes this condition row. |
| Add Condition | Adds another condition row below. |
Condition Pattern
When you have multiple conditions, a Condition Pattern appears showing how they combine. By default, all conditions use AND logic (all must be true). Click the pattern to edit it and use OR logic or custom combinations like (1 AND 2) OR 3.
Tip: Start with a single condition. Add more only if you need complex logic. Most form rules work well with one or two conditions.
Actions
Actions define what happens when the block's condition is met. Add actions from the "Add Action" dropdown in the DO section.
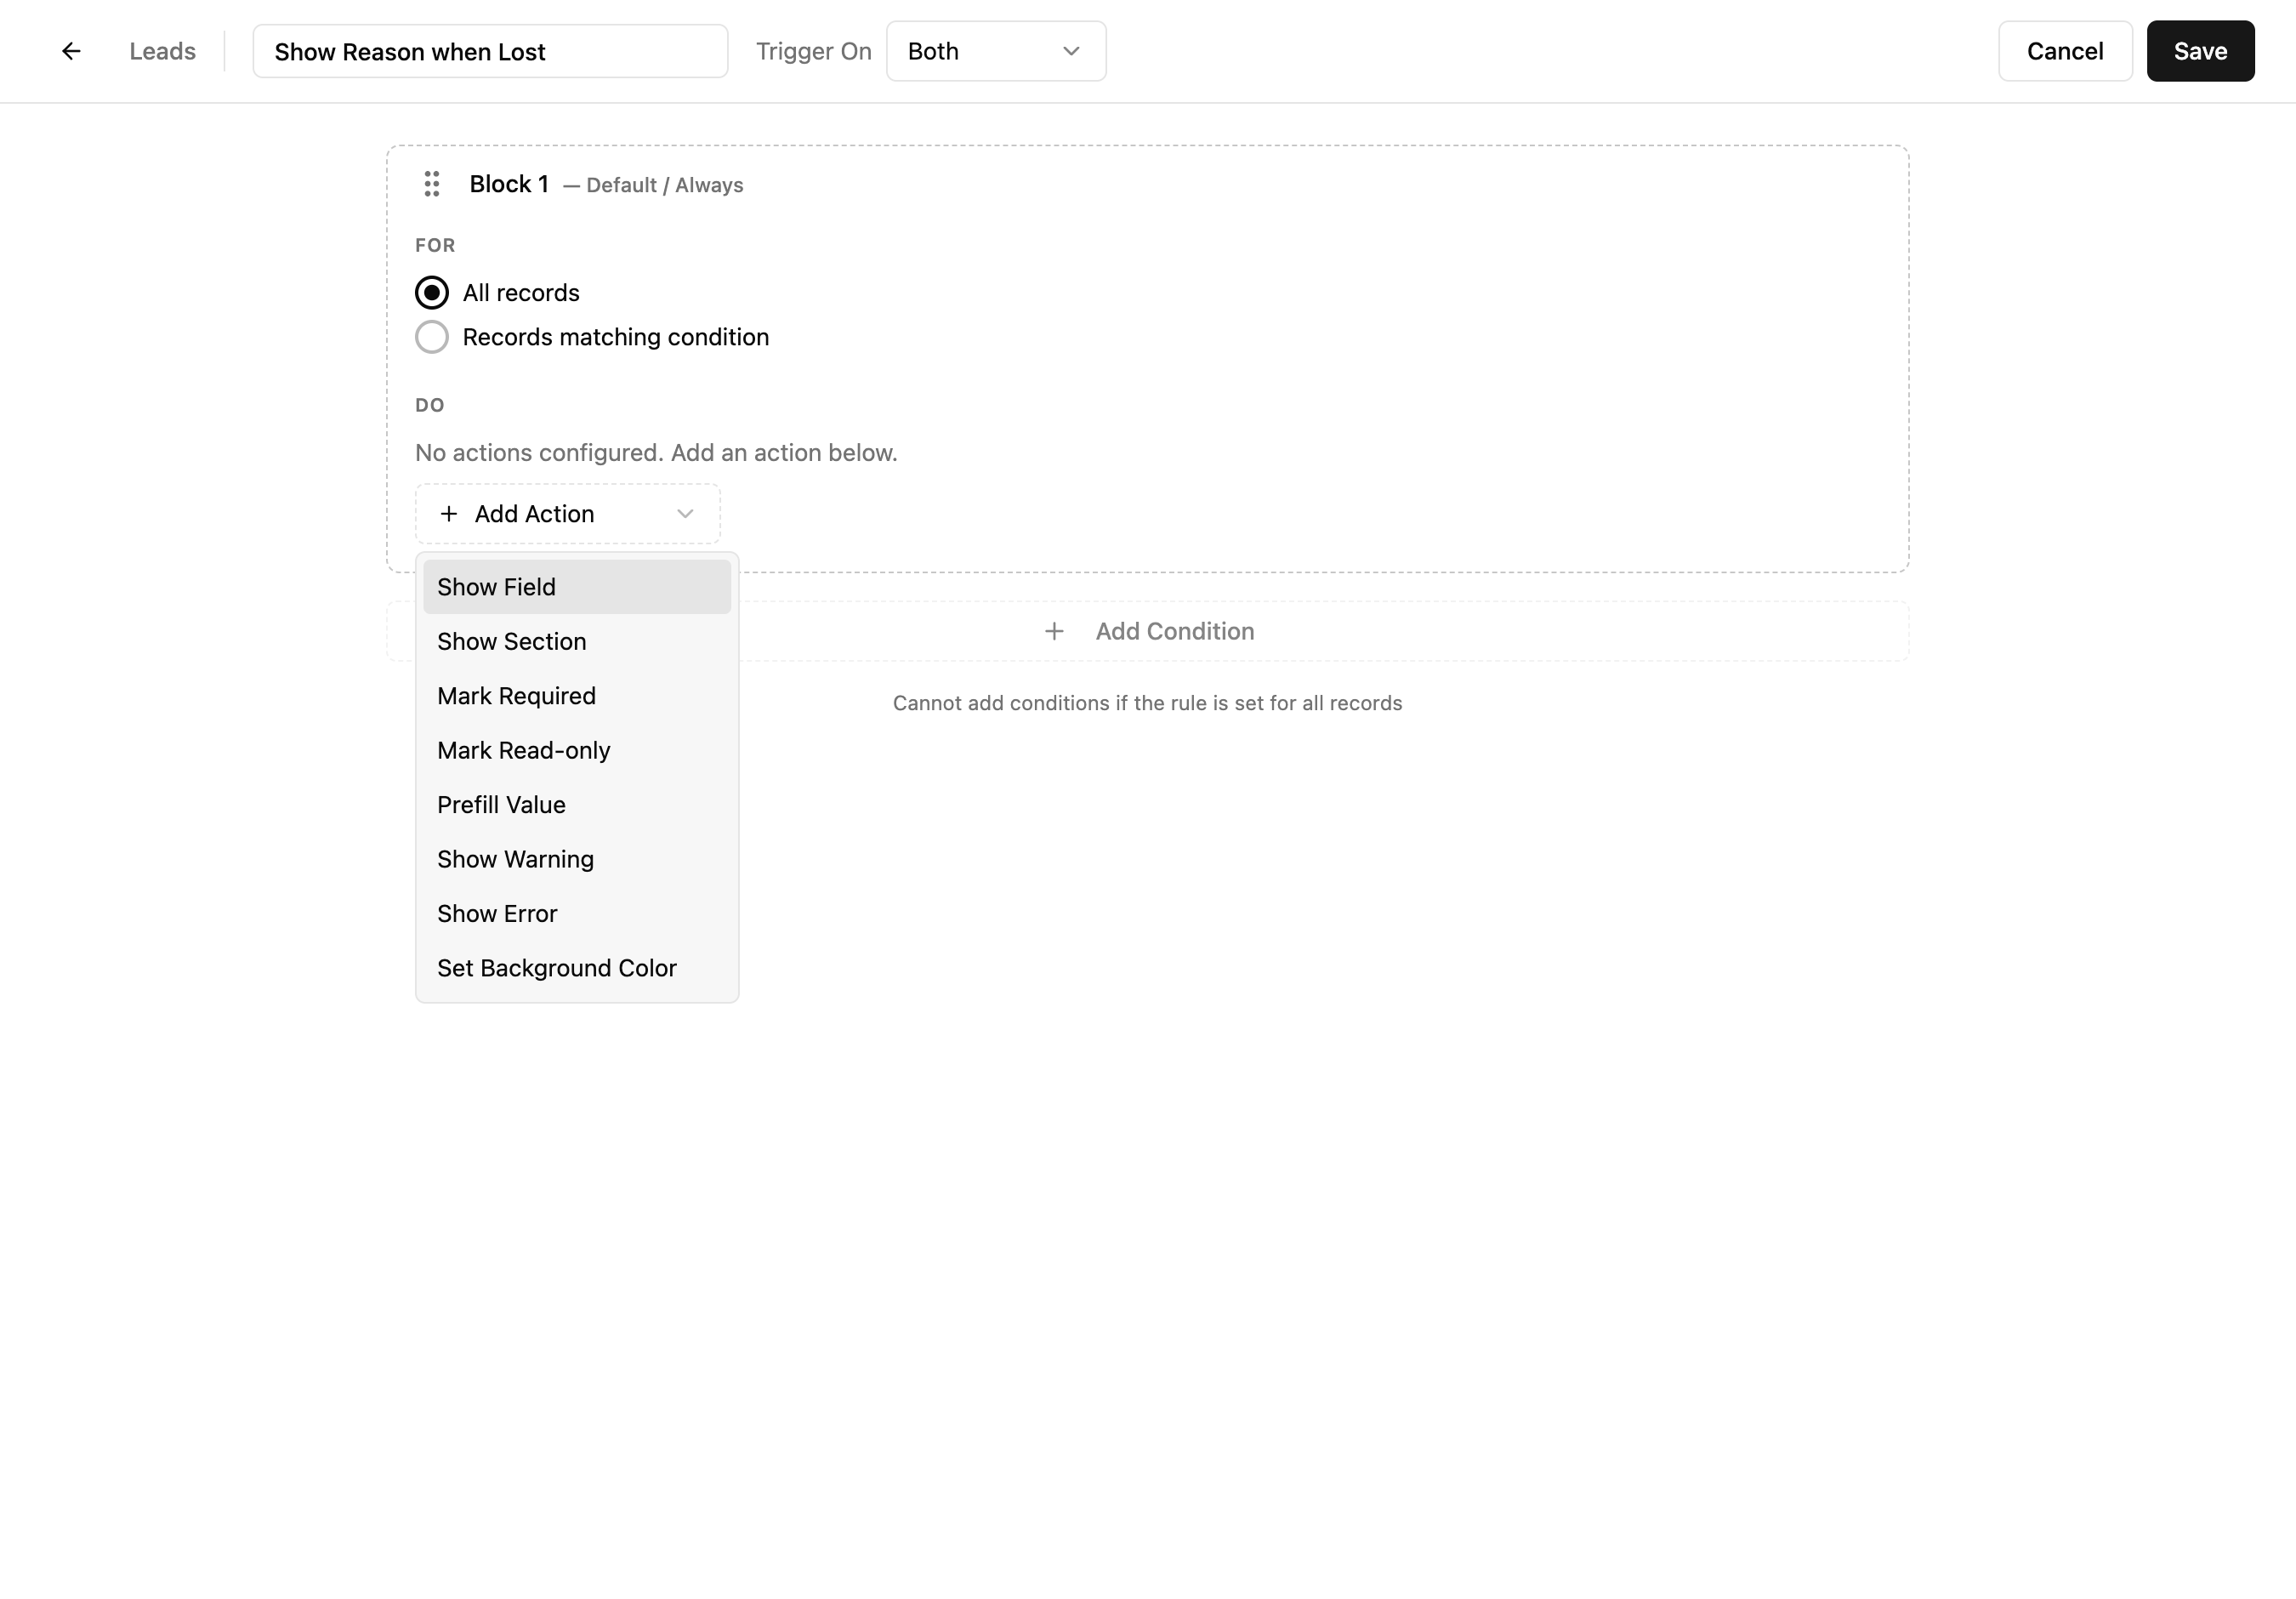
Action Types
| Action | What It Does | Use Case |
|---|---|---|
| Show Field | Makes a hidden field visible on the form. | Show "Loss Reason" only when Status is "Lost". |
| Show Section | Makes an entire hidden section visible. | Show "Shipping Address" section only for physical products. |
| Mark Required | Makes a field mandatory (cannot save without it). | Require "Approval Notes" when Status changes to "Approved". |
| Mark Read-only | Makes a field visible but not editable. | Lock "Amount" after a deal is marked "Closed Won". |
| Prefill Value | Automatically sets a field's value. | Set "Priority" to "High" when "Deal Size" exceeds $100K. |
| Show Warning | Displays a yellow warning message on the form. | Warn when "Discount" exceeds 30%. |
| Show Error | Displays a red error message and blocks saving. | Block save when "End Date" is before "Start Date". |
| Set Background Color | Changes the field's background color for visual emphasis. | Highlight overdue fields in red. |
After Adding an Action
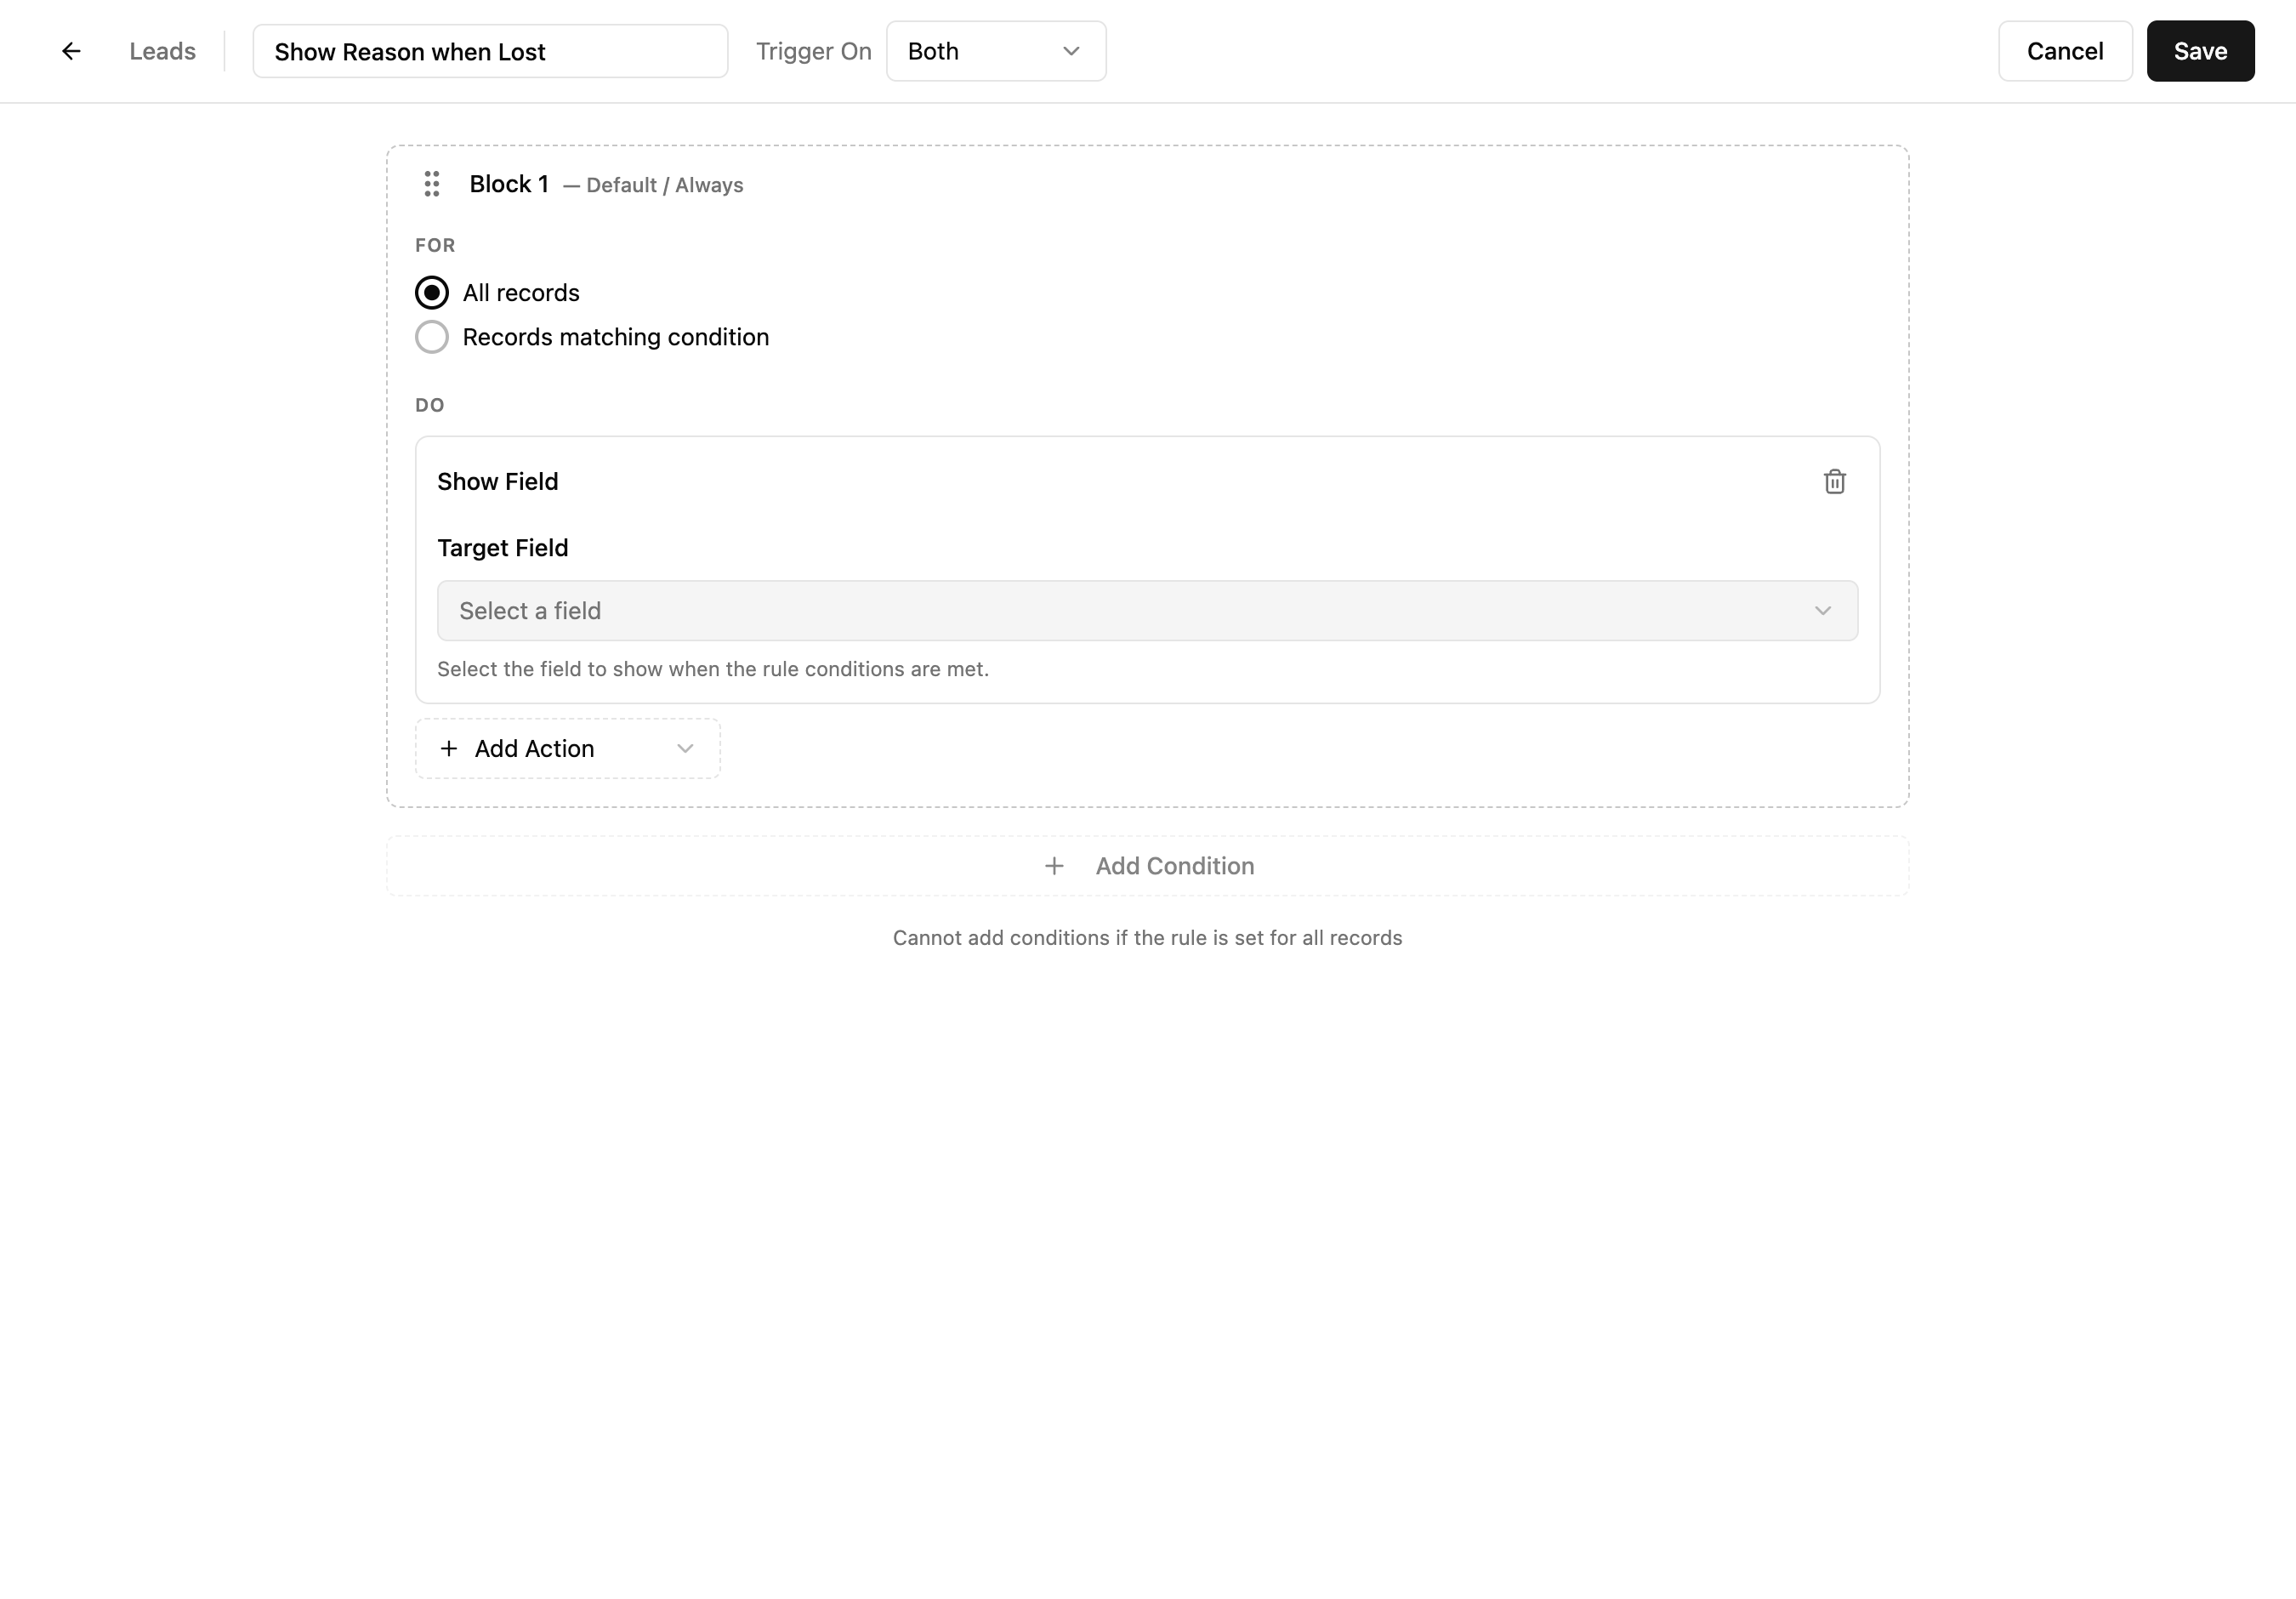
Once you add an action, a Target Field dropdown appears. Select the field this action should affect. You can add multiple actions to the same block — they all execute when the condition is met.
Multiple Blocks
Click "Add Condition" at the bottom to add another block. Each block is independent — it has its own FOR condition and DO actions. Blocks are evaluated in order and can be reordered by dragging.
Real-World Use Case
Insurance agency — dynamic forms for different policy types
An insurance agency uses a single Policies module for all policy types (Auto, Home, Life, Commercial). Each type needs different fields visible and different validations — but they don't want to create four separate modules.
- 1Create a form rule "Auto Policy Fields" — FOR: Policy Type equals "Auto" → DO: Show Field "VIN Number", Show Field "Driver's License", Mark Required "Vehicle Year"
- 2Create a form rule "Home Policy Fields" — FOR: Policy Type equals "Home" → DO: Show Field "Property Address", Show Field "Square Footage", Show Section "Coverage Details"
- 3Create a form rule "High Value Warning" — FOR: Coverage Amount greater than $1M → DO: Show Warning "High-value policy — requires manager approval"
- 4Create a form rule "Renewal Lock" — FOR: Status equals "Renewed" → DO: Mark Read-only "Premium Amount", Mark Read-only "Coverage Amount"
- 5Create a form rule "Prefill Agent" — FOR: All records on Create → DO: Prefill Value "Assigned Agent" with the current user
Adapt this for your team: Form rules work for any scenario where one module serves multiple purposes. A university might show different fields for Undergraduate vs. Graduate applications. A manufacturing company might show different specs for Raw Materials vs. Finished Goods. An event company might require different fields for Virtual vs. In-Person events. One module, many dynamic forms.
Common Workflows
Show a field based on another field's value
- 1Open the module and click the Form Rules tab
- 2Click "Create Form Rule"
- 3Enter a descriptive name (e.g., "Show Reason when Lost")
- 4Set Trigger On to "Create or Edit"
- 5Click "Next"
- 6In the builder, select "Records matching condition"
- 7Click "Add Condition"
- 8Set the condition: Field = "Status", Operator = "Equals", Value = "Lost"
- 9In the DO section, select "Show Field" from the Add Action dropdown
- 10Set Target Field to "Loss Reason"
- 11Click "Save"
Make a field required only in certain situations
- 1Create a form rule (follow the steps above through step 8)
- 2In the DO section, select "Mark Required" from the Add Action dropdown
- 3Set Target Field to the field you want to make conditionally required
- 4Click "Save"
Prefill a value based on another field
- 1Create a form rule and proceed to the builder
- 2Select "Records matching condition" and define the trigger condition
- 3In the DO section, select "Prefill Value"
- 4Set the Target Field and the value to prefill
- 5Click "Save"
Block save when fields are inconsistent
- 1Create a form rule with Trigger On set to "Create or Edit"
- 2Select "Records matching condition" and define the inconsistency check (e.g., End Date is before Start Date)
- 3In the DO section, select "Show Error"
- 4Enter the error message users should see
- 5Click "Save" — the form will block saving when the condition is true