Overview
The Import page lets you upload records in bulk from CSV or XLSX spreadsheet files. A 4-step wizard guides you through selecting a module, uploading a file, mapping columns to fields, and importing the data.
| Step | What You Do |
|---|---|
| 1. Upload | Select the target module from the dropdown, then upload a CSV or XLSX file. |
| 2. Map Fields | Match each column in your spreadsheet to a field in the module. Auto-mapping suggests matches based on column names. |
| 3. Review | Preview all records with validation results. Fix any errors before proceeding. |
| 4. Import | Confirm and run the import. Records are created in batches with progress tracking. |
Step 1 — Upload
Start by selecting the target module and uploading your spreadsheet file. The system accepts CSV, XLSX, and XLS formats.
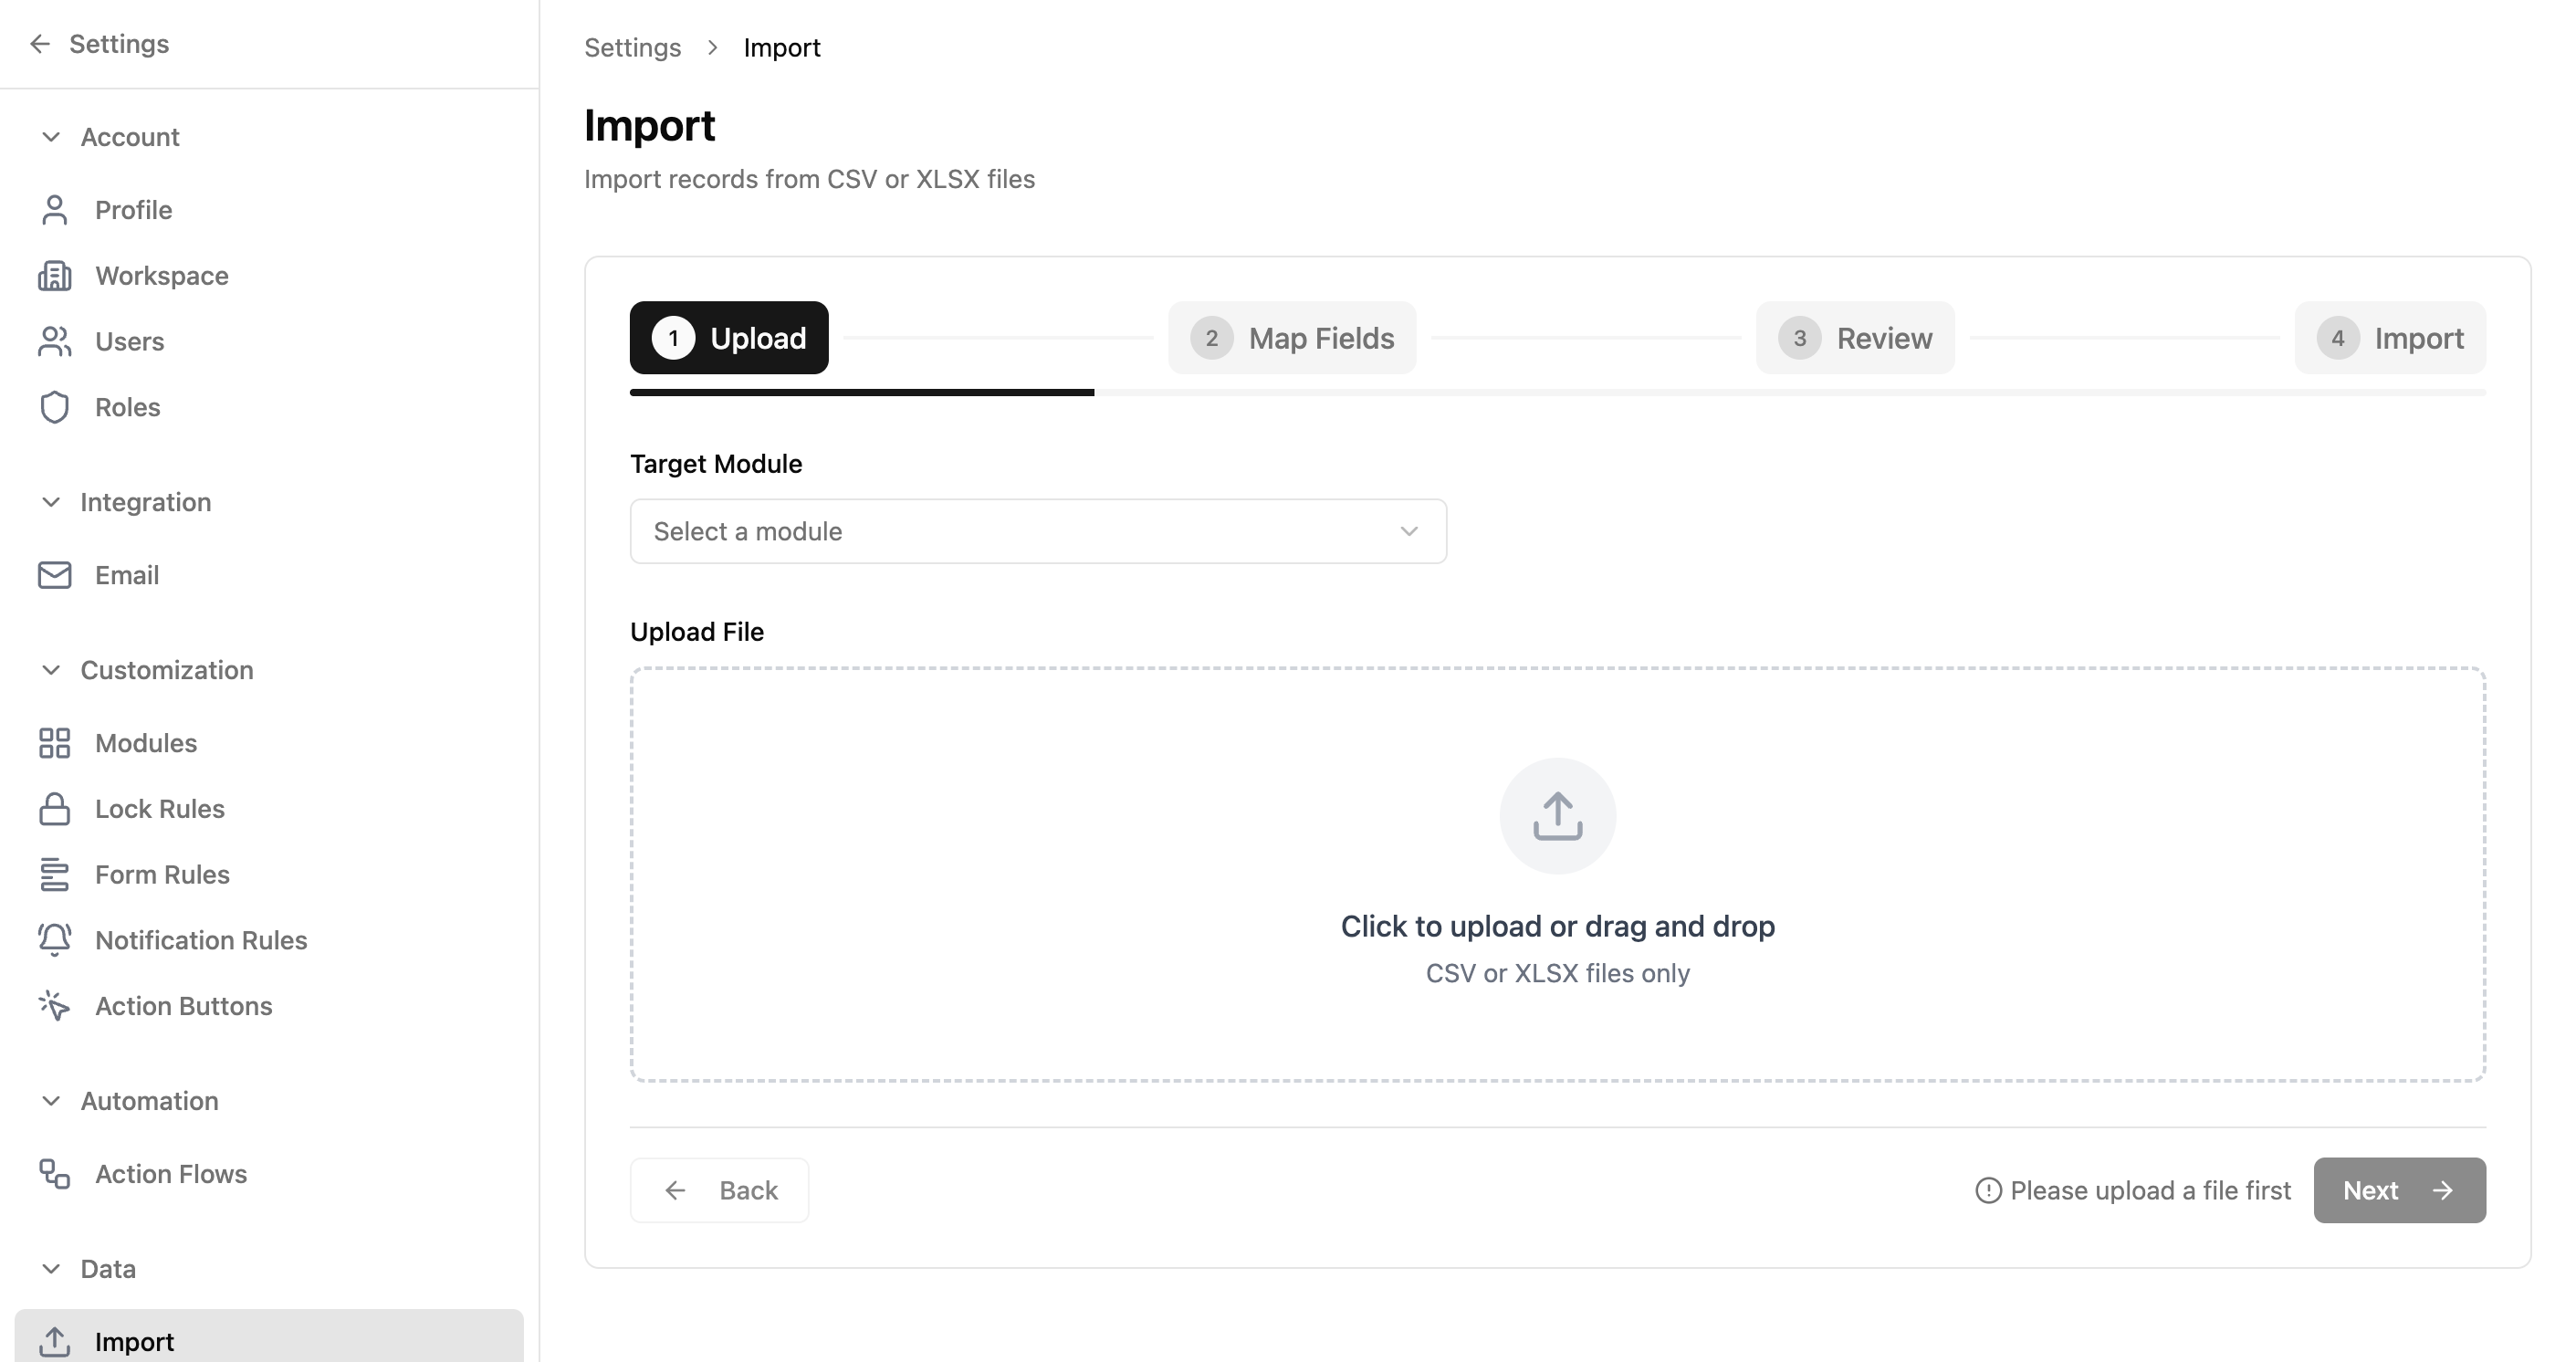
| Element | Description |
|---|---|
| Target Module | Dropdown to select which module receives the imported records (e.g., Deals, Contacts, Leads). |
| Upload File | Click to browse for a CSV or XLSX file. Drag-and-drop is also supported. |
| Preview Table | After uploading, shows the first 5 rows so you can verify the file was parsed correctly. |
| Next | Proceeds to field mapping. Disabled until a file is uploaded. |
Once a file is uploaded, you'll see a preview showing the row count, column count, and file format along with sample data.
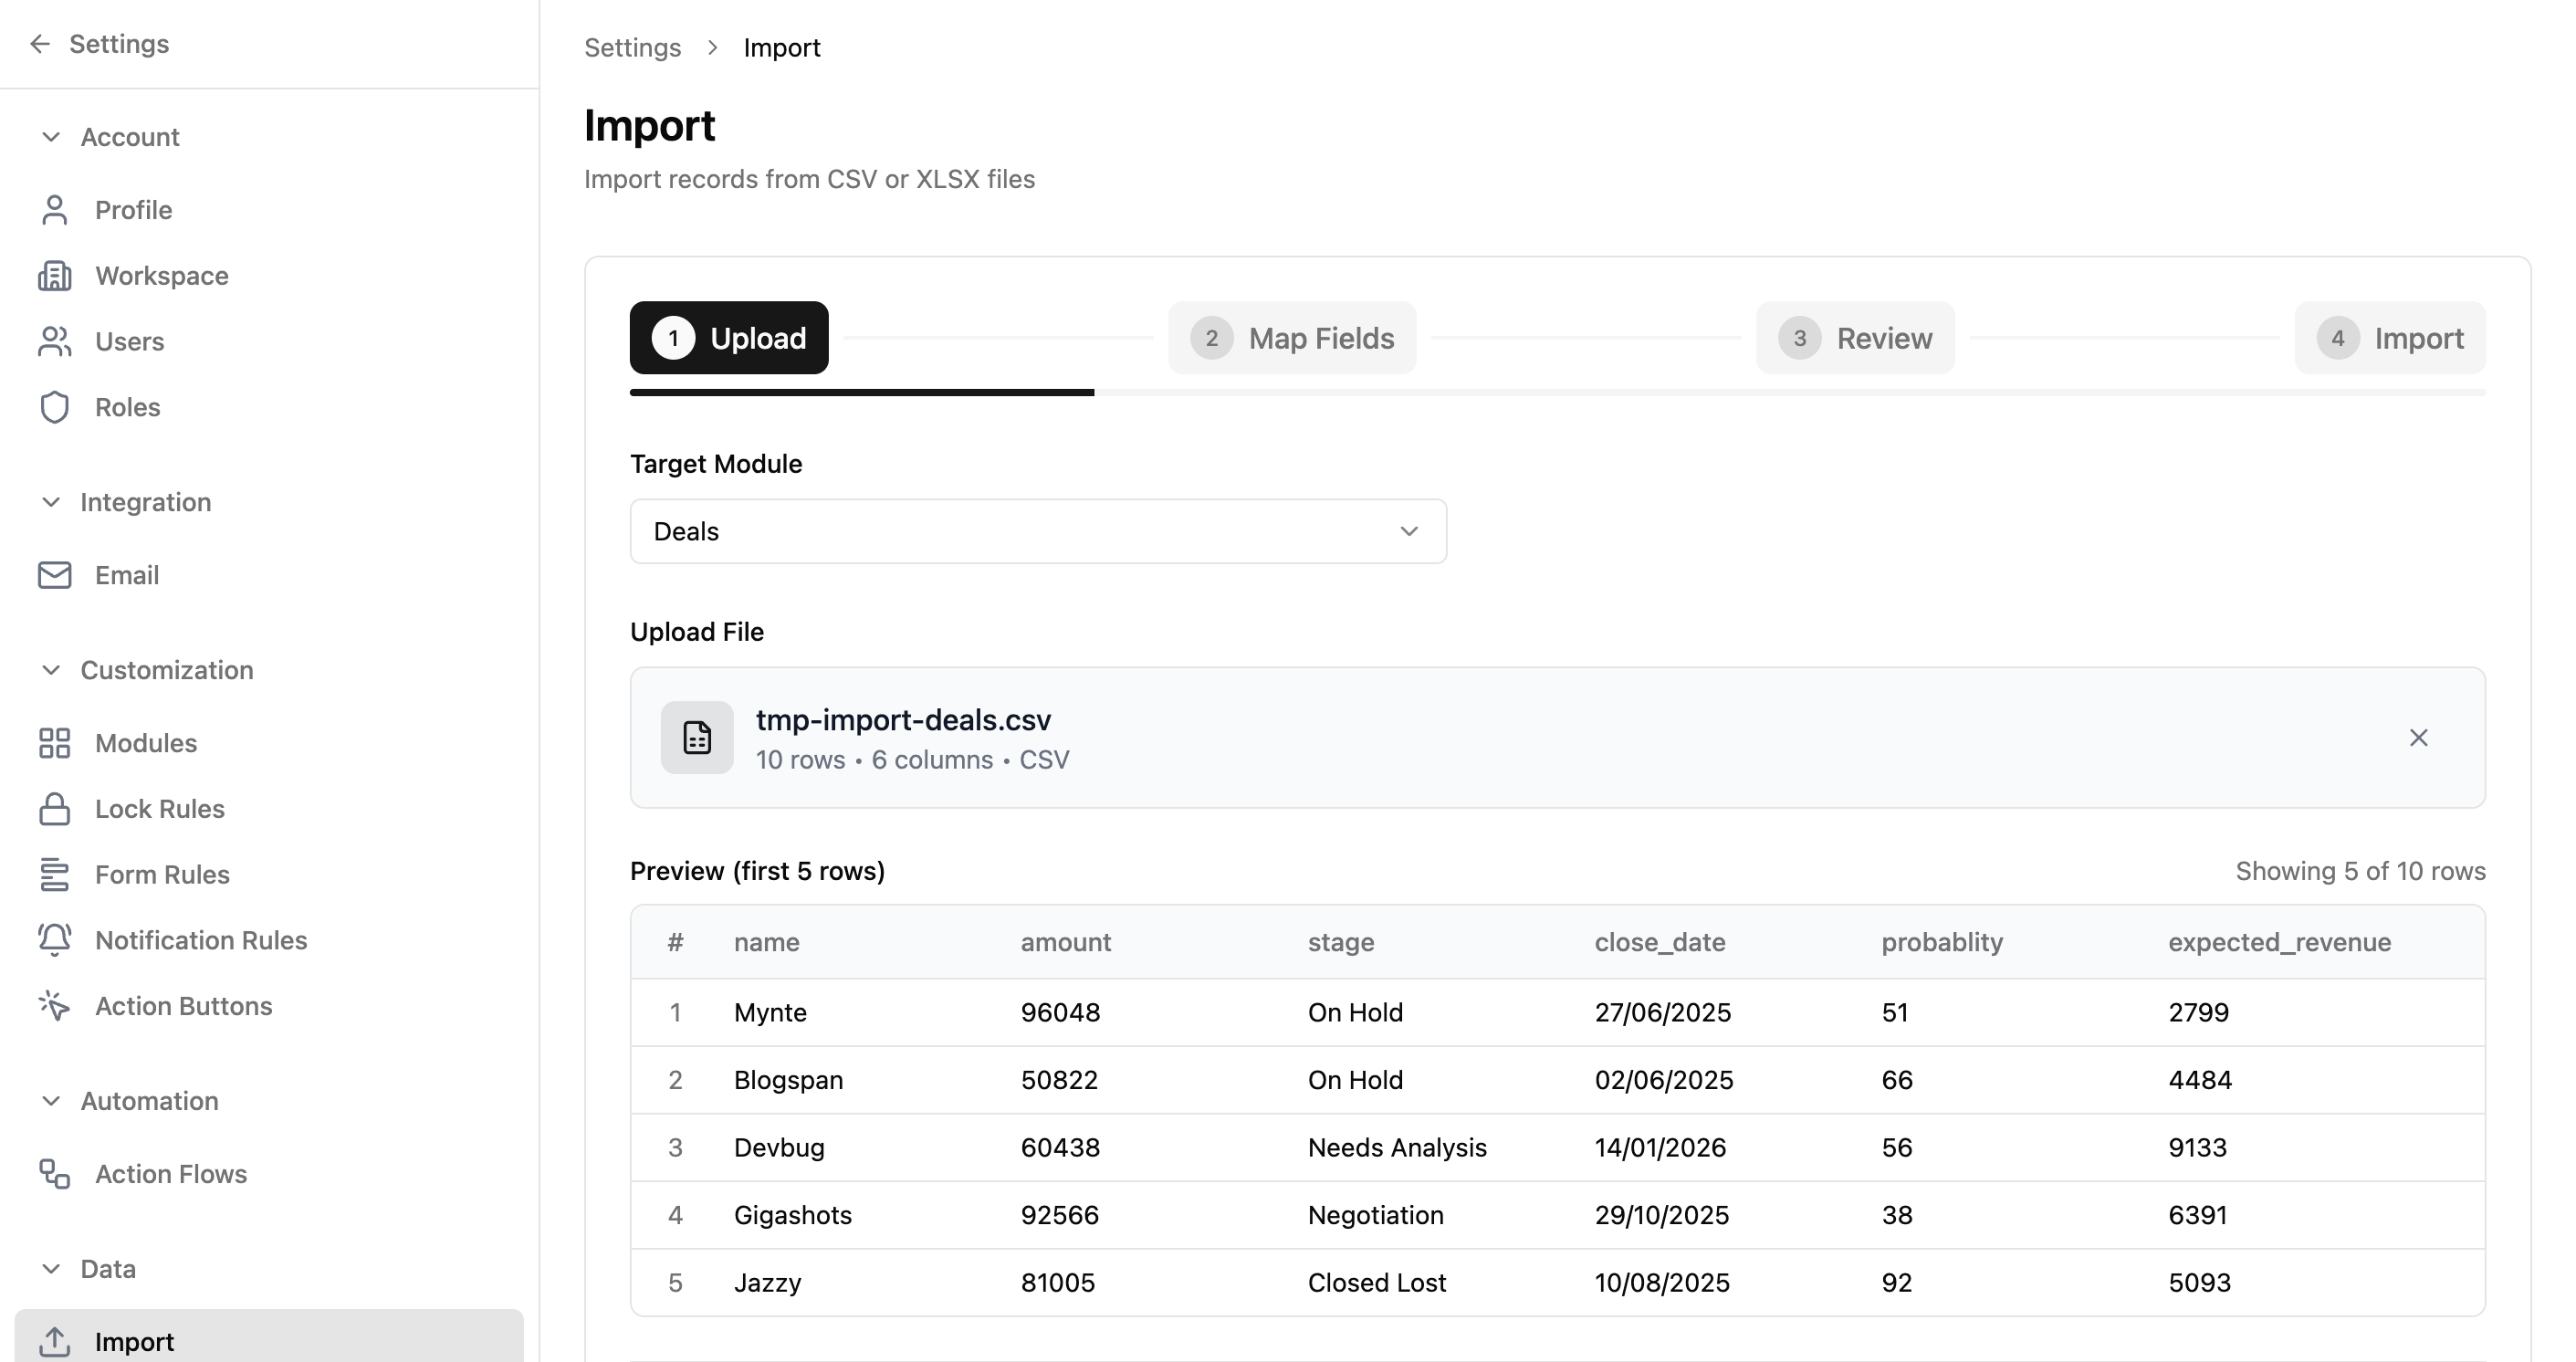
️ Tip: Make sure your spreadsheet's first row contains column headers. The system uses these headers to suggest field mappings in step 2.
Step 2 — Map Fields
In this step, you map each column from your spreadsheet to a field in the target module. The system auto-maps columns whose names closely match existing field names.
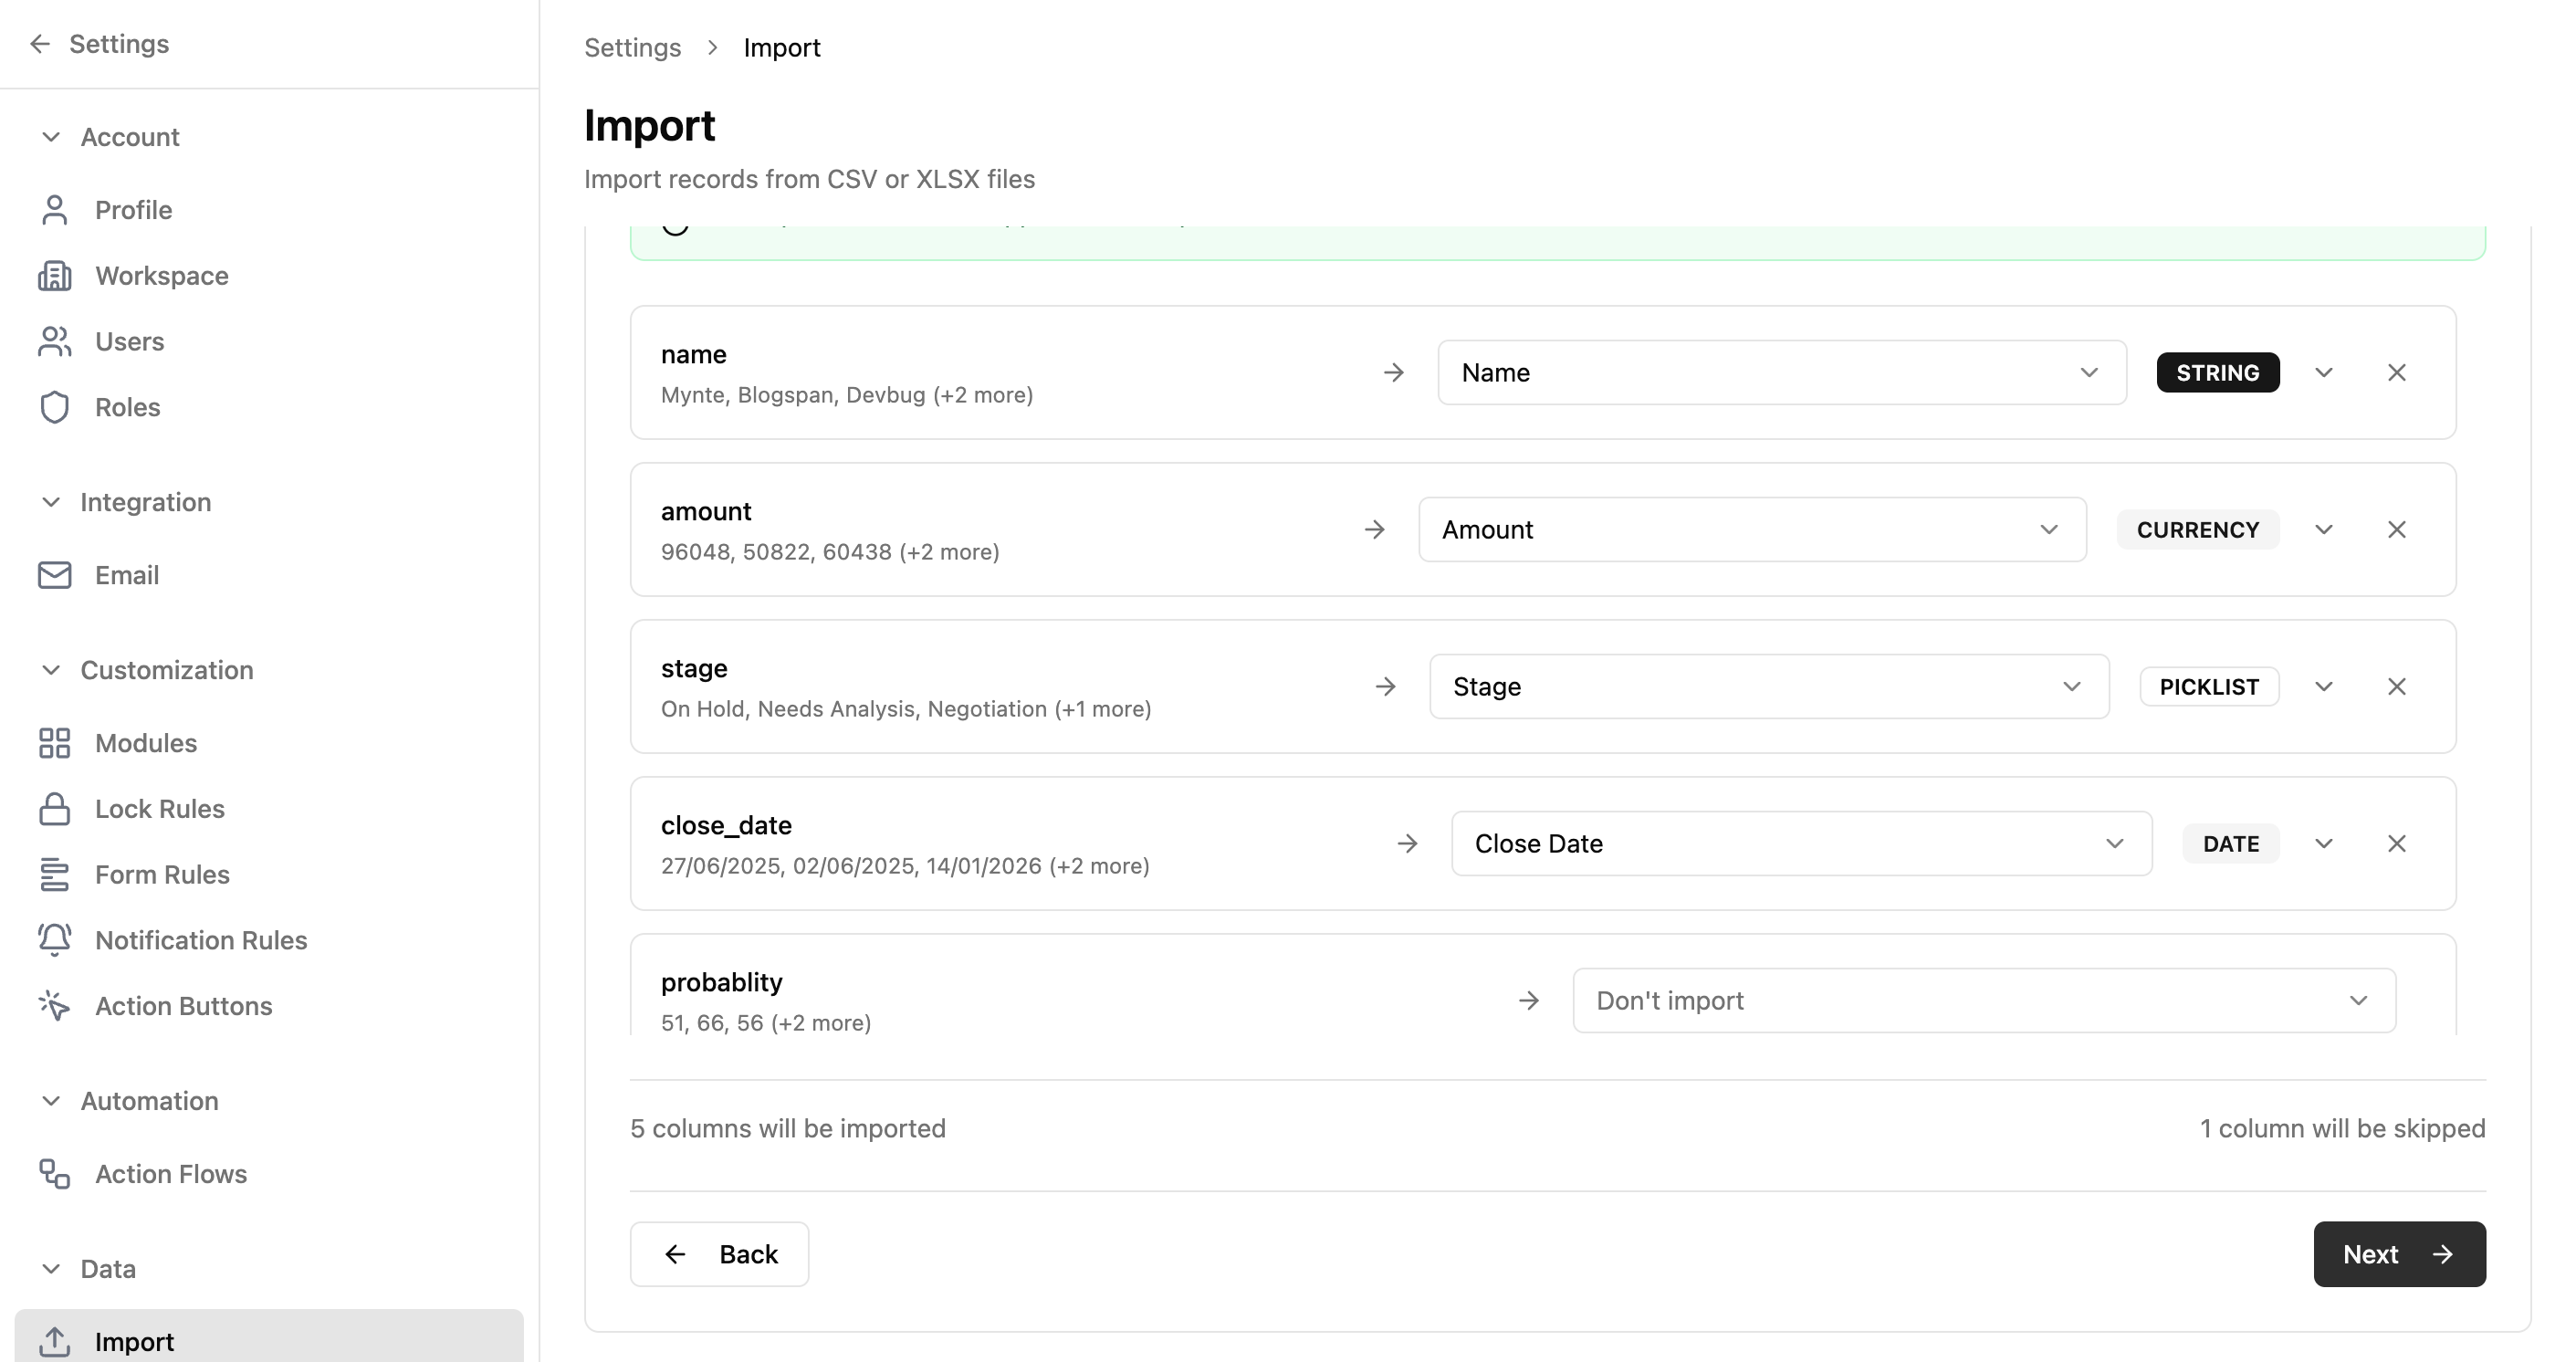
| Element | Description |
|---|---|
| Column Name | The header from your spreadsheet file. |
| Sample Values | A preview of the first few values in that column. |
| Field Dropdown | Select which module field this column maps to, or choose "Don't import" to skip it. |
| Field Type | Shows the data type of the mapped field (STRING, CURRENCY, DATE, etc.). |
| Auto-map | Button to re-run automatic mapping based on column name similarity. |
Once all columns are mapped (or explicitly skipped), the summary at the bottom shows how many columns will be imported vs. skipped.
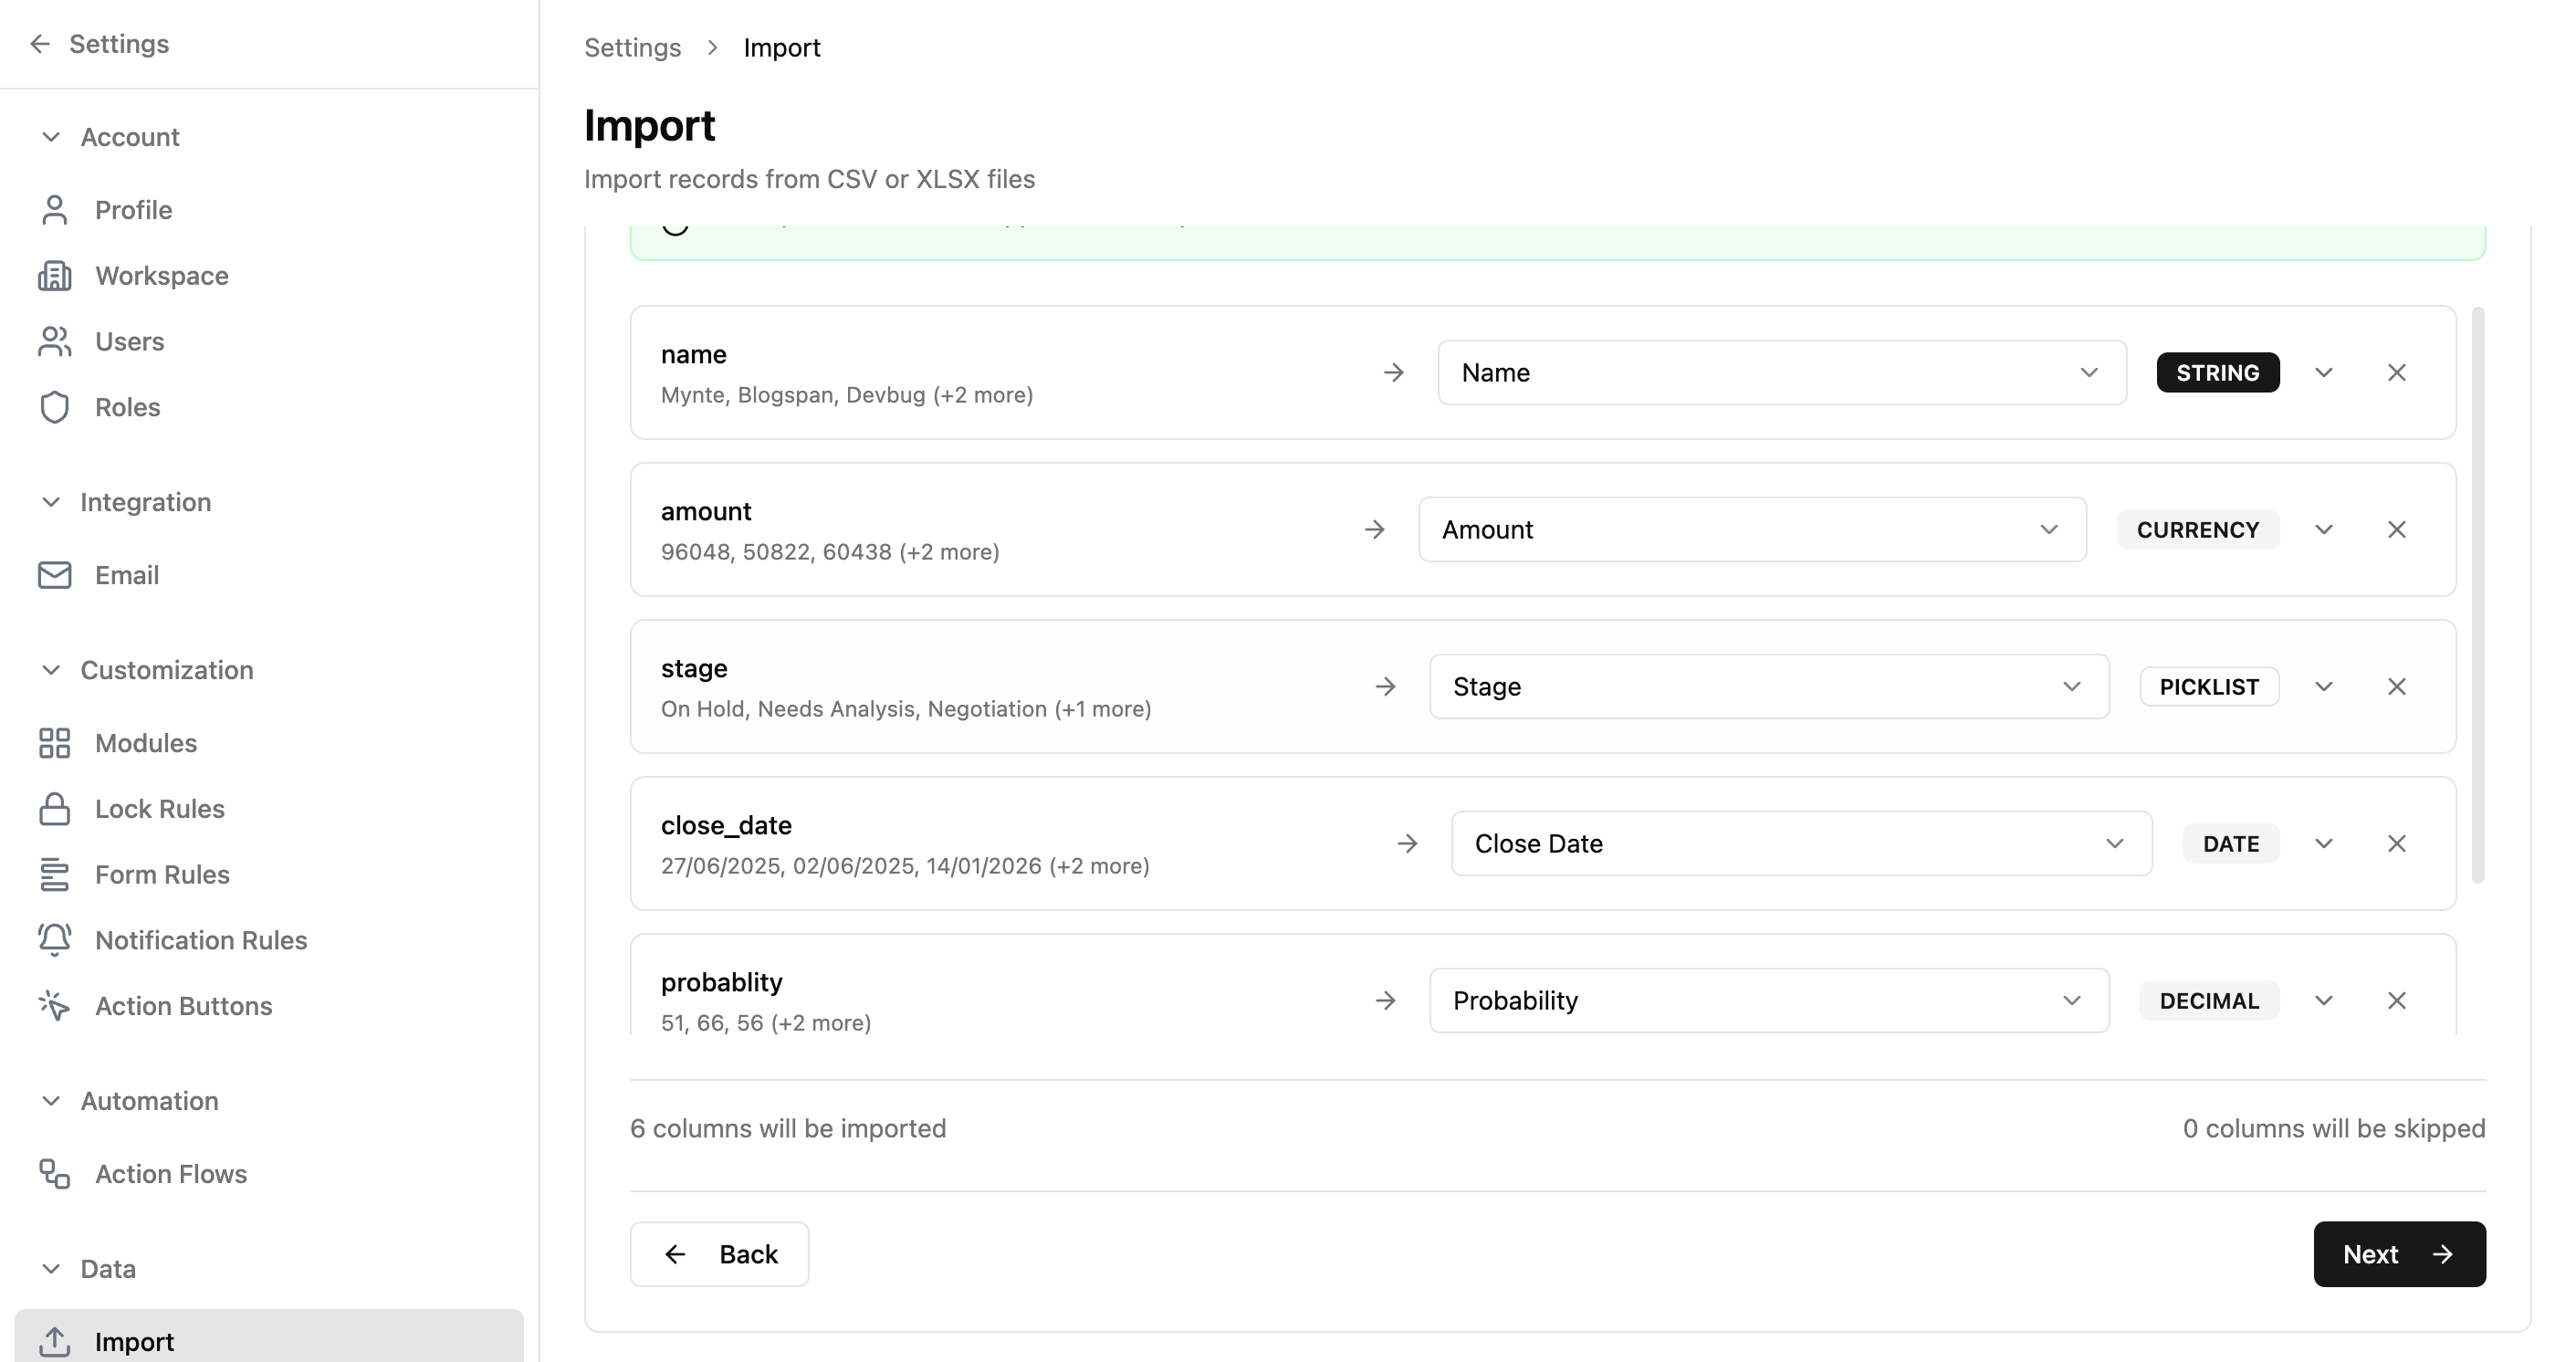
️ Tip: You can set default values for mapped fields using the settings icon next to each mapping. This fills in a value for any empty cells in that column.
Step 3 — Review
The review step shows all records with their mapped values and validation status. Records that pass validation are marked as valid; any with errors are flagged so you can go back and fix them.
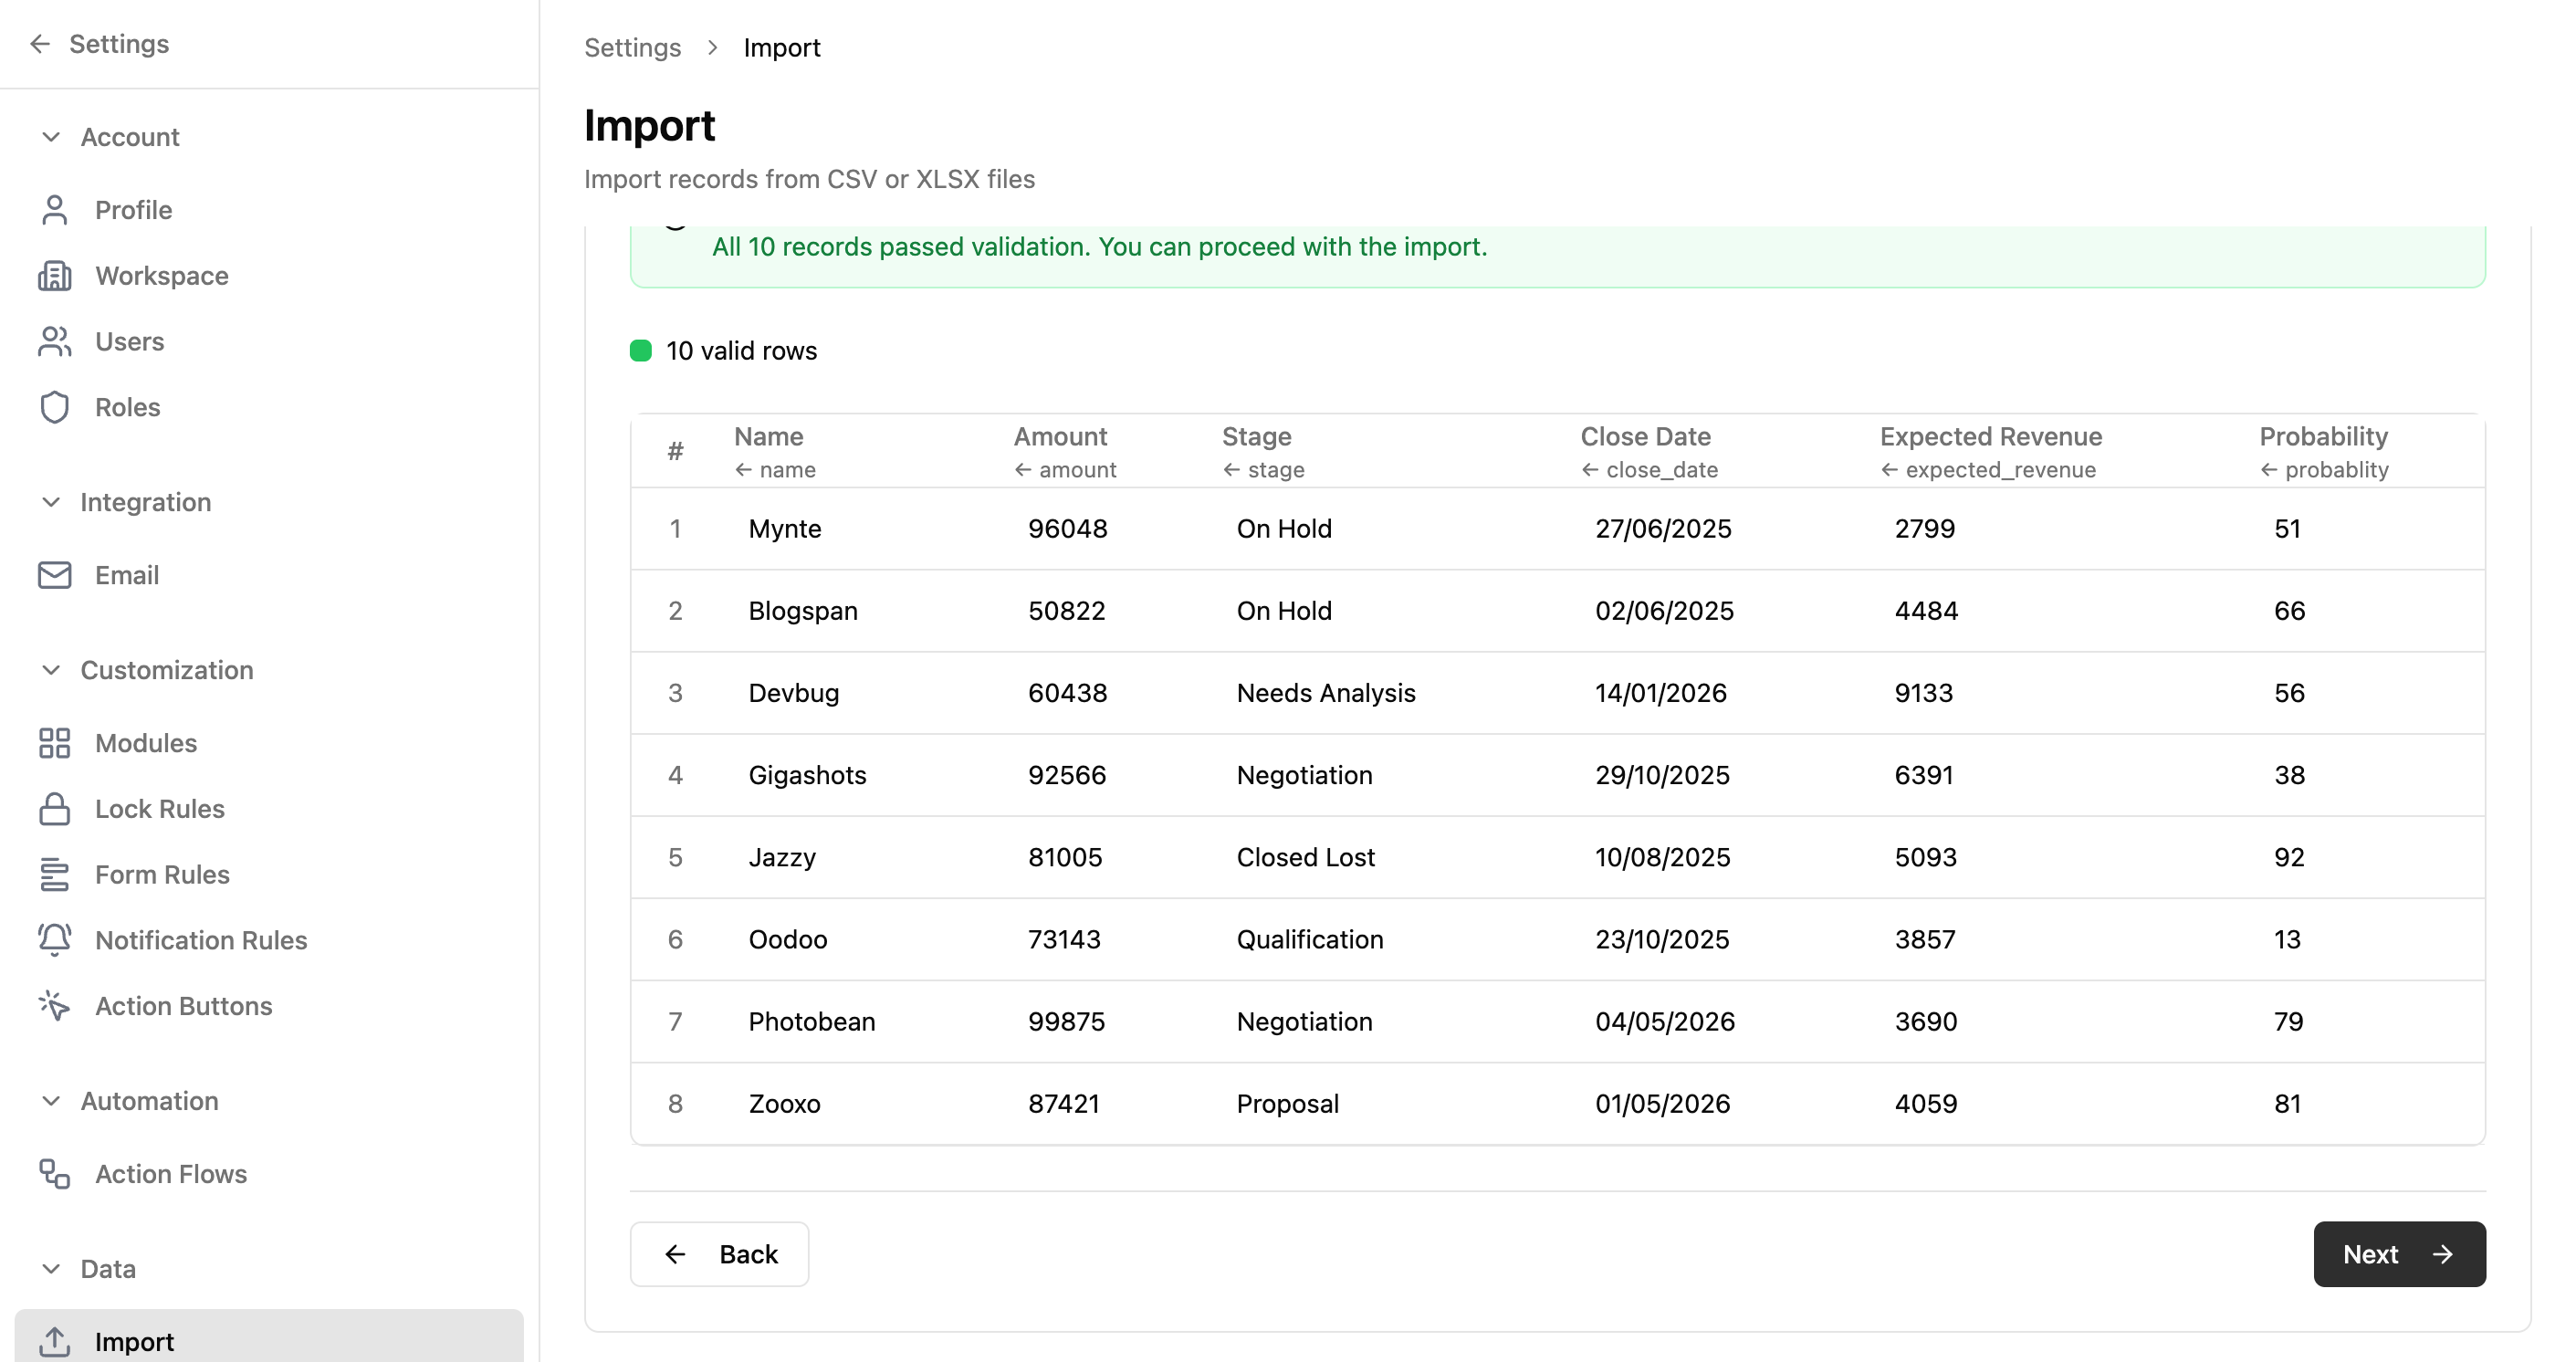
| Element | Description |
|---|---|
| Validation Banner | Shows whether all records passed or if some have errors. Green means ready to import. |
| Column Headers | Shows the module field name with an arrow indicating which CSV column it came from. |
| Data Table | Full preview of all records as they will be imported. |
| Valid/Error Tabs | Filter to see only valid rows or only rows with errors. |
️ Important: If any records have validation errors, you can still proceed — but only valid records will be imported. Download the error report to fix and re-import failed rows later.
Step 4 — Import
The final step shows a summary of how many records will be imported and in how many batches. Click "Start Import" to begin the process.
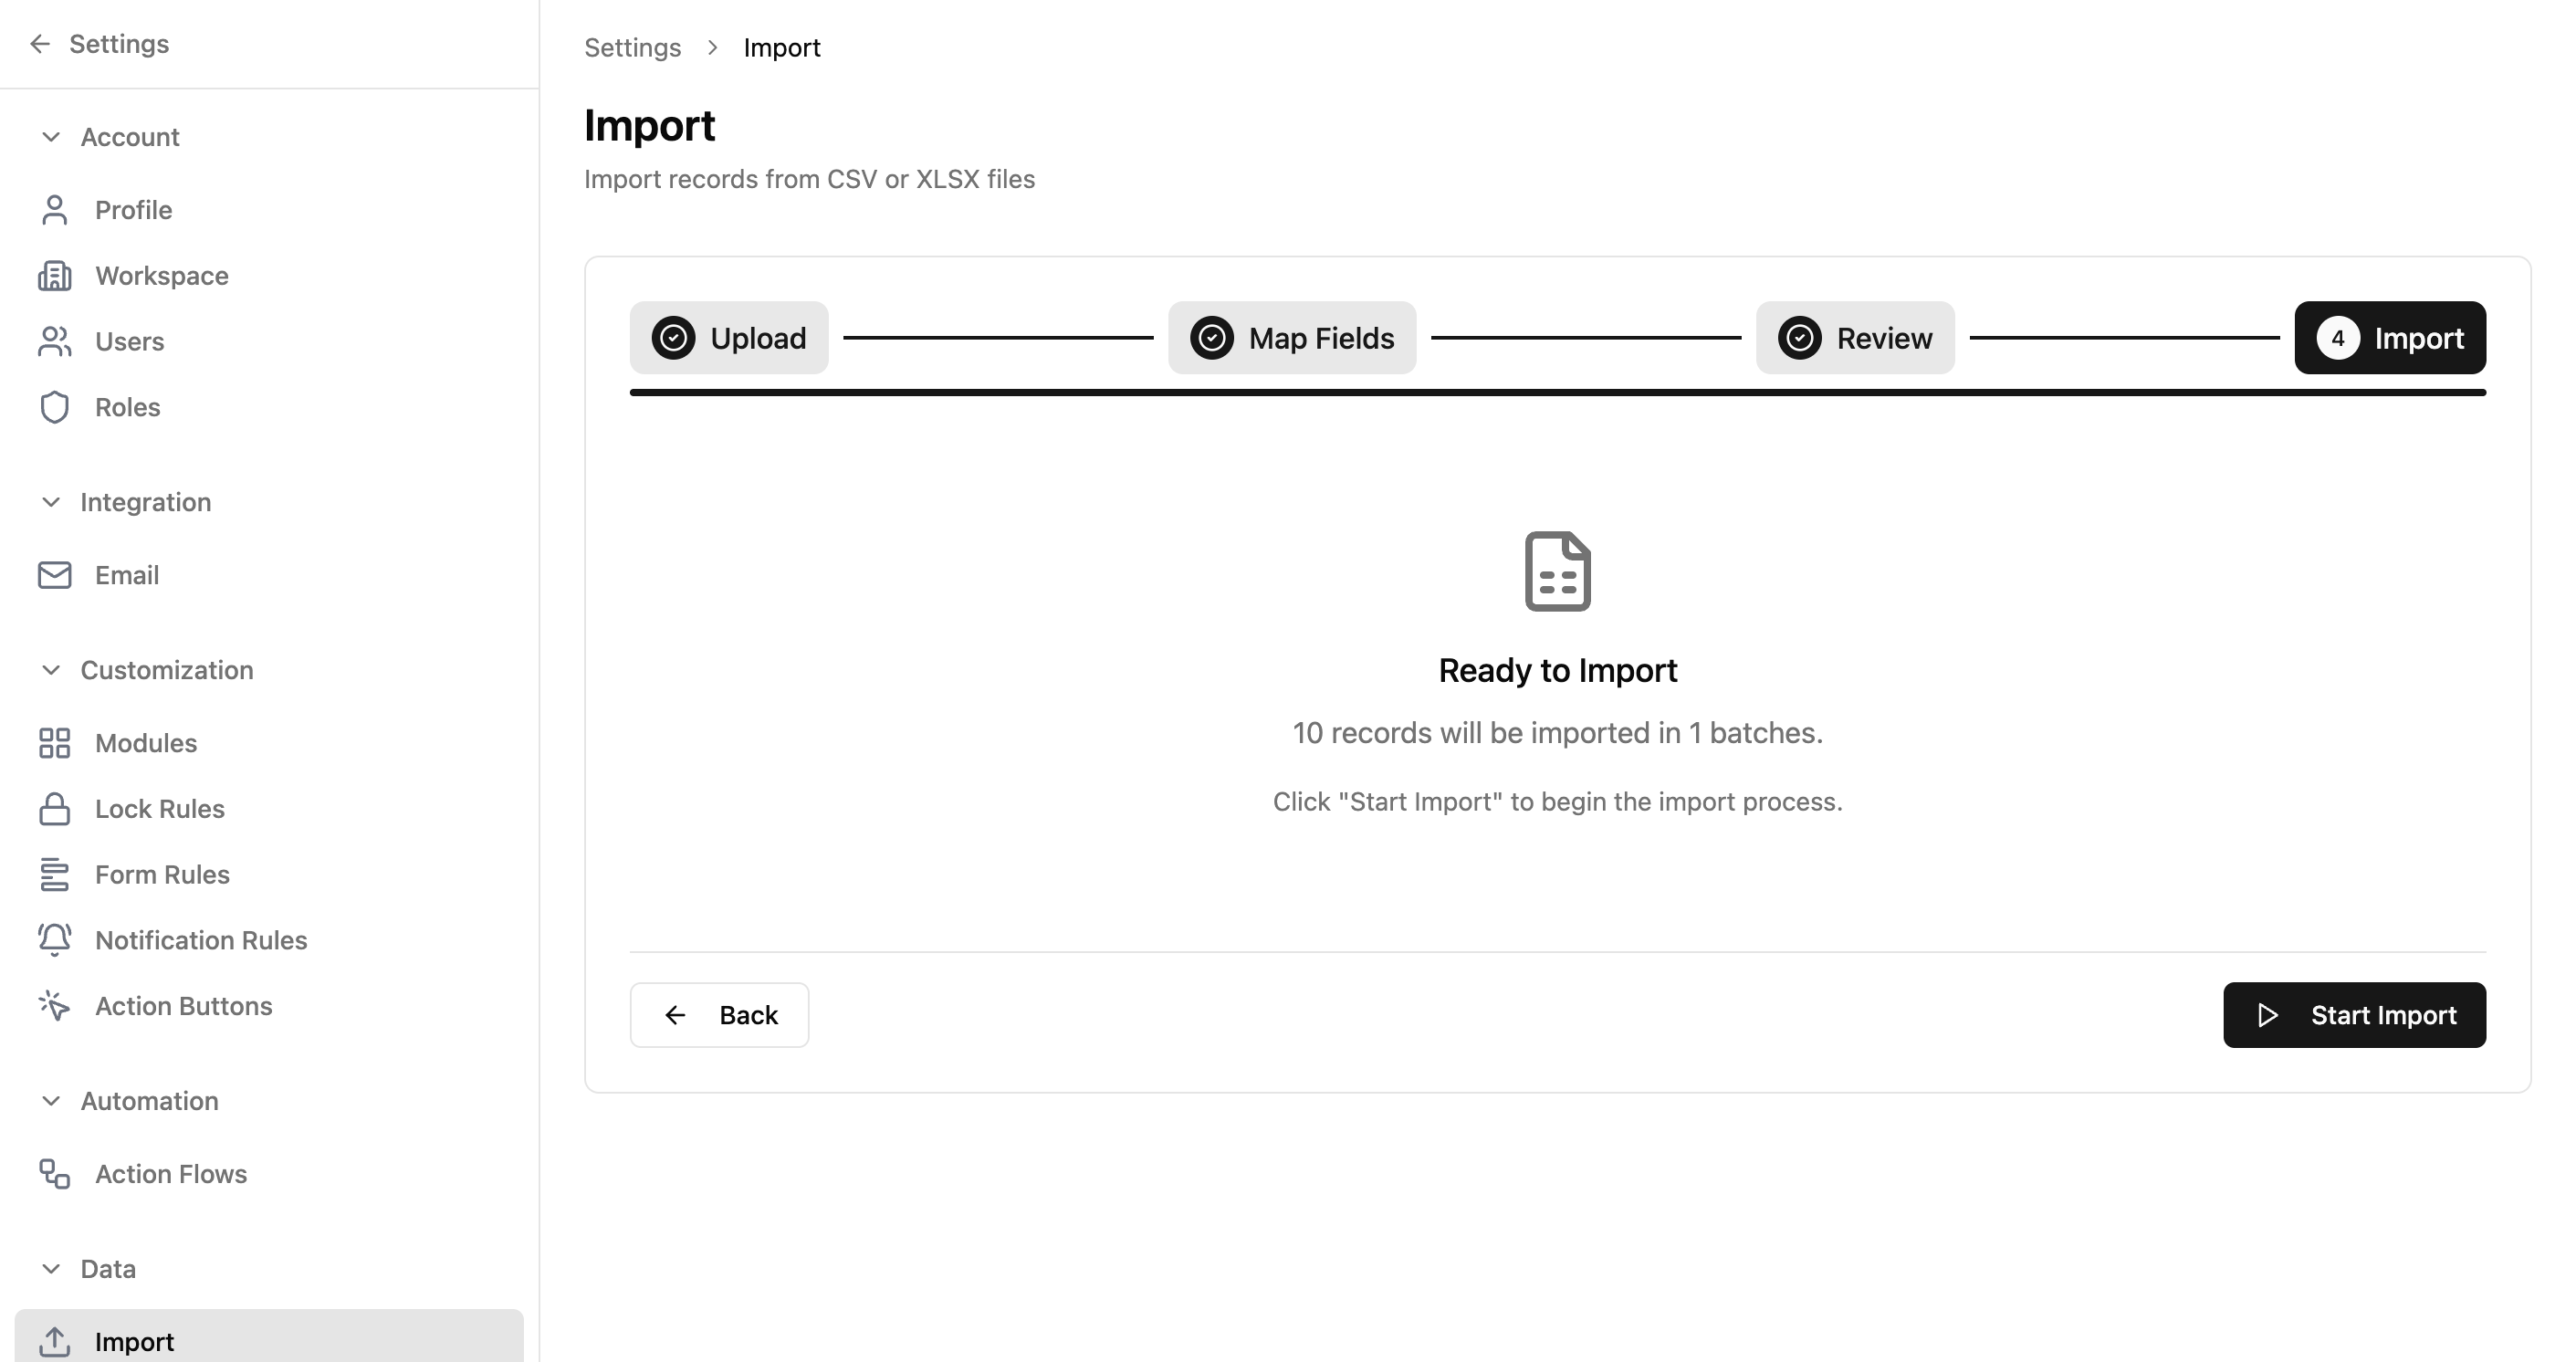
| Element | Description |
|---|---|
| Record Count | Total number of valid records that will be created. |
| Batch Count | Records are imported in batches for reliability. Large files use multiple batches. |
| Start Import | Begins the import process. Shows a progress bar during execution. |
| Back | Returns to the review step if you need to make changes. |
During import, a progress bar shows how many records have been processed. Once complete, you'll see a summary with success and failure counts. If any records failed, you can download a CSV of the failures to fix and re-import.
️ Tip: You can cancel an in-progress import at any time. Records already created will remain — only pending batches are stopped.
Real-World Use Case
Accounting firm migrating client data from spreadsheets
An accounting firm has been tracking 500+ clients in Excel for years. They're moving to Xtend.One and need to bring all that historical data in without manually re-entering every record.
- 1Export the Excel workbook as a CSV file (one sheet per module — Clients, Engagements, Invoices)
- 2Start with the Clients module: upload the CSV and verify the preview shows correct columns
- 3Map columns: "Company Name" → Name, "Tax ID" → Tax Identifier, "Primary Contact" → Contact Person, "Annual Revenue" → Revenue
- 4Set a default value for the "Status" field: "Active" (since the spreadsheet didn't track this)
- 5Review the validation results — fix any rows with missing required fields
- 6Import the 500 client records in batches
- 7Repeat for Engagements and Invoices, using Lookup fields to link them to the imported Clients
Adapt this for your team: Any team moving off spreadsheets or another system can use Import. A school migrating student records, a nonprofit importing donor lists, a logistics company bringing in shipment history — the 4-step wizard handles the mapping regardless of how your source data is structured.
Common Workflow
Import data from a spreadsheet
- 1Go to Settings → Import
- 2Select the target module from the dropdown (e.g., Deals, Contacts)
- 3Click "Upload File" and select your CSV or XLSX file — verify the preview looks correct
- 4Click "Next" to proceed to field mapping
- 5Review the auto-mapped columns. Manually map any unmatched columns using the dropdown, or set them to "Don't import"
- 6Click "Next" to review — check the validation banner for any errors
- 7Click "Next" again to reach the import confirmation screen
- 8Click "Start Import" to begin. Monitor the progress bar until complete