Key Concepts
The Card View is the compact representation of a record. It's what you see in list views, related lists, and when hovering over lookup fields.
Card View
The compact representation of a record shown in list views, related lists, and lookup hover cards. You choose which fields appear.
Available Fields
Every field in the module that's eligible to appear on a card. Click to add to the card layout.
Selected Fields
The fields currently chosen for the card. Drag to reorder; up to 5 can be selected.
Preview
A live render of the card so you can see exactly how it will look before saving.
Card View Tab
The Card View tab controls which fields appear in the compact record representation — shown in list views, related lists, and when hovering over lookup fields.
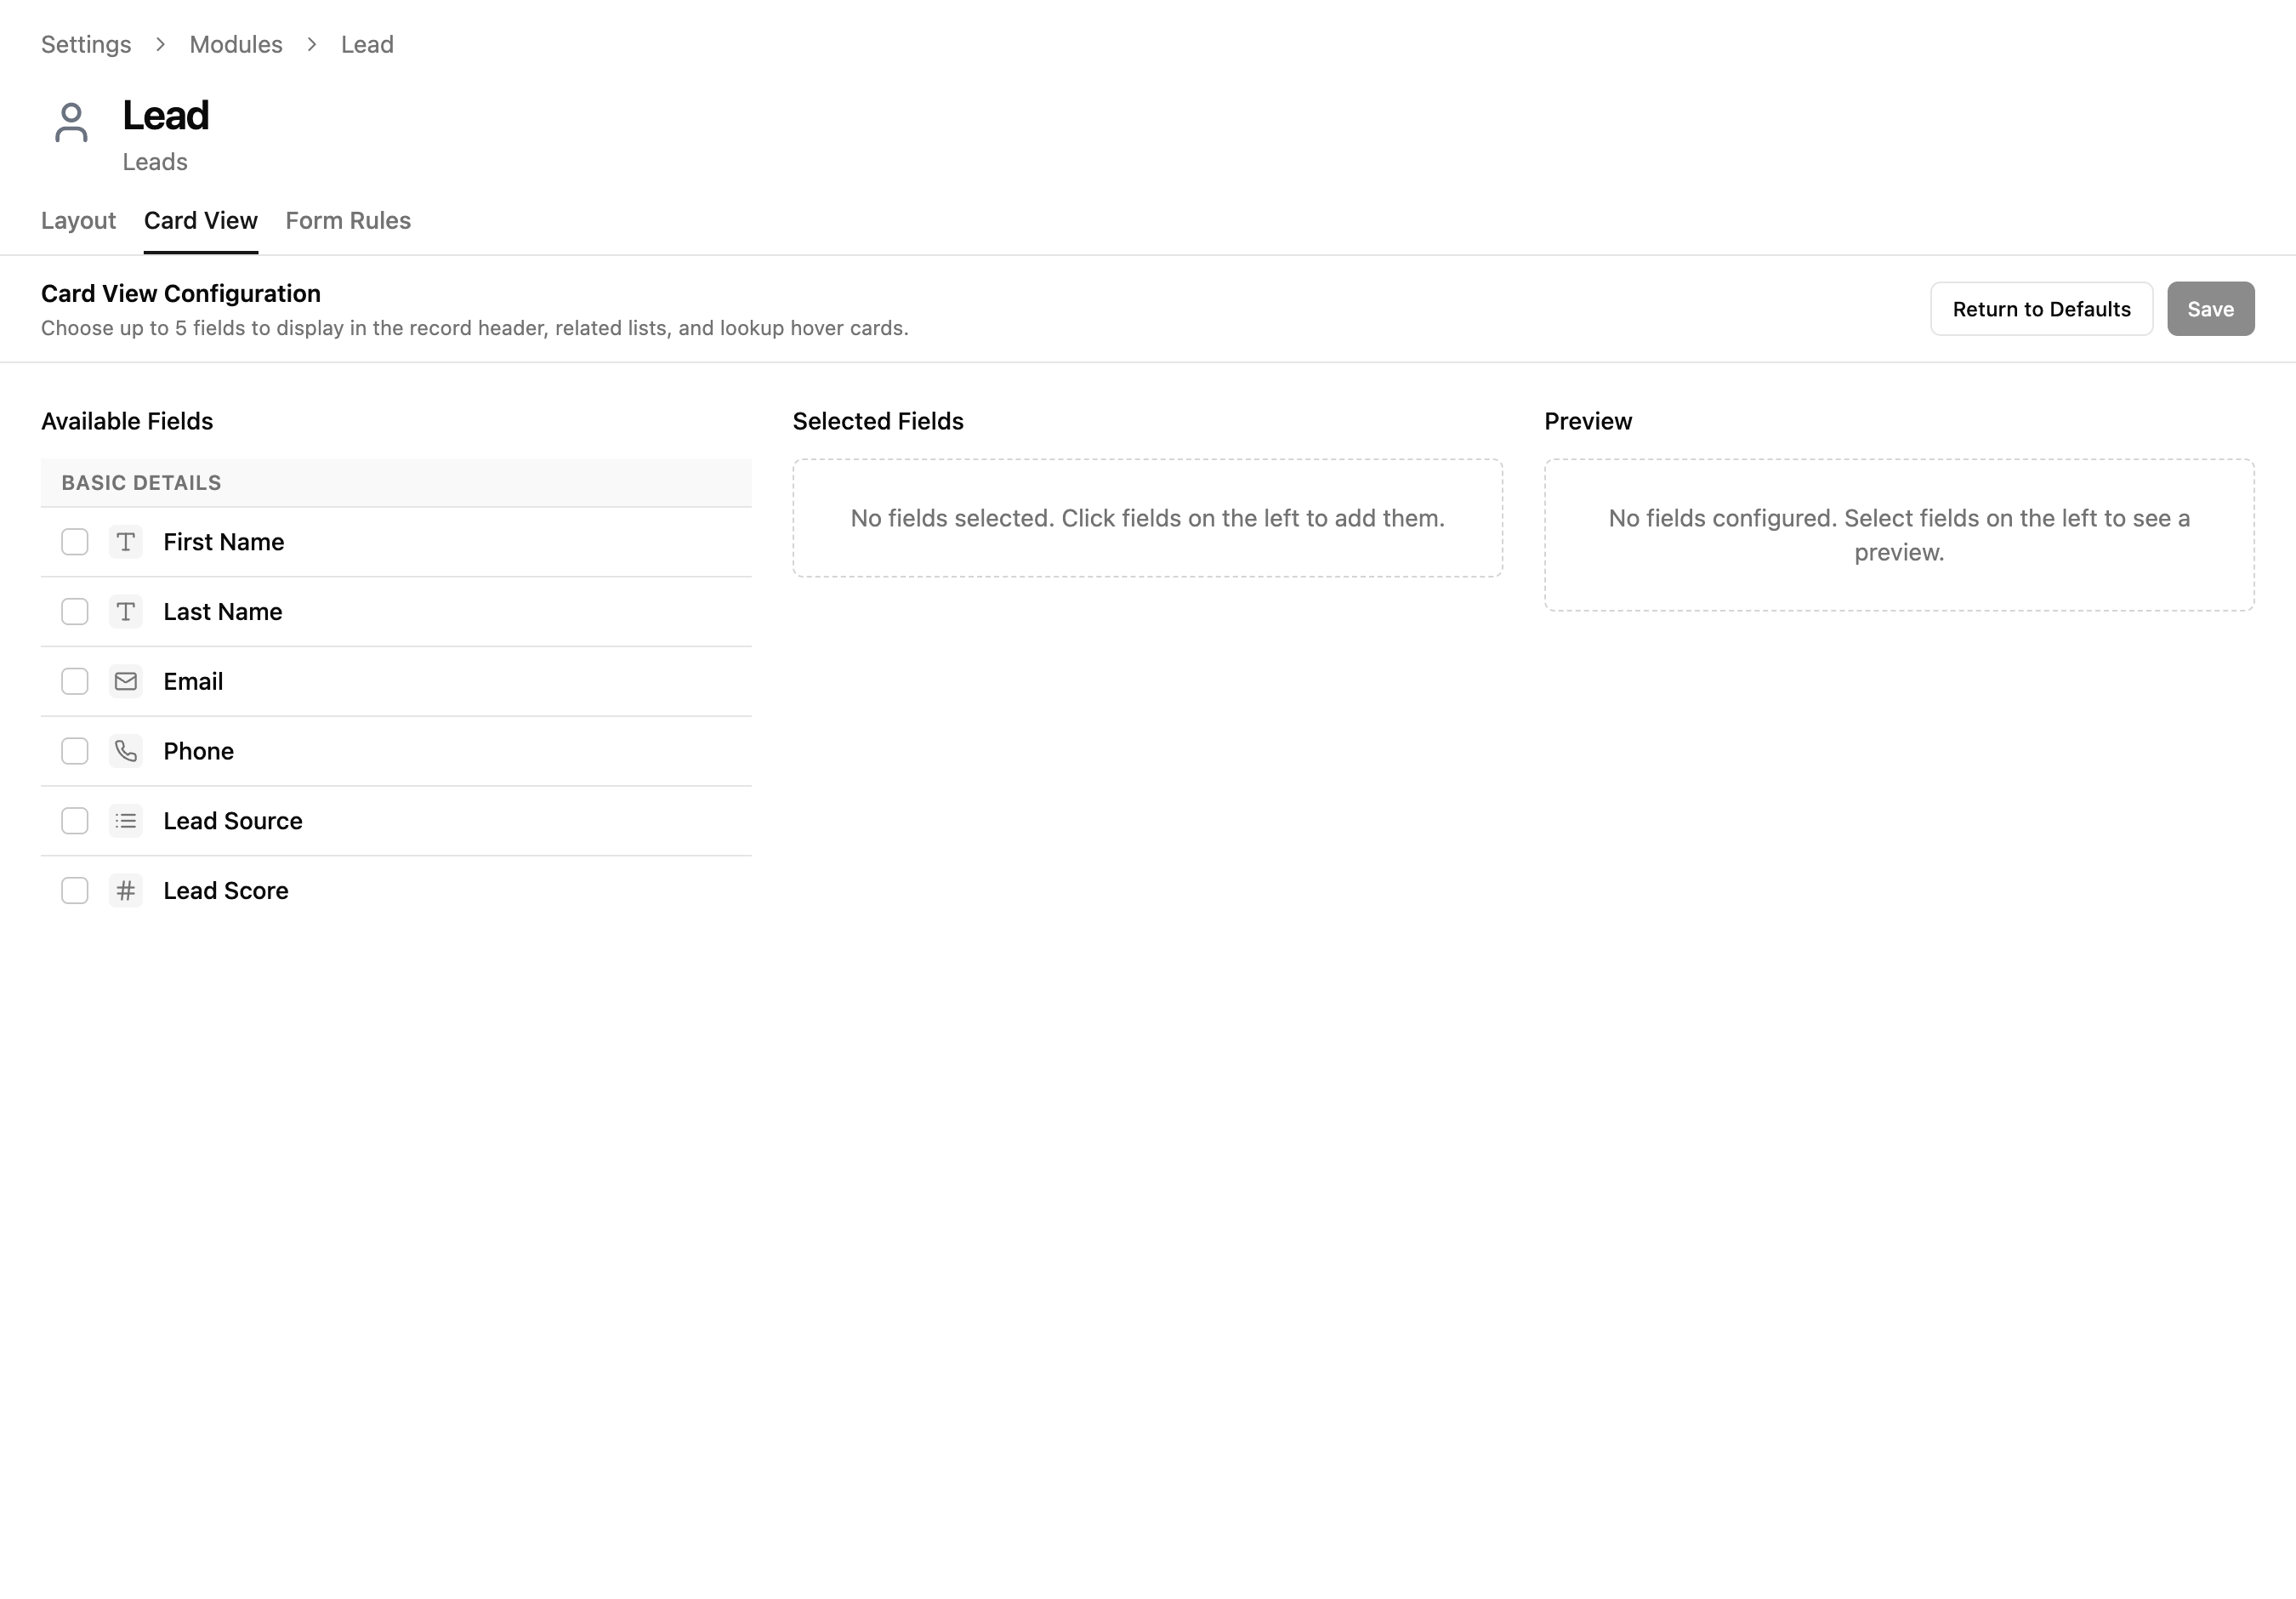
Three Panels
| Panel | What It Shows |
|---|---|
| Available Fields | All fields in this module that can be displayed on the card. Click one to add it. |
| Selected Fields | Fields currently chosen for the card view. Drag to reorder. |
| Preview | A live preview of how the card will look with your selected fields. |
Controls
| Button | What It Does |
|---|---|
| Return Card View to defaults | Resets the card view to the system default field selection. |
| Save Card View configuration | Saves your changes. Disabled until you make a change. |
Limit: You can select up to 5 fields for the card view. Choose the most identifying fields — the ones that help users recognize a record at a glance.
Real-World Use Case
Real estate agency — identifying properties at a glance
A real estate agency manages hundreds of property listings. When agents browse the list view or hover over a property lookup, they need to instantly identify the listing without opening it. The default card shows just the record name, which isn't enough.
- 1Open the Properties module and go to the Card View tab
- 2Add Property Address as the first field (most identifying)
- 3Add Listing Price so agents can see the price range immediately
- 4Add Status (Active, Under Contract, Sold) for quick filtering context
- 5Add Bedrooms and Square Footage to differentiate similar listings
- 6Save — now every list view row and lookup hover shows a rich property summary
Adapt this for your team: Card views matter wherever users scan through records quickly. An IT team might show Ticket Priority, Assignee, and SLA Deadline on their support tickets. A manufacturing team might show Part Number, Warehouse Location, and Stock Level on inventory items. Pick the 3–5 fields that let your team identify records without clicking into them.
Common Workflows
Configure the card view for a module
- 1Open the module and click the Card View tab
- 2Click fields in the Available Fields list to add them (up to 5)
- 3Drag selected fields to reorder how they appear on the card
- 4Check the Preview panel to see how it looks
- 5Click "Save Card View configuration"
Reset the card view to defaults
- 1Open the module and click the Card View tab
- 2Click "Return Card View to defaults"
- 3Confirm — the field selection reverts to the system default
- 4Save if you want to keep the defaults